How can we help?
Guides, tips, and answers for getting the most out of your CRM — from your first import to building dashboards with Nexus.
Getting Started
Getting Started with FlowGrid
FlowGrid is an AI-powered CRM that helps you manage contacts, organizations, and deals (sales opportunities) — and shape the whole thing around how your business actually works.
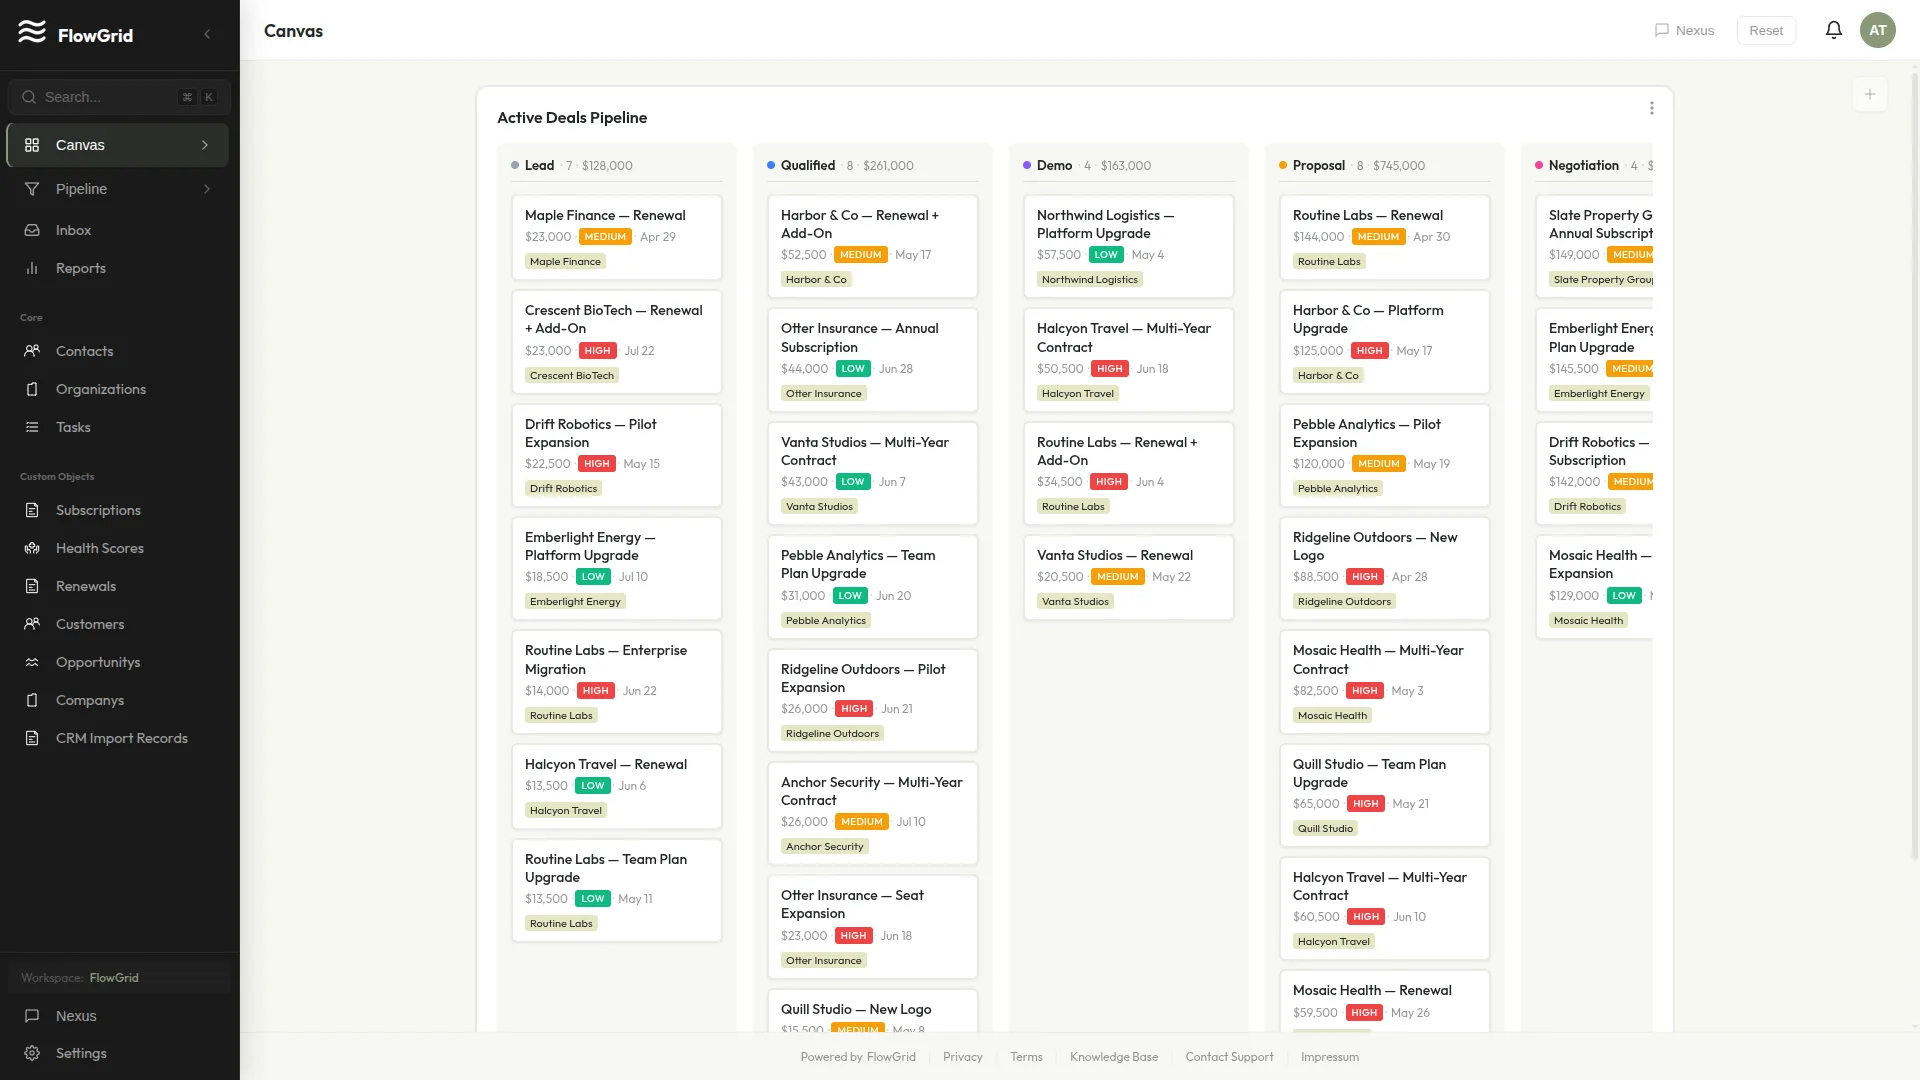 Your FlowGrid dashboard
Your First Steps
When you log in, you'll land on your Canvas — a customizable dashboard showing your key metrics and recent activity. Use the sidebar on the left to navigate between Contacts, Organizations, Pipeline, and the rest of your workspace. The Nexus chat panel gives you an AI assistant that can help with almost anything.
Using Nexus, Your AI Assistant
Nexus can create, update, and search records for you. Just describe what you need in plain language — "Create a contact named John Smith" or "Show me deals over $50,000." Nexus can also add notes, create tasks, help manage your pipeline, build dashboard widgets, and answer questions about how to use FlowGrid. See Using Nexus, Your AI Assistant for more.
Importing Your Data
Bringing your existing data into FlowGrid is simple. Upload a CSV or Excel file and FlowGrid automatically suggests how your columns map to fields. Our AI detects relationships between records (like linking contacts to their organizations), prevents duplicates, and even handles multi-sheet workbooks that create multiple record types at once. See Importing Your Data to get started.
Customizing Your Workspace
To track data beyond the built-in objects, go to Settings > Schema to create custom objects. You might add a "Properties" object for real estate, "Vehicles" for an auto dealership, or any record type your business needs. Custom objects get full CRM capabilities including custom fields, automations, and Nexus support.
Tip: Press
/anywhere to focus the search box, or open the command palette to jump between pages in a couple of keystrokes.
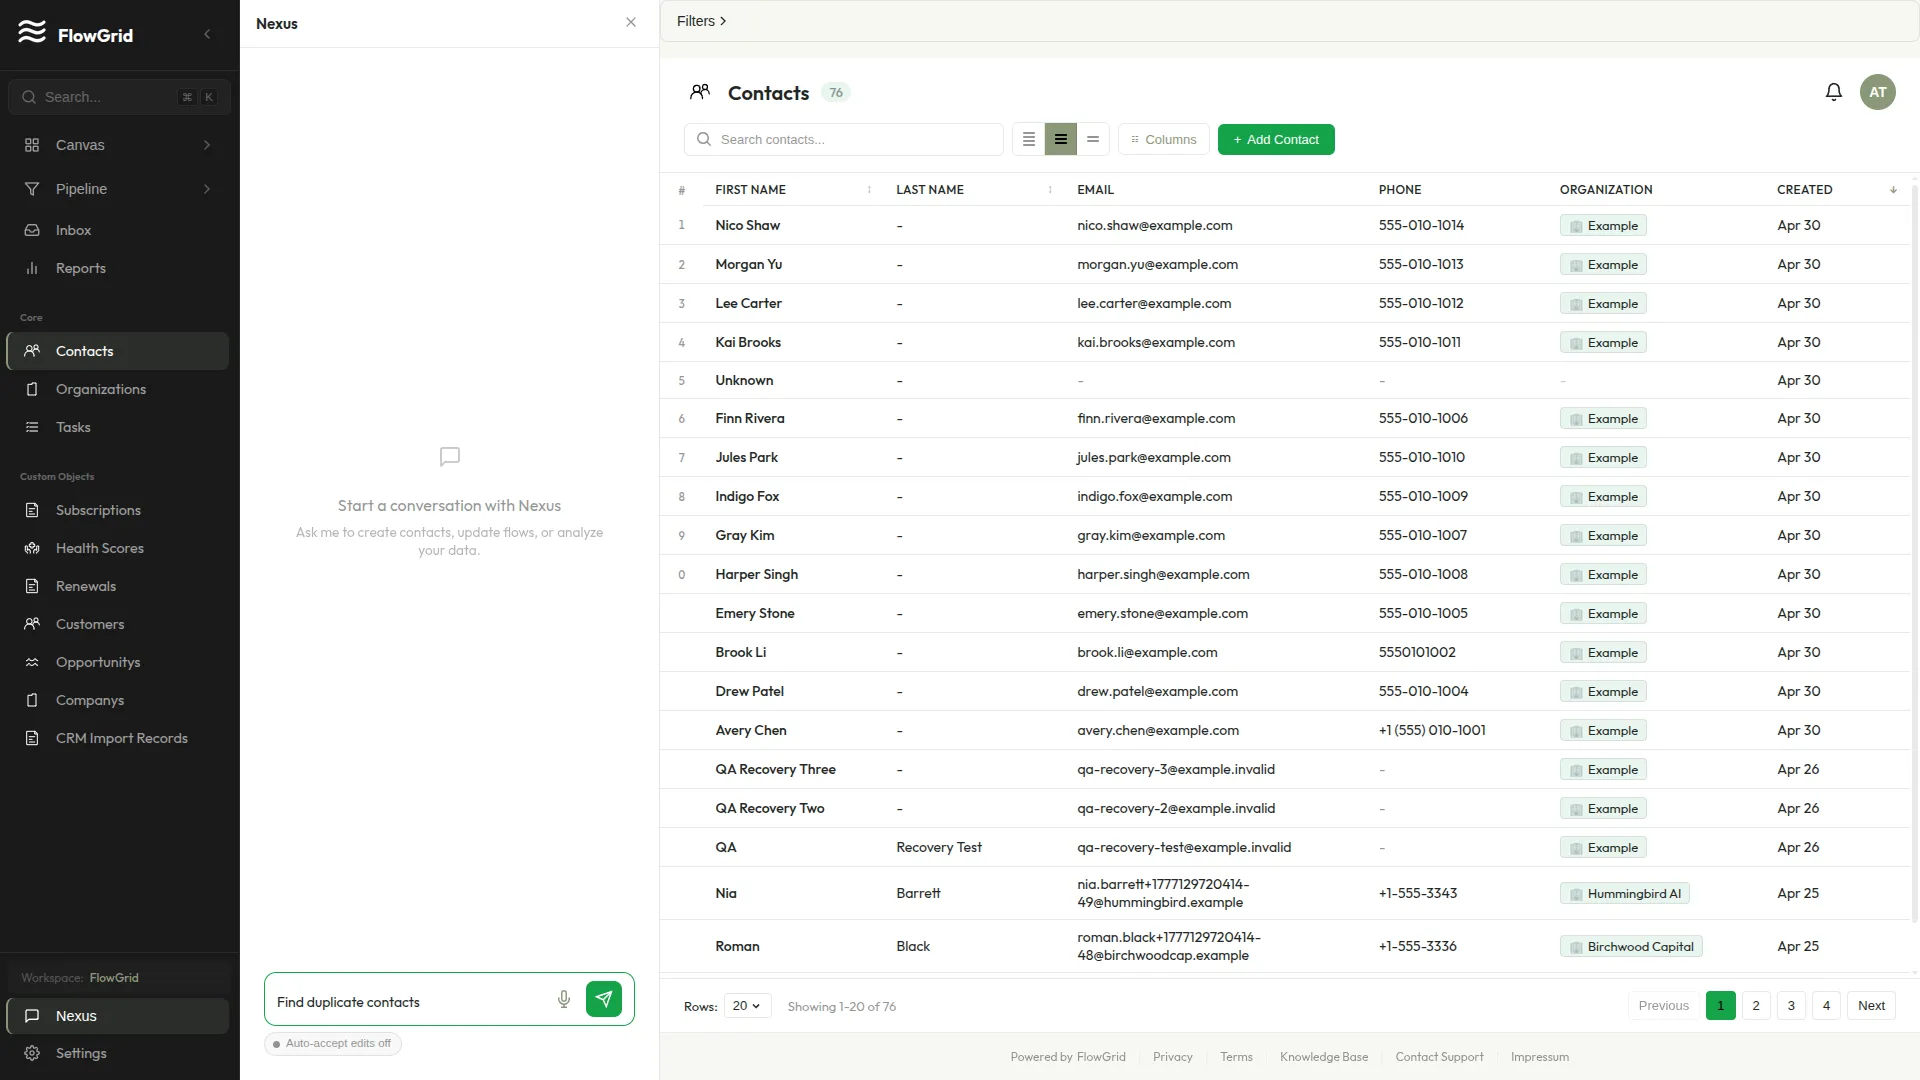
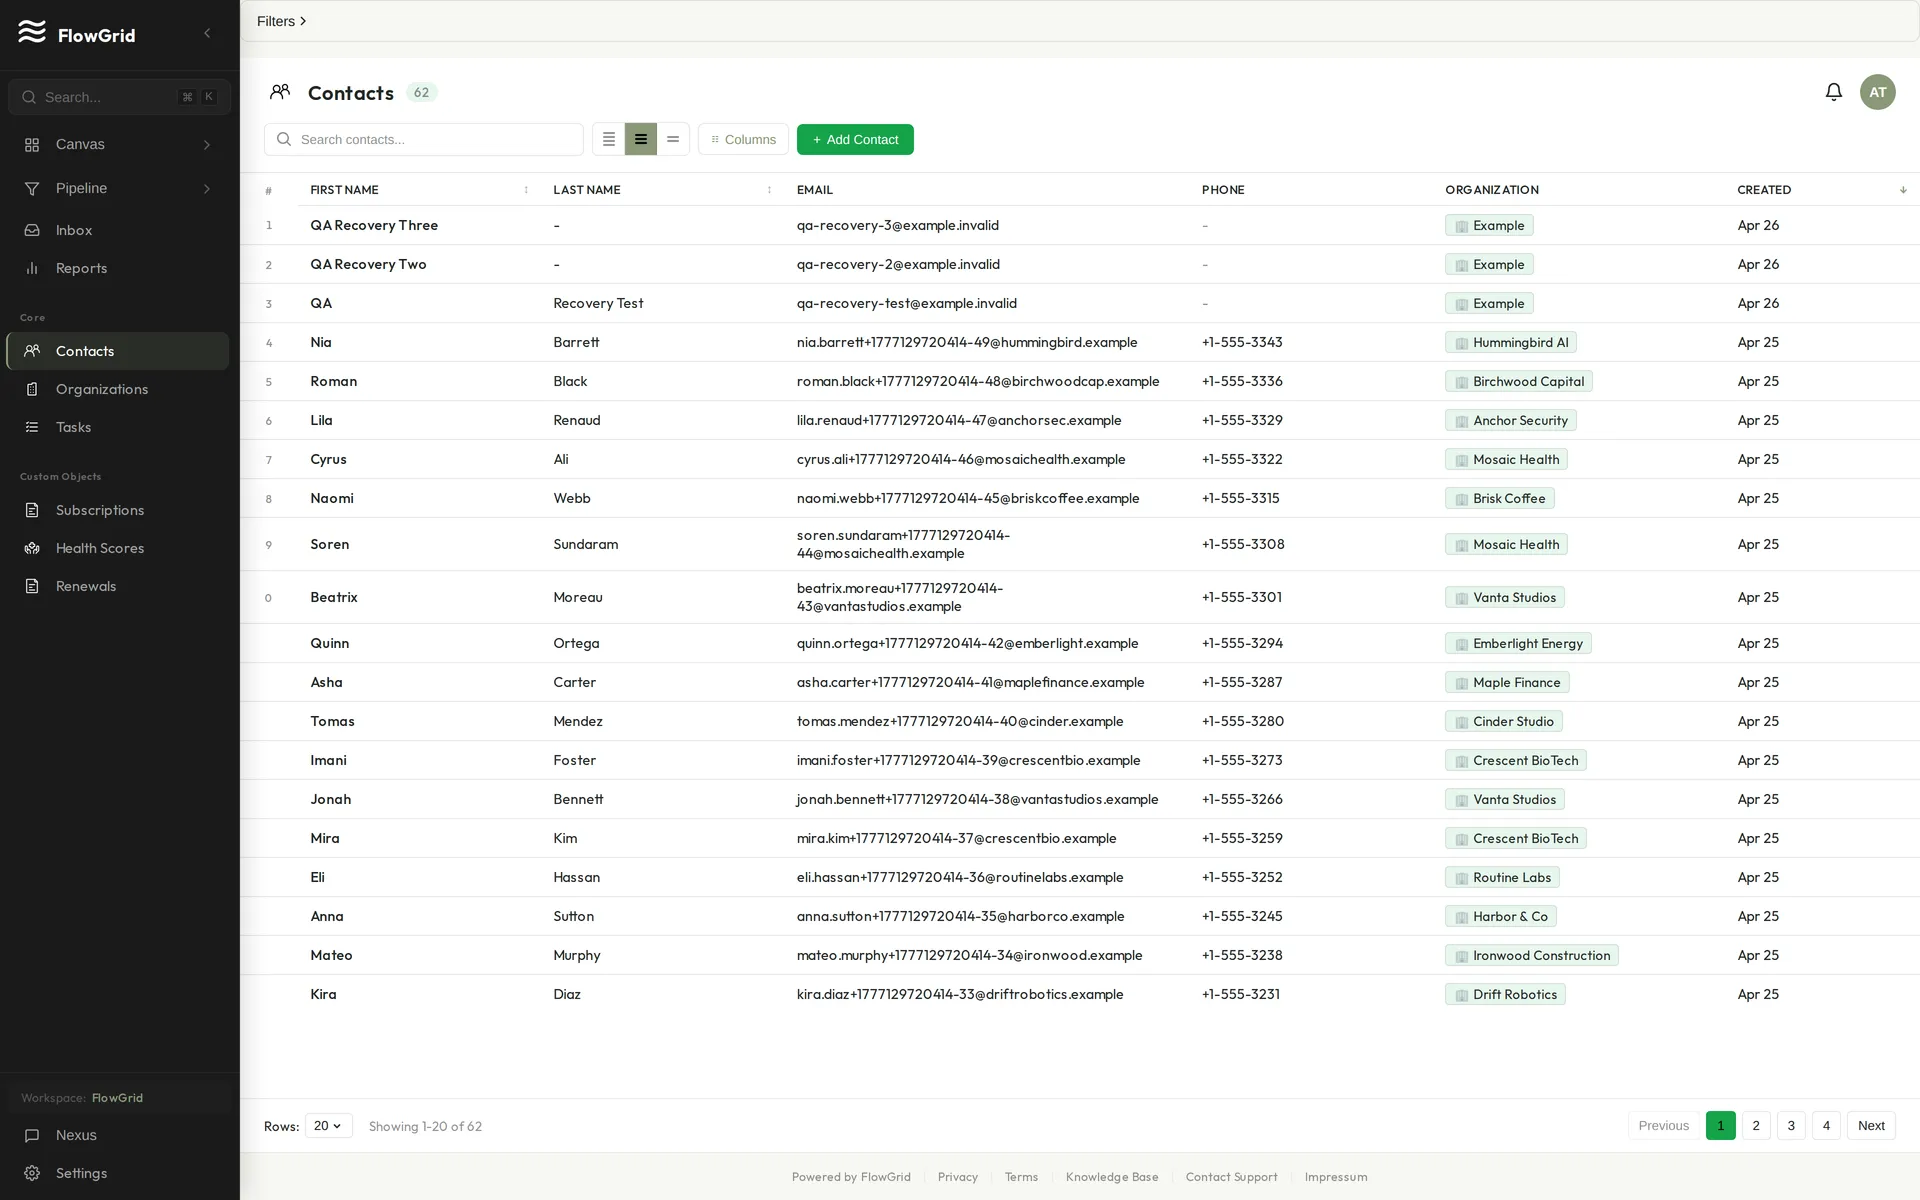
Contacts
Managing Contacts
Contacts are the people you do business with. Each contact can belong to an organization and have multiple deals associated with them.
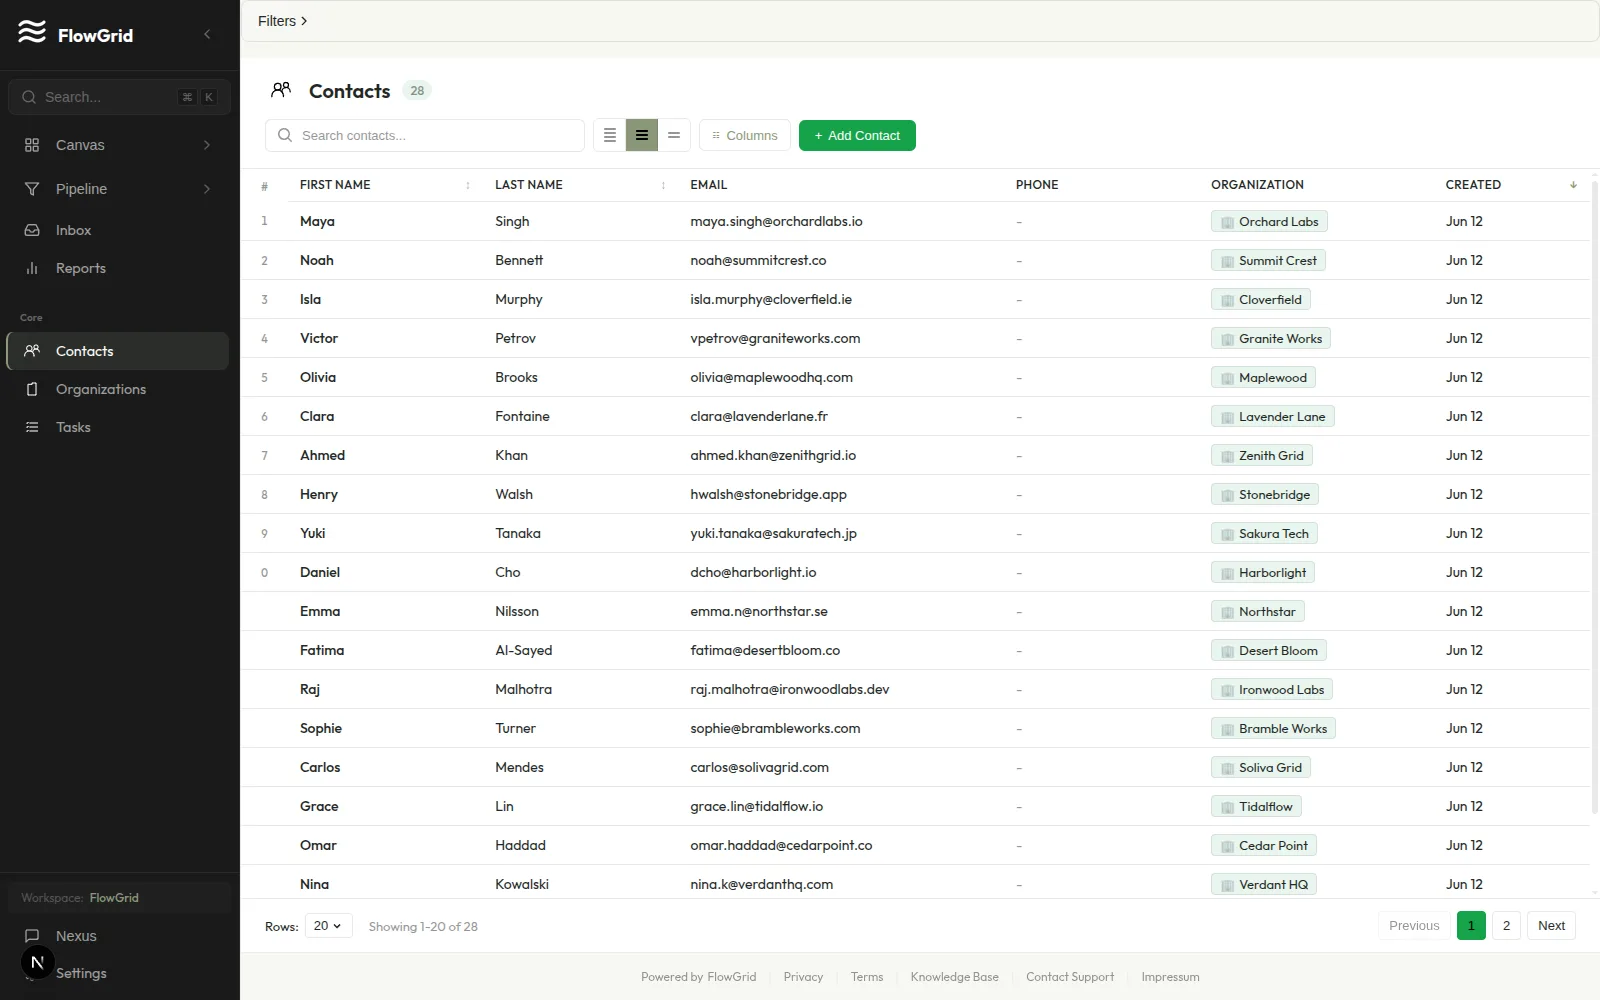 Contacts list view
Creating a Contact
To add a new contact, click + Add Contact in the top-right corner of the Contacts page. Enter the contact's First Name (the only required field), then optionally add their last name, email, phone number, and other details. Click Create Contact when you're done.
You can also ask Nexus to create contacts for you. Try something like "Create a new contact named John Smith at [email protected]" and Nexus will handle the rest.
Contact Fields
Each contact record includes these fields:
- First Name (required)
- Last Name
- Email — must be a valid email format
- Phone — any format accepted
- Organization — links the contact to a company
- Tags — comma-separated labels for categorization
Finding Contacts
The search bar at the top of the Contacts page lets you find contacts by name, email, or phone number. For more advanced filtering, click the Filters button to narrow your list by organization, tags, or other criteria.
You can also ask Nexus to help: "Find all contacts from TechCorp" or "Show contacts tagged VIP" will return matching results.
Activity & Timeline
Click any contact row to open the detail panel on the right side of the screen. This panel shows the contact's information along with a complete activity timeline of all interactions — emails, notes, calls, and any changes to the record. You'll also see linked deals and tasks associated with this contact.
Common Issues
Duplicate contacts can clutter your database, so it's a good idea to search before creating a new contact. If you enter an email address, it must be in a valid format (like [email protected]) or the system will reject it. Remember that First Name is always required — you can't save a contact without it.
Organizations
Managing Organizations
Organizations represent companies or businesses you work with. Contacts belong to organizations, and deals are typically associated with an organization.
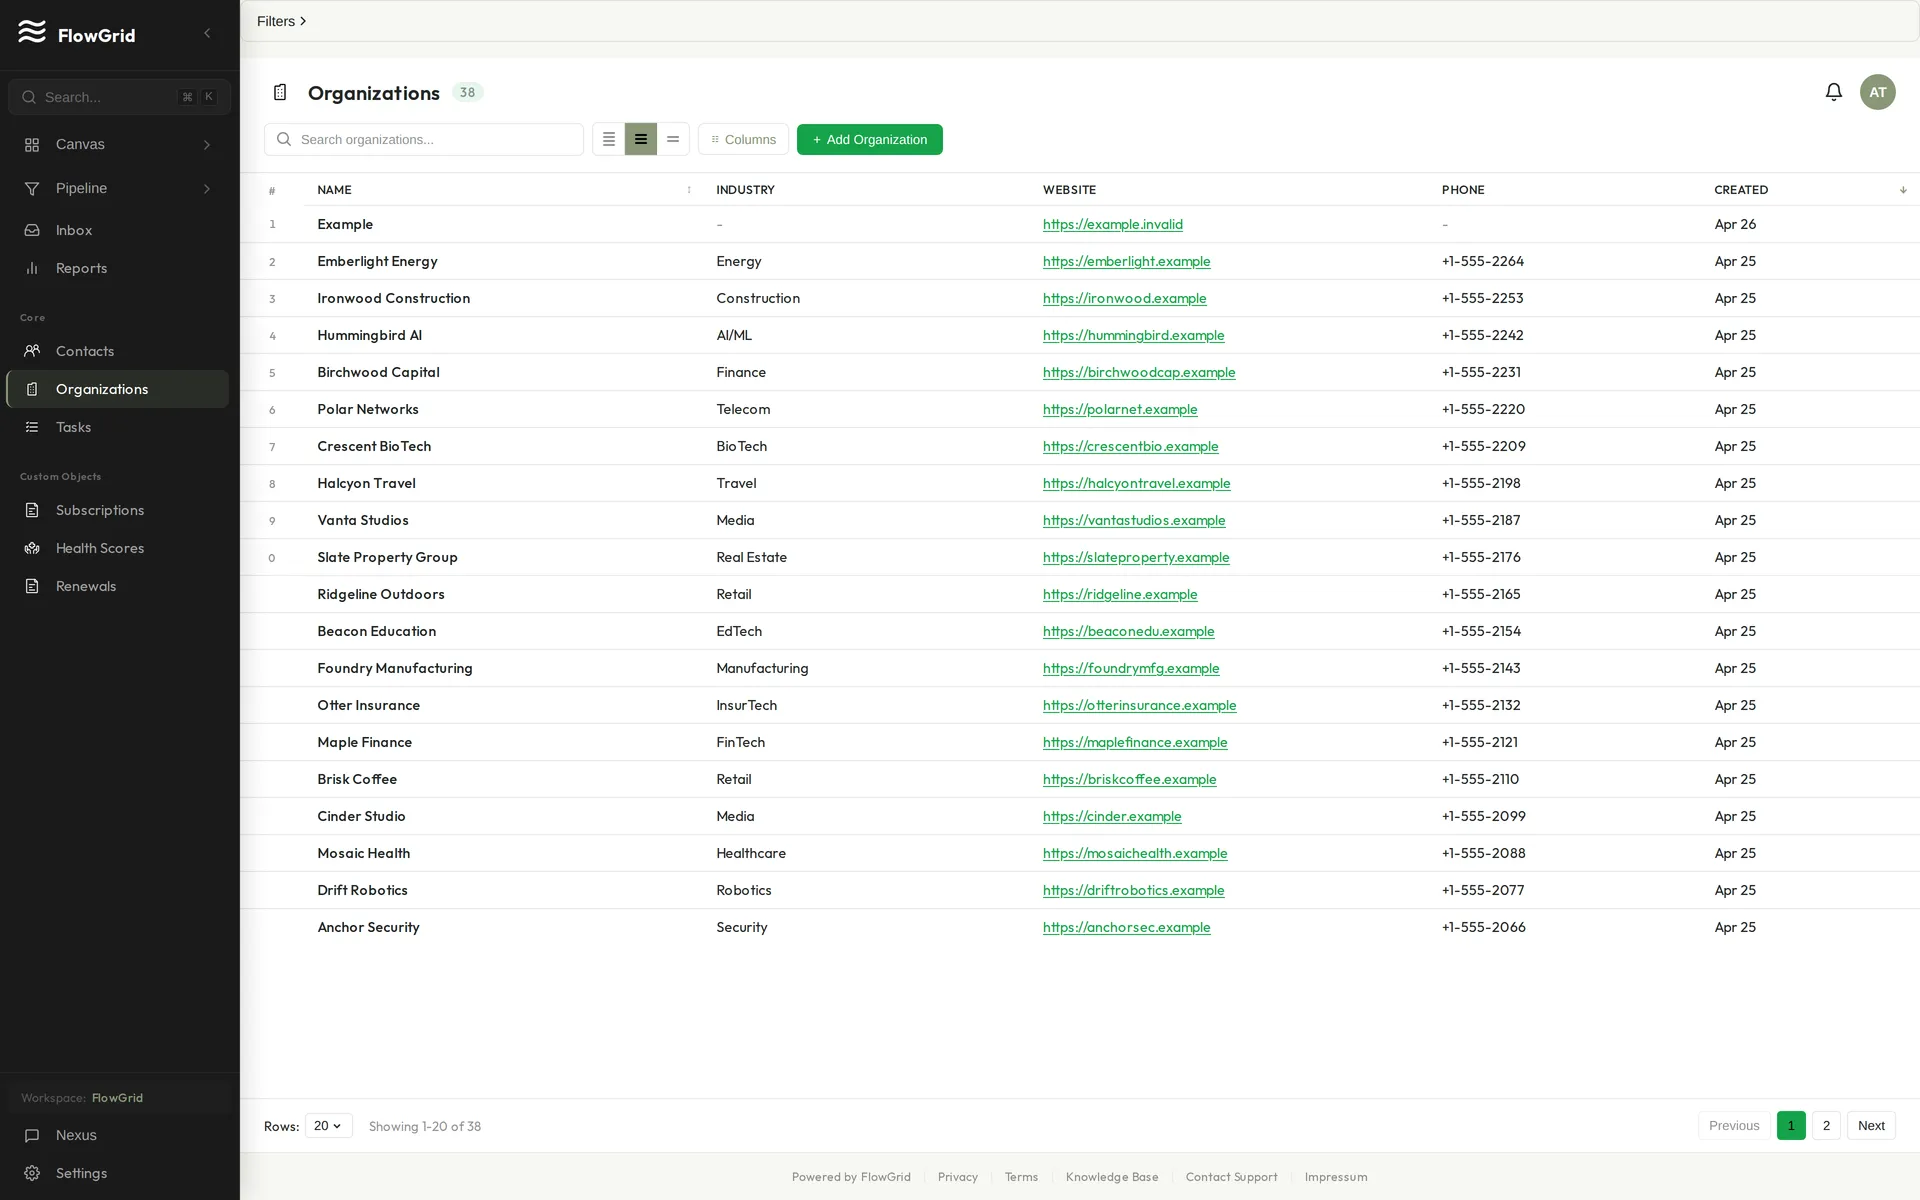 Organizations list
Creating an Organization
To add a new organization, click + Add Organization in the top-right corner of the Organizations page. Enter the company Name (the only required field), then fill in any additional details like Industry, Website, or Phone. Click Create Organization to save.
You can also ask Nexus to help: "Create a new organization called Acme Corp in the Technology industry" will create the record for you.
Organization Fields
Each organization record includes these fields:
- Name (required) — the company name
- Industry — categorizes the business sector
- Website — the company's website URL
- Phone — main contact number
- Address — physical location (expand "More details" to access)
- Notes — free-form text for additional information
Linking Contacts to Organizations
When creating or editing a contact, you can link them to an organization by selecting from the Organization dropdown. Alternatively, ask Nexus: "Link contact John Smith to TechCorp" and it will update the relationship for you.
Each contact can only belong to one organization at a time. If someone moves companies, simply edit their contact record and select the new organization.
Finding Organizations
The search bar at the top of the page lets you find organizations by name. For more refined results, use the Filters button to narrow by industry or other criteria. Click any row to view the organization's details and see all linked contacts.
Common Issues
The Name field is required — you can't save an organization without it. To avoid duplicates, search for an organization before creating a new one. If you find duplicates later, you'll need to manually merge the contacts and delete the extra record.
Deals
Managing Deals
Deals represent potential revenue opportunities. Track them through your sales pipeline from lead to close.
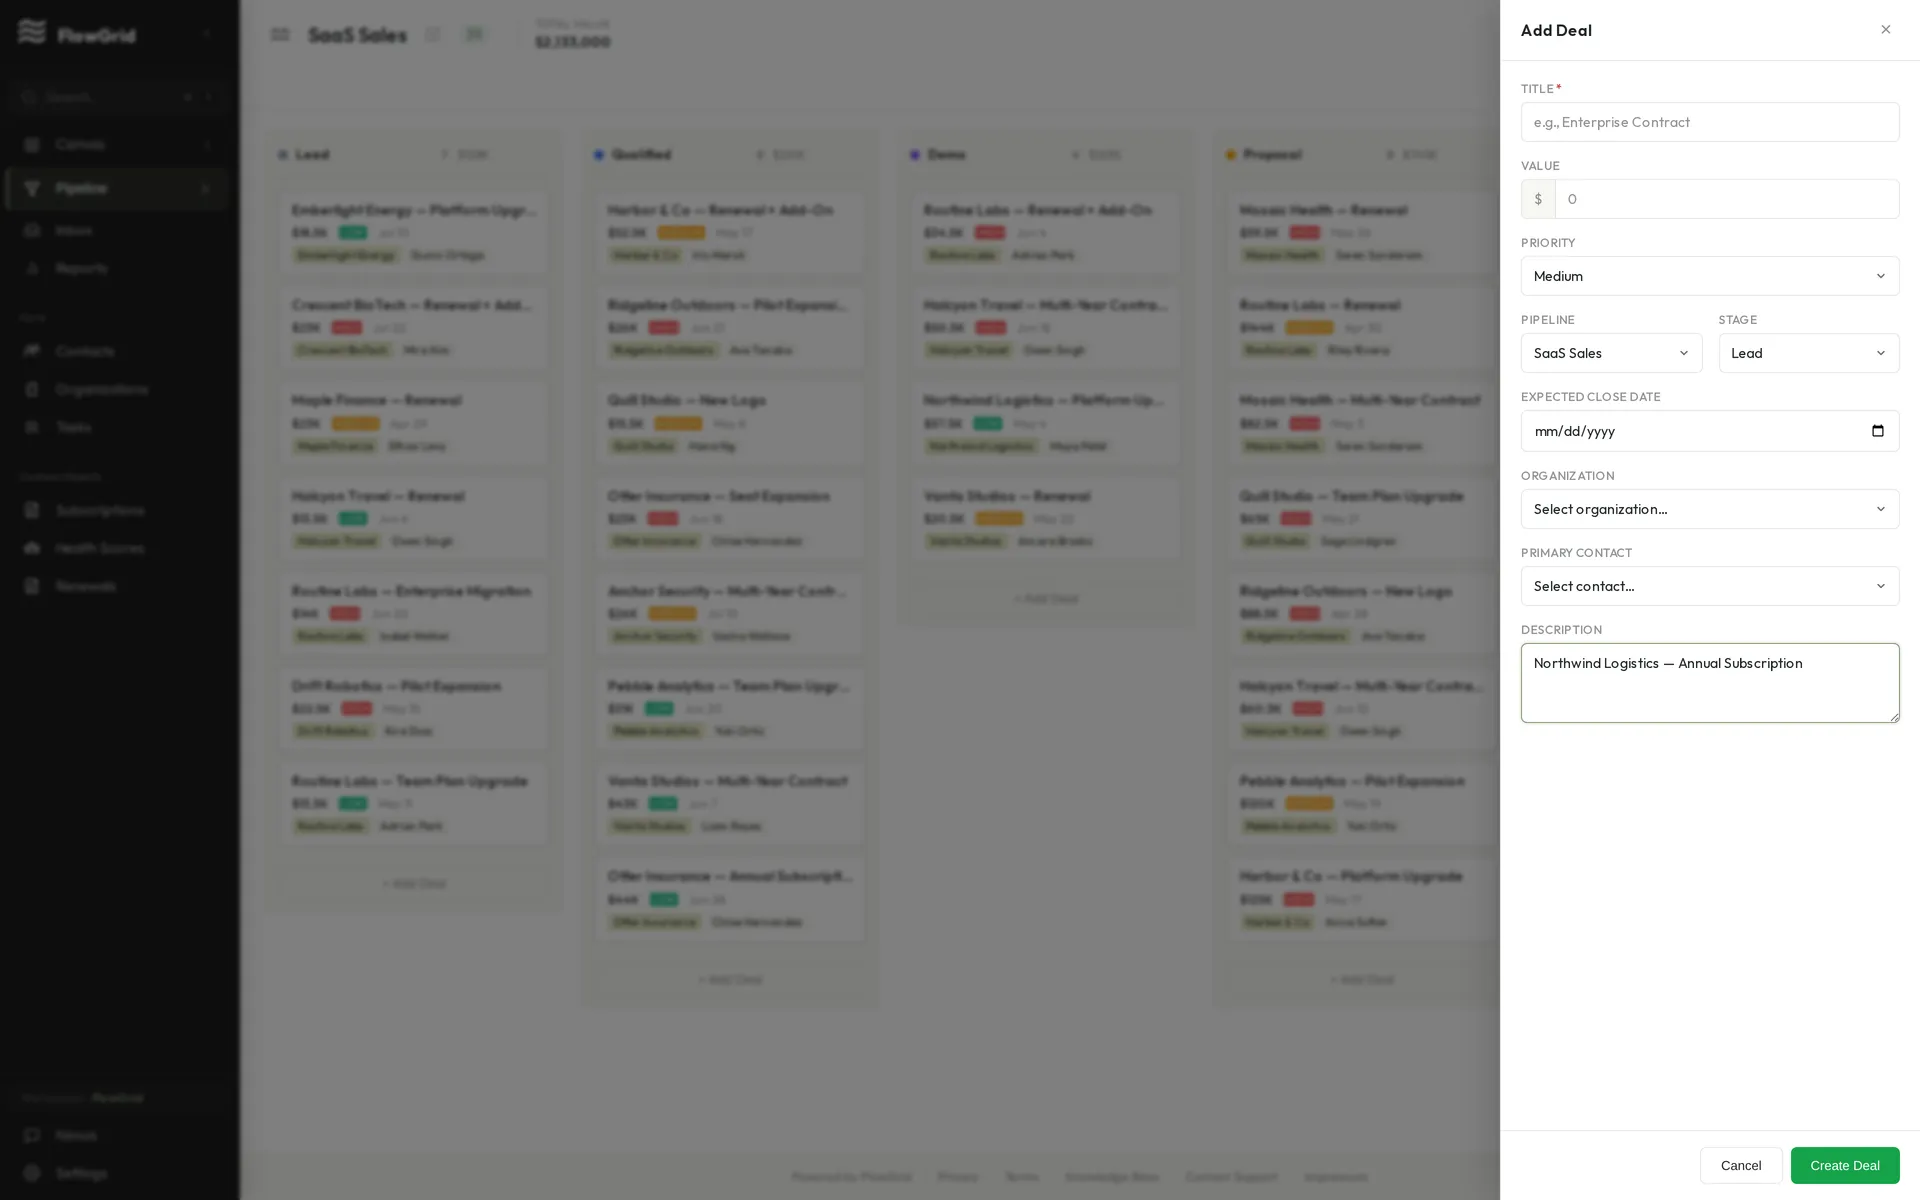 Creating a deal
Creating a Deal
Click + Add Deal or ask Nexus: "Create a deal for $50,000 with TechCorp." When creating a deal, set the value, choose the current stage, and add an expected close date. You can also link the deal to an organization and primary contacts for context.
Deal Stages
The default pipeline includes six stages: New (just created, needs qualification), Qualified (confirmed as a valid opportunity), Proposal (proposal sent to prospect), Negotiation (actively discussing terms), Closed Won (successfully closed), and Closed Lost (did not close). You can customize stages in Settings > Schema > Pipelines.
Managing Your Pipeline
View deals visually on the Kanban board by clicking Pipeline in the sidebar. Drag and drop deal cards to move them between stages as opportunities progress. You can also ask Nexus: "Show me deals in negotiation stage" or filter by value, stage, or expected close date.
Common Issues
Every stage change is logged automatically, creating an audit trail of how deals progressed. Once a deal is marked as Closed Won or Closed Lost, review it carefully before changing — these stages typically represent final outcomes. When entering deal values, just type the number; the currency symbol is added automatically.
Pipeline
Managing Multiple Pipelines
FlowGrid supports multiple pipelines for different sales processes. This is useful when different products have different sales cycles, when you want to separate inbound from outbound leads, or when tracking renewals separately from new business.
Creating a New Pipeline
To create a new pipeline, go to Settings > Schema > Pipelines and click New Pipeline. Give your pipeline a descriptive name, then define its stages in order from first contact to closed. You can also set a default pipeline that new deals will be assigned to automatically.
Switching Between Pipelines
Use the pipeline selector dropdown above the Kanban board to switch your view between different pipelines. Each pipeline maintains its own stages and deals — a deal belongs to exactly one pipeline at a time.
Moving Deals Between Pipelines
If you need to move a deal to a different pipeline, edit the deal and change the pipeline field. When you do this, the deal's stage will reset to the first stage of the new pipeline. Don't worry about losing history — all previous stage changes are preserved in the deal's audit log.
Best Practices
Keep stage names consistent across pipelines when possible to make reporting easier. Use clear, distinctive names for your pipelines (like "Enterprise Sales" and "SMB Sales") so team members know which one to use. When a pipeline is no longer needed, archive it rather than deleting — this preserves historical data while keeping your active workspace clean.
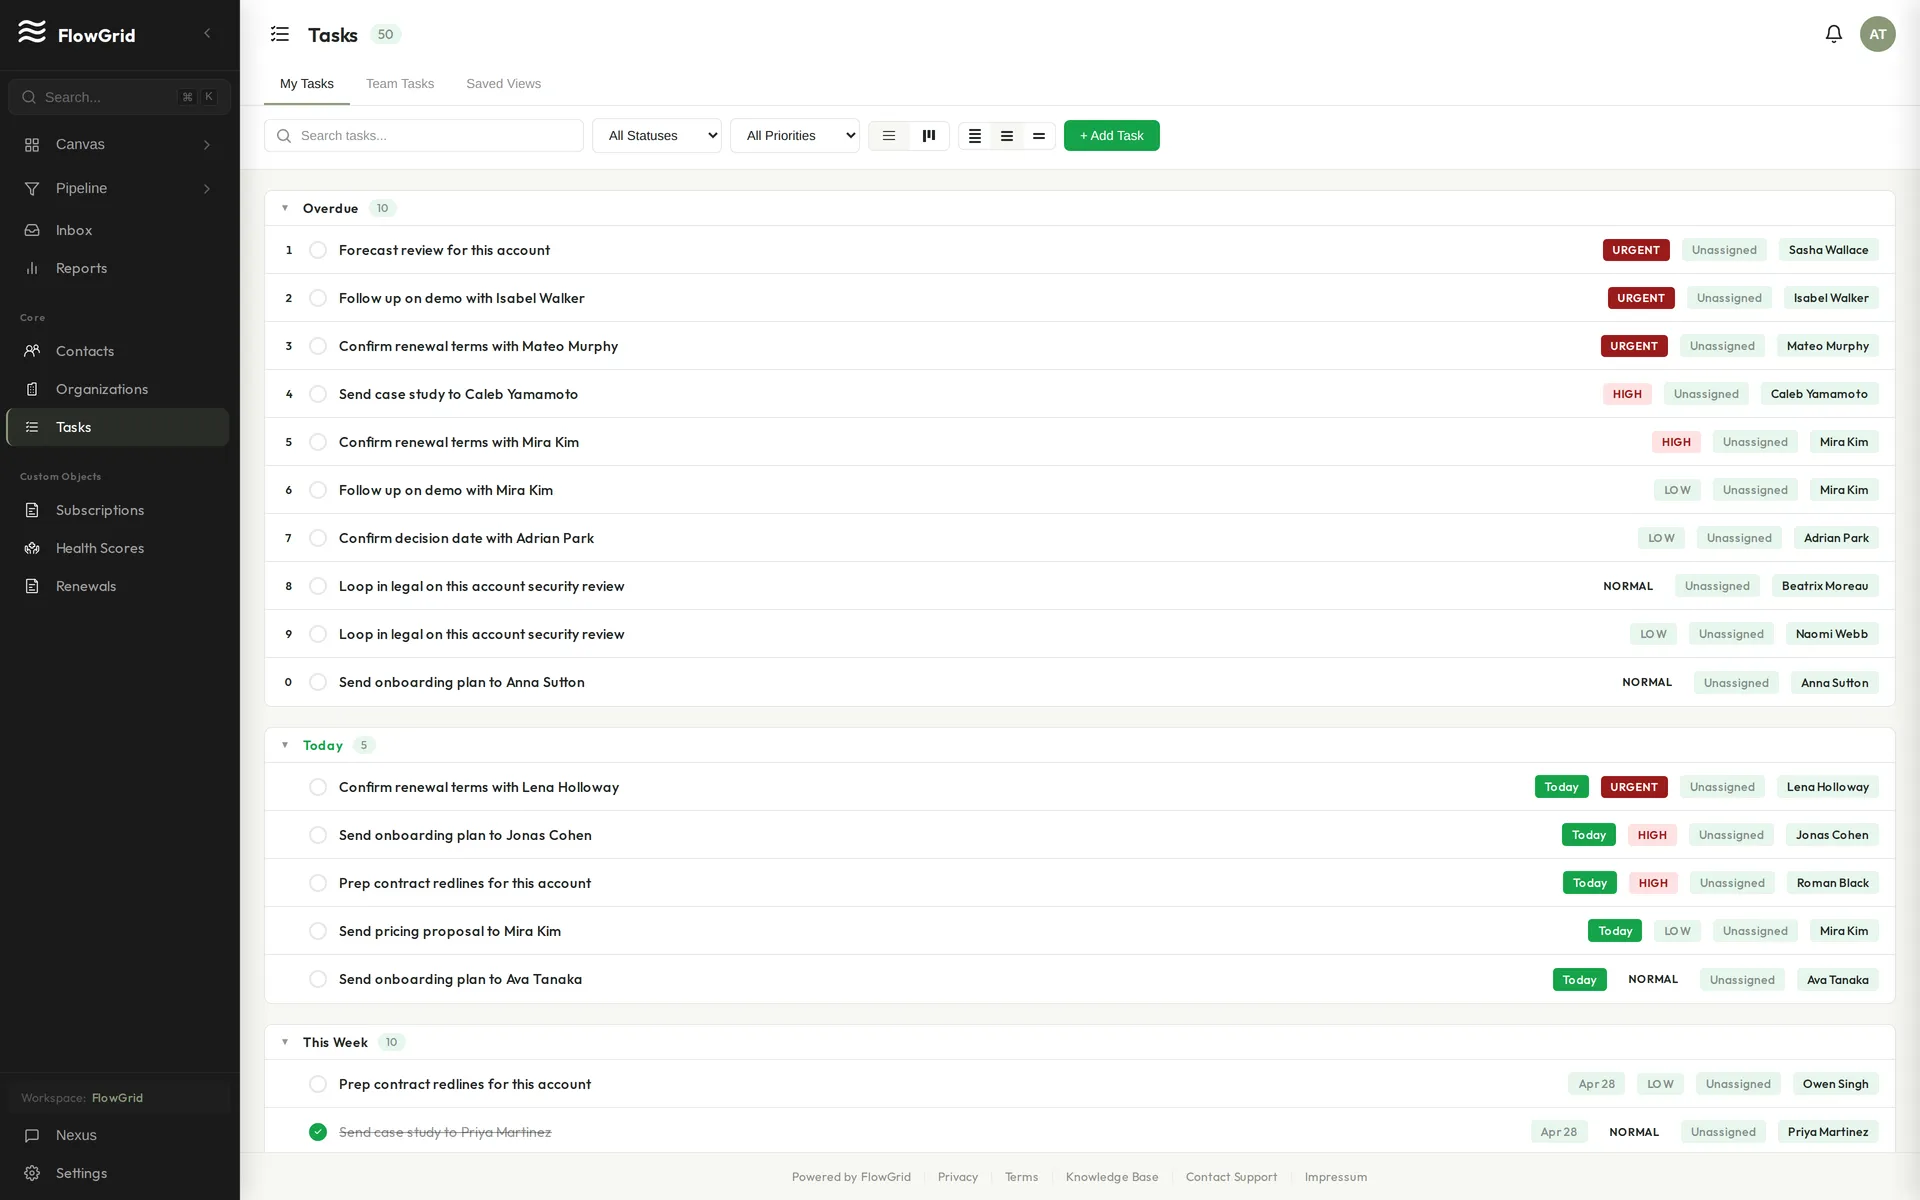
Pipeline Overview
The Pipeline view provides a visual Kanban board for managing your deals through sales stages. Each stage appears as a column, with deal cards that you can drag between stages as opportunities progress.
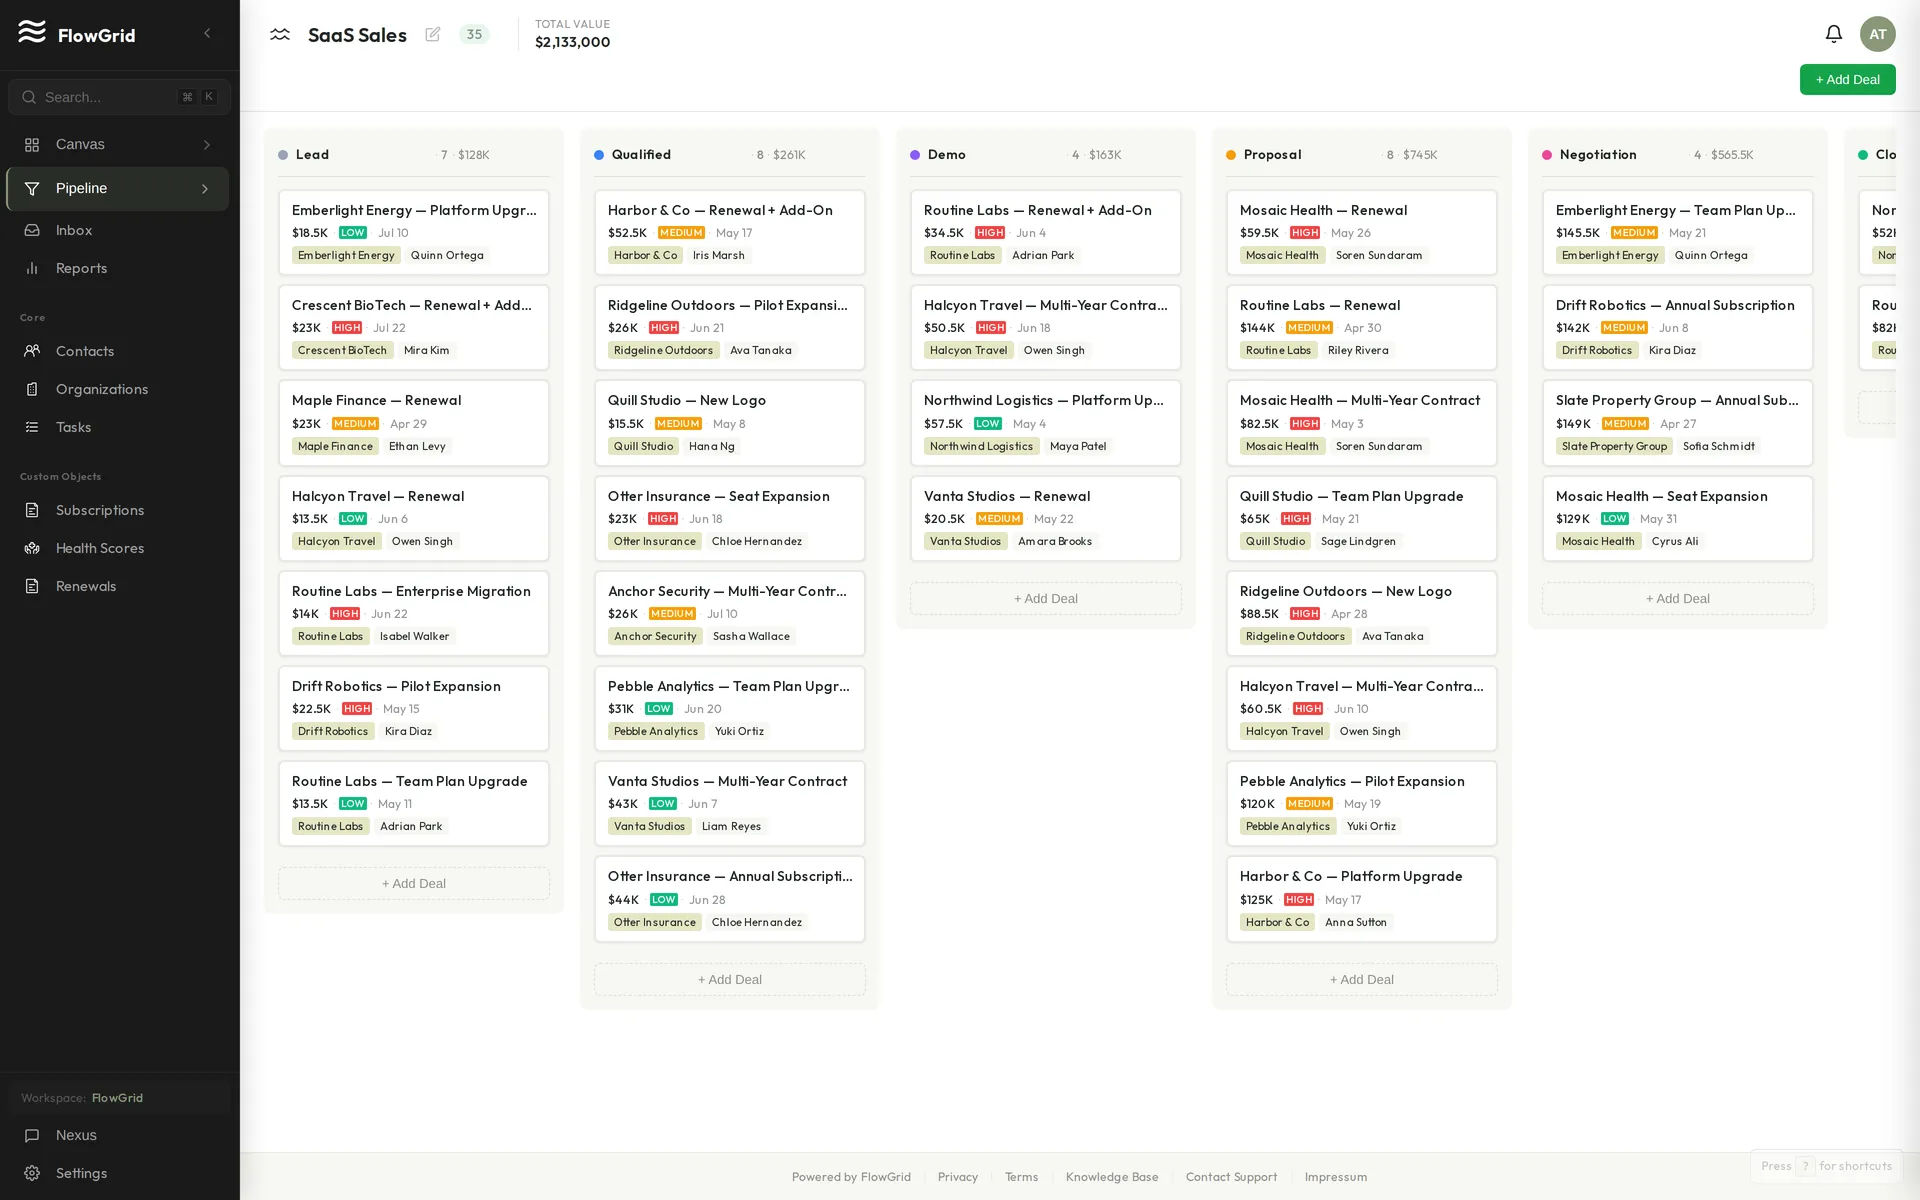 The pipeline Kanban board
What the Pipeline Shows
The board displays all your active deals organized by stage. Each deal card shows key information at a glance: the deal value, primary contact, and expected close date. At the top of each column, you'll see the total value of all deals in that stage — useful for forecasting and pipeline reporting.
Getting Started
When you first open the Pipeline, you'll need to set up your stages. Type a name in the "New Stage" field to create your first stage (for example, "Qualification" or "Proposal"). Once you have stages, click + Add Deal to create your first deal, then drag it between stages as it progresses through your sales process.
Accessing the Pipeline
Click Pipeline in the sidebar to open the board. You can also use the keyboard shortcut G then P, or ask Nexus: "Show me the pipeline" or "Open the Kanban board."
Pipeline vs. Deals List
FlowGrid offers two ways to view your deals. The Pipeline is a visual Kanban board designed for stage-based workflow — great for seeing where deals stand at a glance. The Deals List shows the same data in a traditional table format with sorting and filtering options. Choose whichever view fits your workflow better; both display the same underlying data.
Using the Kanban Board
The Kanban board lets you manage deals visually by dragging them between stages. It's designed to give you a quick overview of your entire pipeline and make it easy to move deals forward.
Moving Deals
To move a deal to a new stage, simply drag and drop the deal card from one column to another. Changes are saved automatically, and every stage change is logged in the deal's activity timeline so you have a complete history of how opportunities progressed.
Deal Cards
Each deal card displays the essential information you need at a glance: the deal title, value (formatted as currency), primary contact, expected close date, and how many days the deal has been in its current stage. This last metric helps you spot deals that might be stuck.
Quick Actions
Drag a deal card between columns to move it through your stages — changes save instantly and are logged to the deal's timeline.
 Moving a deal between stages
Click any deal card to open the detail panel on the right side of the screen. Here you can view the full activity timeline for the deal, add notes, create related tasks, or update the deal's information.
Filtering the Board
The filter bar above the board lets you focus on specific deals. Filter by value range, expected close date, primary contact, or organization. Your filters persist during your session, so you can work through a filtered view without losing your place.
Column Totals
Each stage column displays the total value of all deals it contains. This running total is useful for pipeline forecasting — you can quickly see how much potential revenue sits at each stage of your process.
Tasks
Managing Tasks
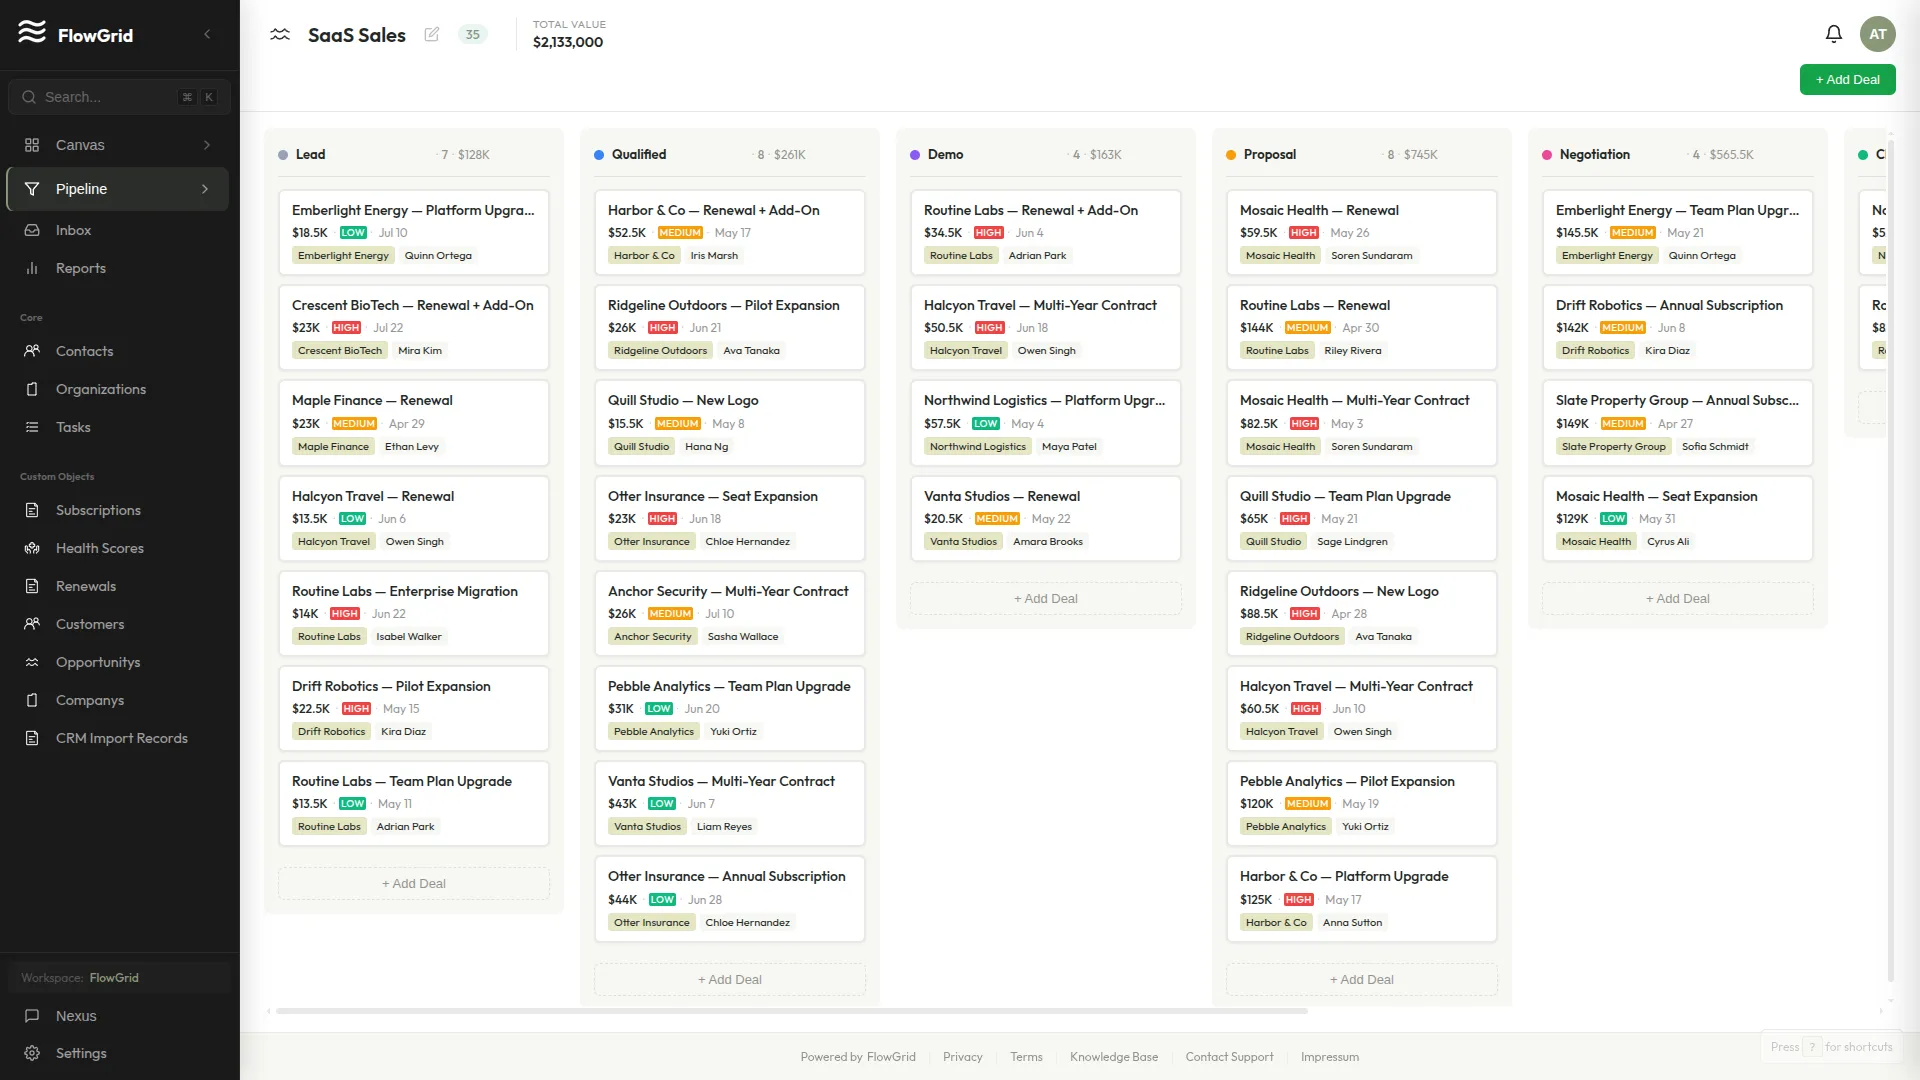
Tasks help you stay on top of follow-ups and action items. You can view your tasks in either List or Kanban mode, depending on how you prefer to work.
 Tasks grouped by due date
Creating a Task
To create a new task, click + Add Task in the top-right corner of the Tasks page. Enter a Title (required), set the Due Date and Priority, then click Create Task.
You can also ask Nexus to create tasks for you: "Create a task to follow up with John tomorrow at high priority" will handle everything automatically.
Task Status
Tasks move through four states as you work on them: Pending (not yet started), In Progress (actively being worked on), Completed (finished), and Cancelled (no longer needed). Change the status by clicking on a task and updating the Status dropdown.
Task Priorities
Set priority to help you focus on what matters most. Urgent tasks require immediate attention, High priority items should be done soon, Medium is the default for standard work, and Low priority tasks can wait if needed.
View Modes
The Tasks page offers two ways to view your work. List View shows tasks in a traditional table format with sortable columns. Kanban View displays tasks as cards organized into columns by status, making it easy to see your workflow at a glance. Switch between views using the toggle buttons in the toolbar.
Filtering & Finding Tasks
Use the search bar to find tasks by title. The Status and Priority dropdowns let you filter the list to show only what you need. Toggle between My Tasks and Team Tasks to see your personal workload or everything assigned across the team.
Nexus can help here too: "Show me overdue tasks" or "What's due this week?" will return matching results.
Linking Tasks
Tasks can be linked to other records for context. When creating a task, expand More details to connect it to a specific Contact, Organization, or Deal. This makes it easy to see related tasks when viewing those records.
Common Issues
Tasks that are past their due date appear highlighted so you can spot overdue items quickly. If you don't set a due date, tasks default to tomorrow.
Custom Objects
Creating Custom Objects
Custom objects let you track any type of data beyond the built-in Contacts, Organizations, and Deals. Common examples include Products for your catalog, Projects for delivery, Tickets for support, or Subscriptions for recurring revenue.
 The schema editor with custom objects
Creating a Custom Object
Go to Settings > Schema and click Add Object. Give it a descriptive name, then define the fields you need. Once created, the object appears in your sidebar and you can start adding records right away. You can also describe what you want to the schema assistant — "create a Properties object with address, price, and status fields" — and let it build the object for you.
Available Field Types
Custom objects support Text, Textarea (long content), Number, Currency, Date, Select (dropdown), Multi-select, Email, Phone, URL, and Relation (to link to another object).
Relationships
Use Relation fields to connect objects — link a Subscription to an Organization, or a Ticket to a Contact. Related records show up on each other's detail pages, so you can navigate your data the way your business actually connects.
Working with Custom Objects
Custom objects behave just like core objects. Create records from the sidebar, use Nexus to create and search them in natural language, lay out their detail pages (see Designing Record Layouts), and add fields and relationships as your needs evolve.
Limitations
Custom objects aren't meant to replace core CRM objects — use Contacts, Organizations, and Deals for standard CRM workflows. When storing sensitive data, use encrypted fields. Workspace plans have limits on the number of custom objects you can create.
Designing Record Layouts
The layouts editor controls how a record's detail page looks — which fields appear, in what order, and grouped into which sections. A good layout makes the information your team needs most the first thing they see.
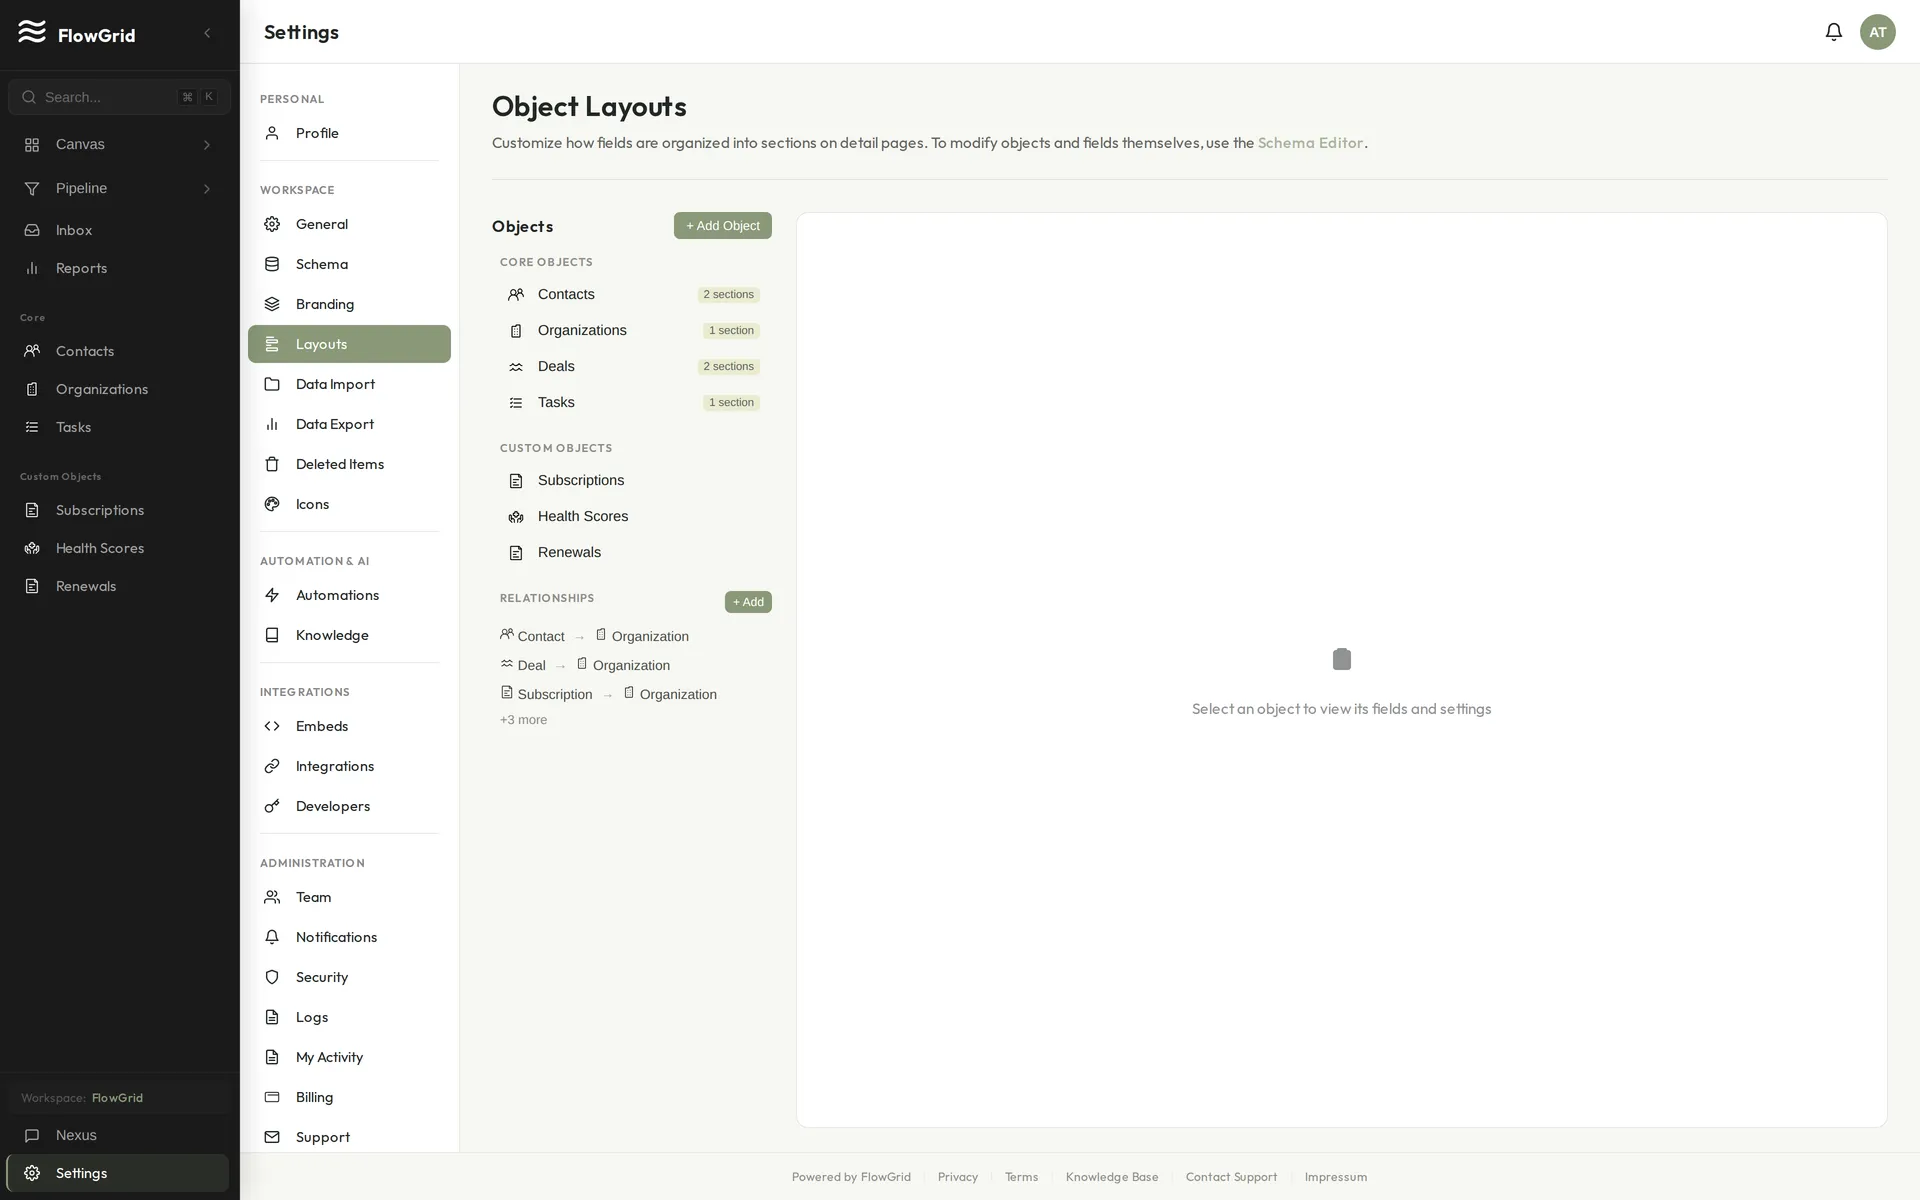 The layouts editor
Editing a Layout
Go to Settings > Layouts and choose the object you want to lay out (Contact, Deal, or any custom object). Drag fields into sections, reorder them, and group related fields together — for example a "Basics" section up top and a "Commercials" section below for a Deal.
Sections & Field Order
Organize fields into named sections so long records stay scannable. Put the fields people reference constantly near the top; tuck rarely-used fields into a collapsible section lower down. The order you set here is the order everyone on your team sees.
Layouts vs. Schema
The schema defines what fields an object has; the layout defines how they're arranged on the page. Changing a layout never changes your data — it only changes presentation — so you can refine it freely as your team's needs change.
Canvas & Dashboards
Building Dashboards with Nexus
You don't have to configure widgets by hand. Describe the dashboard you want in plain language and Nexus builds it on your canvas — this is FlowGrid's prompt-to-widget feature.
 Nexus turning a prompt into widgets
How It Works
Open an empty canvas (or any canvas) and tell Nexus what you'd like to see. For example:
- "Show me deals closing this month grouped by owner"
- "Add a KPI tile for total open pipeline value"
- "Build a chart of deals won per month this year"
- "Make a table of my overdue tasks"
Nexus interprets the request, picks an appropriate widget type, queries your data, and places the widget on the canvas. You'll see it assemble the result as a tool card in the chat, then drop the finished widget onto the grid.
 A widget built from a prompt
Refining a Widget
After a widget appears, you can keep going conversationally — "group that by stage instead", "only show deals over $50k", "change it to a bar chart" — or open the widget's settings and adjust it manually. Either way, the change is yours to keep or undo.
Starting from Empty
A brand-new canvas shows a prompt box inviting you to describe your first widget. It's the quickest way to go from a blank dashboard to something useful — no widget configuration required.
 An empty canvas with the build prompt
Using the Canvas
The Canvas is your customizable dashboard — a flexible grid of widgets that surfaces the CRM data you care about most. It's the first thing you see when you log in.
A populated Canvas dashboard
Widget Types
- KPI tile — a single metric shown prominently (pipeline value, open deals, overdue tasks).
- Table — records in rows, great for "deals closing this month" or "my open tasks".
- Kanban — a pipeline-style board grouped by a field like stage.
- Chart — bar, line, and other visualizations for trends and comparisons.
Customizing the Canvas
Add, remove, resize, and rearrange widgets to build the view you want. Each widget has its own settings so you can choose exactly which records and metrics it shows. Drag widgets to reorder them; the layout saves automatically.
Multiple Canvases & Saved Layouts
Keep separate canvases for separate workflows — for example "My Week", "Follow-ups Owed", and a team-wide "Sales Overview". Switch between them from the canvas menu. Each user can keep their own canvas preferences independent of the rest of the team.
Working with Nexus
Ask Nexus questions about your data straight from the canvas — "What's my pipeline value?" or "List recent activities" — or have it build a widget for you. See Building Dashboards with Nexus.
Reports
Creating Custom Reports
Build custom reports to track the metrics that matter to your business.
Creating a Report
Go to Reports and click New Report. Choose a base object (Deals, Contacts, etc.), select which fields to include, add grouping and aggregation settings, apply any filters, then save and name your report.
Grouping Options
Group your data by date (day, week, month, quarter, or year) or by field values (like stage, owner, or source). You can add multiple grouping levels for more detailed breakdowns.
Aggregation Functions
Apply aggregations to summarize your data: Count shows the number of records, Sum totals numeric fields, Average calculates the mean value, and Min/Max finds the lowest or highest values.
Filtering Reports
Narrow your reports with filters. Use date ranges (this month, last quarter, or custom periods), field values (like stage = "Proposal"), or ownership filters (my deals, team deals, or all).
Saving and Sharing
Save reports for quick access later. Reports are private by default, but admins can share reports with the team for collaborative analysis.
Scheduling Reports
You can schedule reports to run automatically on a recurring basis. When creating or editing a report, enable the Schedule this report option and choose a frequency:
- Daily — runs every day at 10:00 AM UTC
- Weekly — runs once per week on your chosen day at 10:00 AM UTC
- Monthly — runs once per month on your chosen day at 10:00 AM UTC
Scheduled reports are generated automatically and stored in your report history. View past runs in the History tab to see generated reports and compare results over time.
Using Reports
Reports help you analyze your CRM data and track key metrics over time.
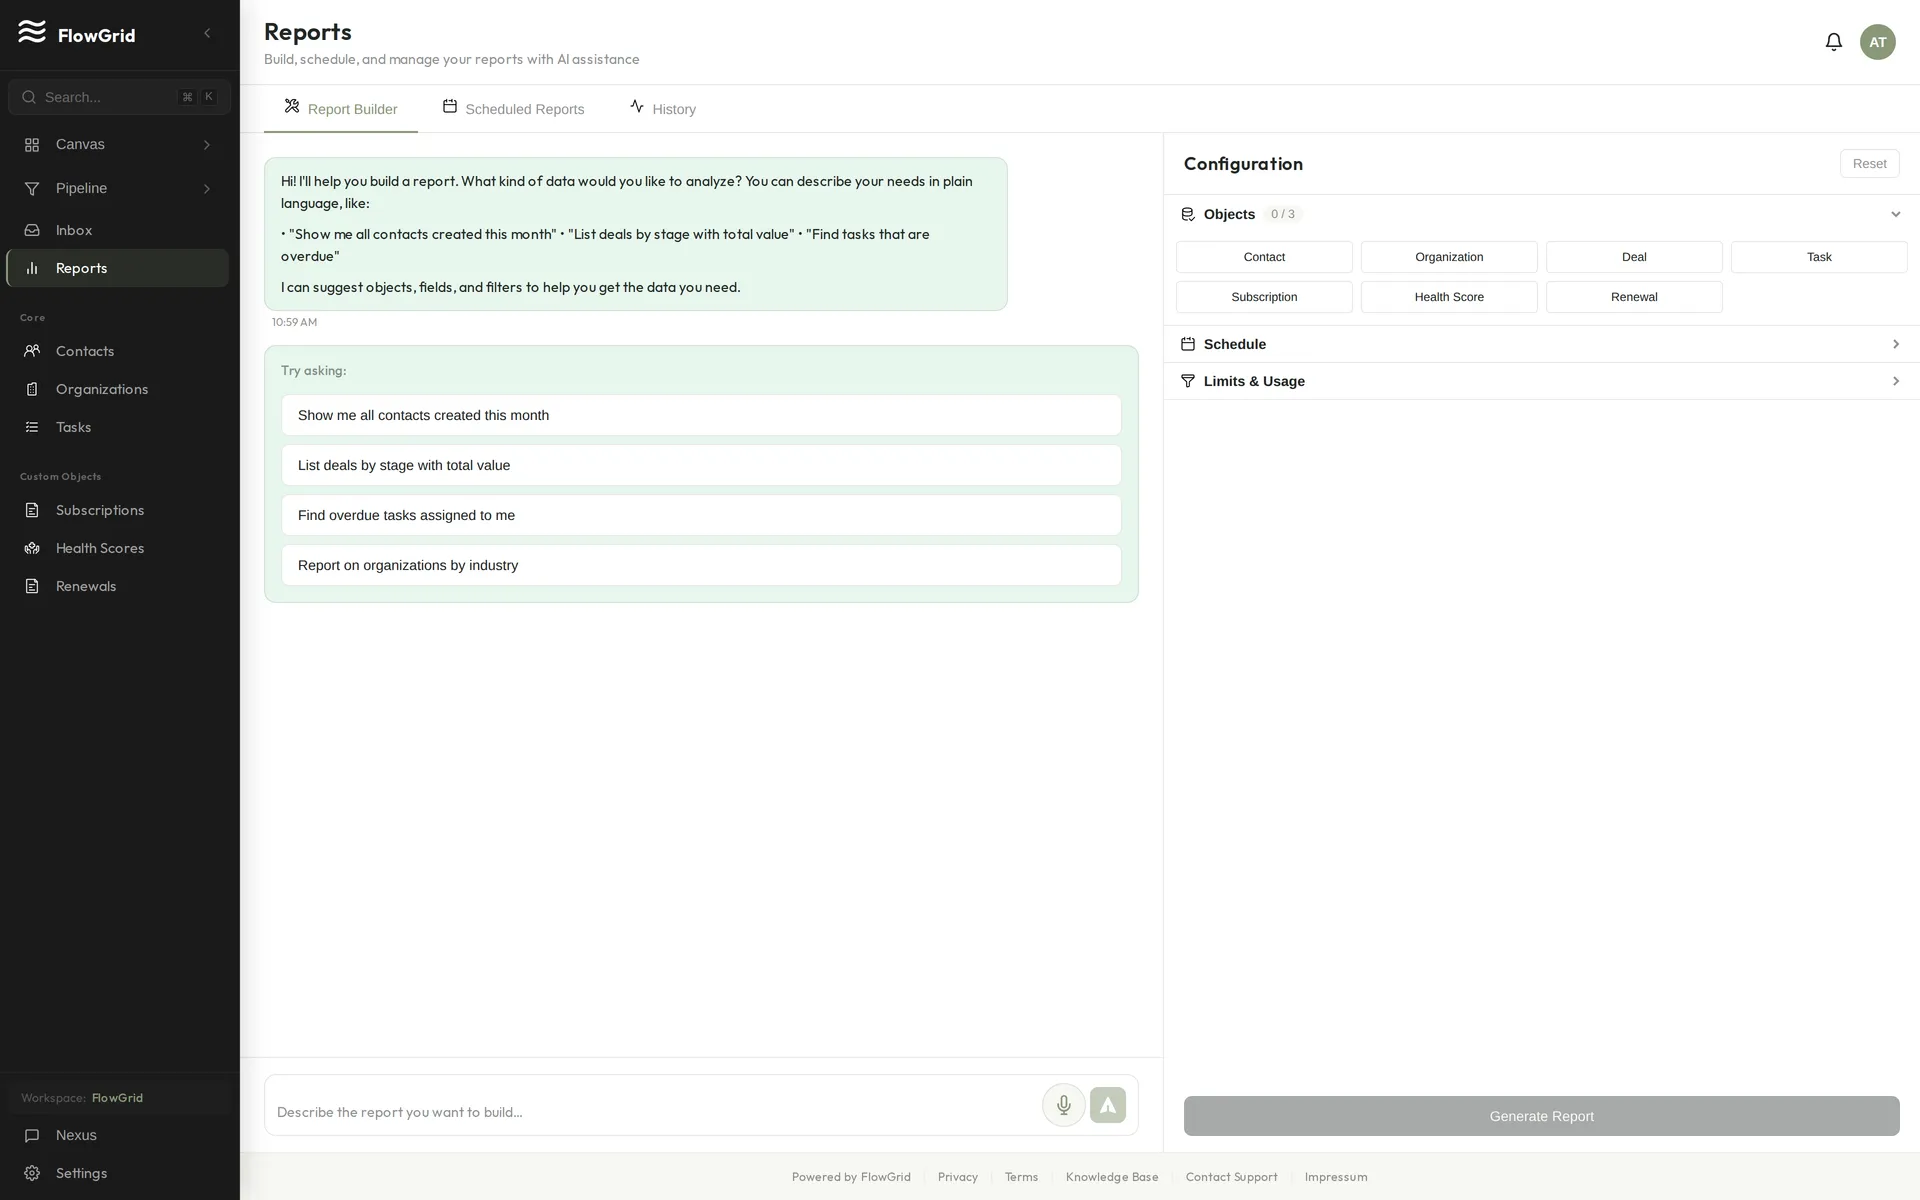 The Reports view
What Reports Show
Reports provide insights into your deal pipeline by stage, revenue trends over time, activity metrics (calls, emails, meetings), team performance, and custom metrics based on your specific data.
Accessing Reports
Click Reports in the sidebar to view available reports. You can also ask Nexus: "Show me sales reports" or "What's my pipeline this month?" to jump directly to relevant reports.
Report Types
Summary reports show aggregated totals and averages for a snapshot view. Trend reports display data across time periods to reveal patterns. Comparison reports provide side-by-side analysis for benchmarking.
What Reports Are NOT
Reports are not real-time dashboards — use the Canvas for live metrics. They're not for raw data export — use Data Export for that. And reports are not editable; they reflect your live data as it exists in the CRM.
Automations
Marketing vs Transactional Emails in Automations
When a workflow sends marketing email, FlowGrid requires email compliance details before activation. This protects recipients and your sending reputation, and supports legal requirements for promotional email in many regions.
Why Setup Is Required for Marketing Email
Marketing email must include clear sender identity and a physical mailing address so recipients know who is contacting them and how to opt out. Without this, providers can flag or block sends, and your domain reputation can degrade.
For this reason, activation is blocked until your workspace completes email compliance setup.
What You Need to Fill In
Go to Settings > Branding and complete the email compliance section:
- Sender name (the business/brand name recipients recognize)
- Physical mailing address (used in marketing footer/compliance details)
Once these are set, marketing automations can be activated.
When to Use Transactional Instead
Use Transactional email type for operational, expected messages tied to a user action or account state, for example:
- Password reset or security confirmation
- Receipt, invoice, or account notification
- Form confirmation or workflow status update
Do not use transactional type for campaigns, promotions, newsletters, or nurture sequences.
How to Switch an Automation Email Type
- Open Settings > Automations
- Edit the workflow
- Open the Send Email action
- Set Email Type to Transactional if the message is operational (not promotional)
- Save and activate
If the message is promotional, keep it as Marketing and complete compliance setup in Settings > Branding first.
Using Automations
Automations let you create workflows that run automatically when certain events occur. They save time by automating repetitive tasks like creating follow-up reminders or notifying team members about important changes.
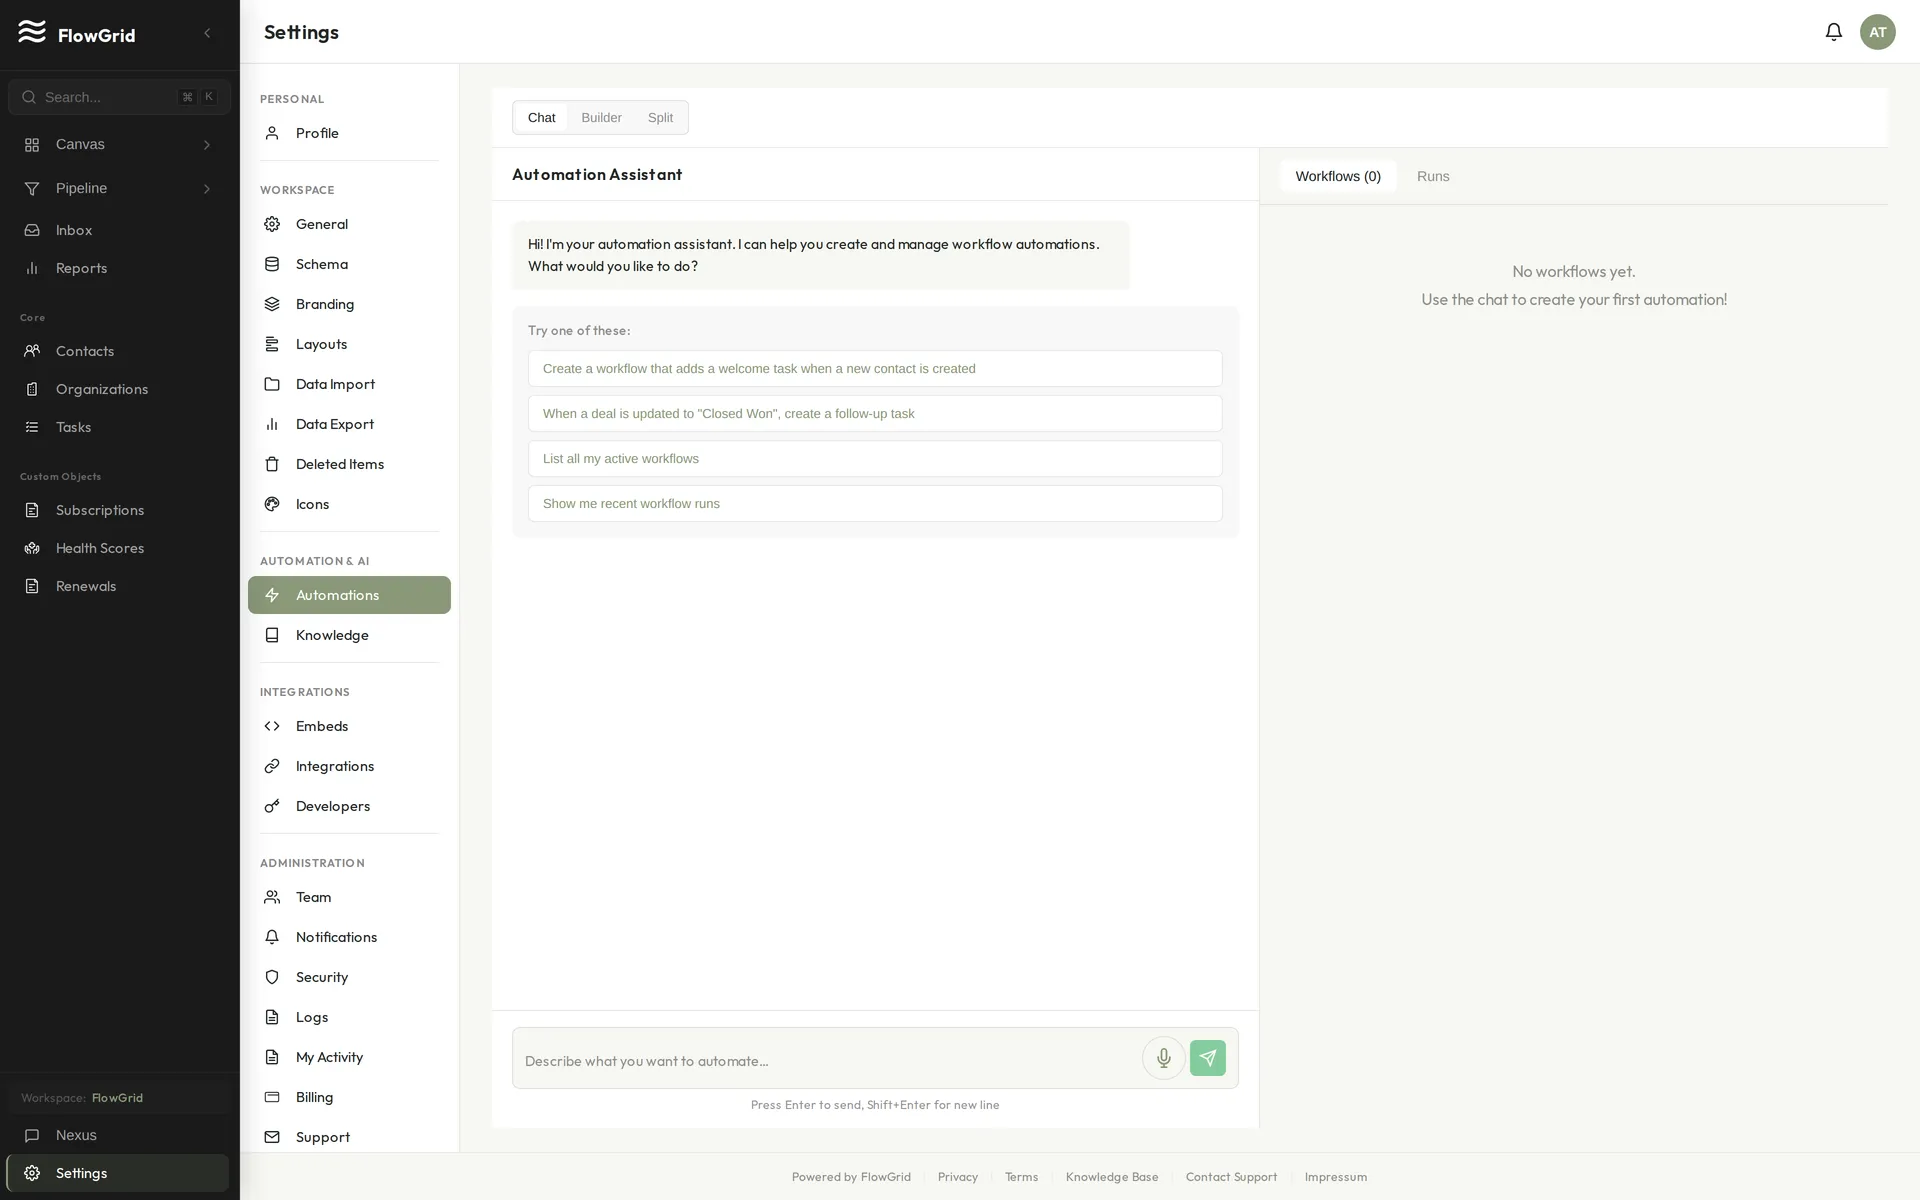 The automations builder
Getting Started
Go to Settings > Automations to access the automation builder. You can also ask Nexus to help: "Create an automation that creates a task when a new contact is created" will build the workflow for you.
Trigger Types
Every automation starts with a trigger that determines when it runs.
- Record Created fires when a new record is added (contact, organization, deal, etc.).
- Record Updated fires when an existing record is modified.
- Incoming Webhook runs when an external system calls your webhook URL.
- Time Elapsed runs after a delay from a reference timestamp field.
- Schedule runs on a recurring cadence (hourly, daily, weekly, monthly).
- Stage Duration runs when a record has stayed in a stage for too long.
- No Activity runs when no activity has happened for a duration.
- Field Changed runs when a specific field changes value.
- Date runs on/around a date field (day-of, before, or after).
- Email Engagement runs when recipients open or click emails.
- Score Threshold runs when a score crosses a threshold.
- Related Record runs on events from related objects.
- Time Schedule is the legacy schedule trigger kept for backward compatibility.
Time-Based Trigger JSON Examples
Use these exact JSON shapes in API payloads and Nexus tool calls:
- timeElapsed
{"delay":{"days":3},"referenceField":"createdAt"}
- schedule
{"frequency":"daily","at":"09:00"}
- stageDuration
{"stageId":"<stage-id>","duration":{"days":5}}
- noActivity
{"sinceField":"lastContactedAt","duration":{"days":30}}
- date
{"dateField":"birthday","when":"dayOf","recurring":true}
- emailEngagement
{"event":"opened","within":{"hours":24}}
- scoreThreshold
{"scoreField":"leadScore","threshold":75}
- relatedRecord
{"relatedObject":"task","event":"created"}
Available Actions
Once triggered, automations can perform various actions. Create Record adds a new contact, organization, deal, or custom object. Update Record modifies the triggering record or another related record. Create Task adds a follow-up with a due date and priority. Append Note adds a note to a contact or organization. Send In-App Notification alerts team members. Send Email sends an email notification. Call Webhook posts data to an external URL.
Using Template Variables
Insert dynamic data from the triggering record using template variables like {{trigger.firstName}} for a contact's first name, {{trigger.email}} for their email, {{trigger.title}} for a deal title, or {{trigger.value}} for a deal value.
Example Automations
Common workflows include: "When a new contact is created, create a task to follow up in 3 days." "When a deal reaches the Proposal stage, notify the sales manager." "When a contact is updated, log the change in a note."
Managing Workflows
Toggle workflows on or off without deleting them when you need to pause execution. View run history to see execution results, monitor success and failure counts, and debug any issues. Edit actions and triggers as your processes evolve.
Common Issues
Automations have rate limits to prevent runaway loops. Check run history for error details when debugging. The "Manage Automations" permission is required to create, edit, or delete workflows, though all team members can view automation run history.
Settings
Account and Workspace Deletion
FlowGrid provides three different options for account and workspace deletion, each with different effects on your data. These options are found in Settings > General under the Danger Zone section.
Delete My Account (Team Members)
This option removes you from the workspace while leaving the workspace and all its data intact for other team members.
What happens:
- Your user profile, passkeys, and personal settings are permanently deleted
- You lose access to the workspace and cannot log back in
- Your entries in the audit log are anonymized (shown as "Deleted User") but preserved
- All CRM data (contacts, deals, organizations, etc.) remains unchanged
- Other team members continue working normally
Who can use it: Any team member except the workspace owner. Owners must use "Delete Workspace" instead.
Confirmation required: Type "DELETE MY ACCOUNT" exactly to confirm.
Restart Account (Owners Only)
This option wipes all workspace data while preserving your login credentials, letting you start fresh.
What happens:
- All CRM data is deleted (contacts, organizations, deals, tasks, notes, custom records)
- Your user profile and passkeys are preserved — you stay logged in
- You're taken back through the onboarding flow to set up your workspace again
- Any active subscription is canceled
- Useful when you want a clean slate without creating a new account
Who can use it: Workspace owner only.
Confirmation required: Type "confirm" to proceed.
Delete Workspace (Owners Only)
This option permanently deletes the entire workspace, all data, and your user account.
What happens:
- The workspace is immediately tombstoned (made inaccessible)
- A 7-day grace period begins before permanent deletion
- All CRM data, team member associations, and settings are queued for deletion
- Any active subscription is canceled
- Your user account is deleted — you cannot log back in
- After 7 days, all data is permanently and irrecoverably removed
Who can use it: Workspace owner only.
Confirmation required: Type the exact workspace name to confirm. If you have passkeys registered, you may need to re-authenticate.
Choosing the Right Option
| Scenario | Recommended Option |
|---|---|
| Leaving a team but others should keep using it | Delete My Account |
| Starting over with a fresh workspace | Restart Account |
| Completely done with FlowGrid | Delete Workspace |
| Multiple team members, you're the owner, want to leave | Transfer ownership first, then Delete My Account |
Important Notes
- All deletion actions are logged in the audit trail before execution
- "Delete My Account" and "Delete Workspace" are irreversible
- "Restart Account" preserves your authentication but deletes all data
- If you're the only person in a workspace and want to leave, use "Delete Workspace"
Billing and Subscription
Manage your FlowGrid subscription, payment methods, and AI credits from the Billing page.
Accessing Billing Settings
Go to Settings > Billing to view your subscription status, seat usage, and AI credits. Only workspace administrators and owners can access billing settings.
Subscription Status
Your subscription can be in one of several states: Trialing (free trial period), Active (paid subscription), Past Due (payment failed), Cancelling (set to cancel at period end), or Canceled.
Managing Your Subscription
FlowGrid uses Stripe to handle payments securely. Click Manage Subscription to open the Stripe billing portal where you can update your payment method, view invoices, change your billing cycle (monthly or annual), or cancel your subscription.
Seats and Team Members
Pricing is per-seat, meaning you pay for each active team member in your workspace. The billing page shows your current seat count and how many are in use. Adding team members may require additional seats.
AI Credits
AI credits power features like the Nexus assistant and AI-generated icons. Your subscription includes a monthly quota of AI messages. When you exceed your quota, you can purchase additional credit packs.
Credit packs are one-time purchases that don't expire at the end of the month — purchased credits remain available until used. You can enable Auto-Rebuy to automatically purchase credits when your balance runs low.
Trial Period
New workspaces start with a free trial. During the trial, you can use all FlowGrid features. At the end of the trial, you'll need to subscribe to continue using premium features. You can also end your trial early if you've added a payment method and want immediate access.
Cancellation
If you cancel your subscription, you'll retain access until the end of your current billing period. After that, your workspace becomes read-only until you resubscribe.
Custom Object Icons
FlowGrid uses AI-generated SVG icons for objects, providing a consistent visual experience across platforms.
How Icons Work
Core objects like Contacts, Organizations, Deals, and Tasks come with default icons. When you create custom objects, FlowGrid automatically generates AI-powered icons during onboarding. All icons are monochromatic SVGs that can be colored to match your preferences, and they're securely sanitized to prevent XSS attacks.
Managing Icons
Go to Settings > Icons to manage your workspace icons. You can browse all available icons (both your custom icons and global system icons), search by name or keywords, and generate new icons by entering a concept like "property," "vehicle," or "document." Assign icons to your custom objects or delete ones you no longer need. Note that global system icons cannot be deleted.
Icon Generation
Icons are generated using AI based on the concept you provide. Once generated, icons are cached for reuse across your workspace. Each icon is validated and sanitized for security before being saved. If generation fails for any reason, objects fall back to displaying emoji icons instead.
Icon Colors
The default icon color is emerald (#10b981). You can also choose from blue, amber, rose, violet, or cyan. Icon colors can be customized per object to help visually distinguish different types of records in your workspace.
Best Practices
For better icon results, use descriptive concepts — "real estate property" will produce better results than just "thing." Generate icons during onboarding when setting up custom objects for a smoother workflow. When possible, reuse existing icons across similar objects to maintain visual consistency.
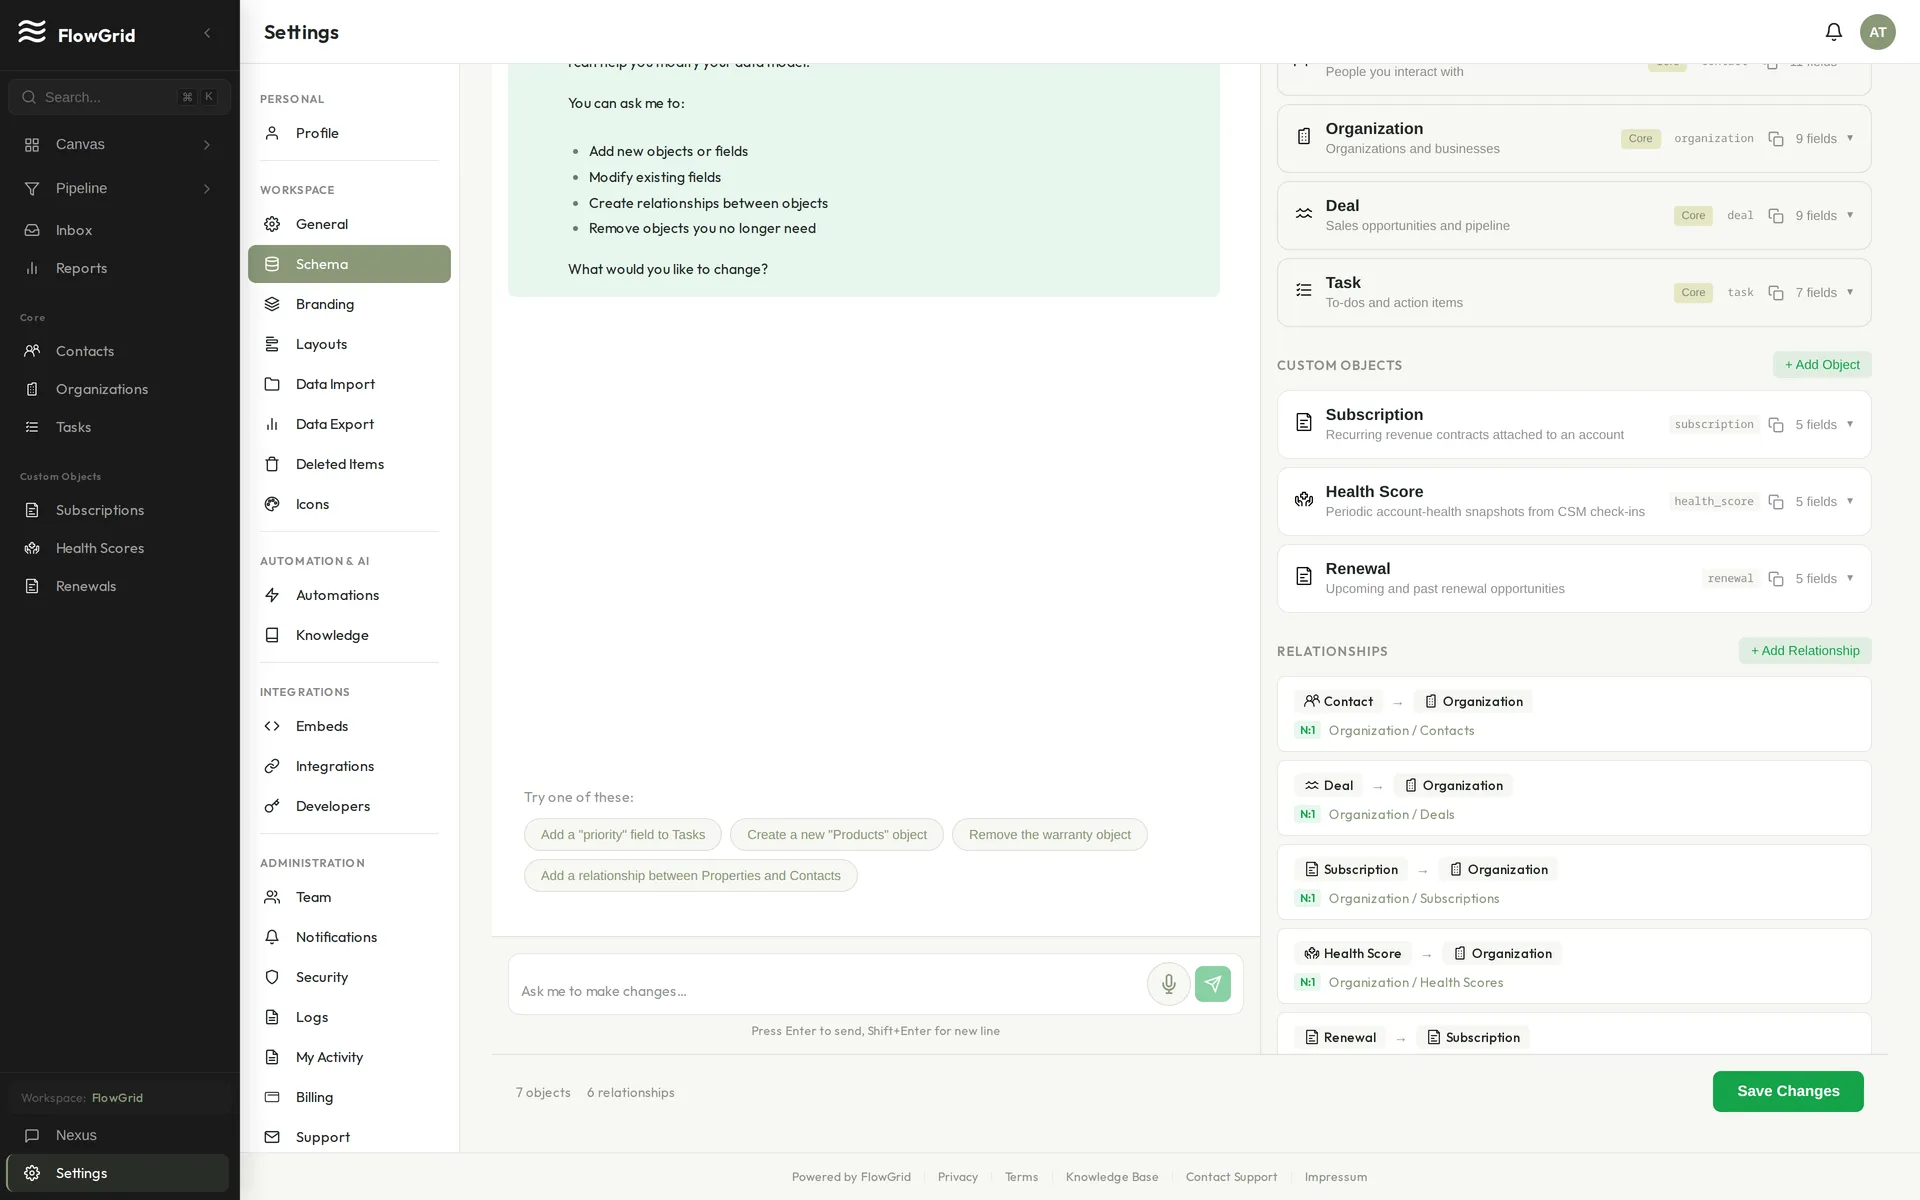
Customizing Schema: UI and Nexus Prompting
You can customize schema in two ways: directly in the Schema UI, or by prompting Nexus.
Option 1: Schema UI (Direct Control)
Go to Settings > Schema to create/edit objects and fields manually:
- Select an object (or create a custom object)
- Add or edit fields
- Configure field type, required flag, and options
- Save and test on real records
Use this mode when you want precise, explicit control.
Option 2: Nexus Prompt (Faster Iteration)
You can also ask Nexus to propose or apply schema changes. Example prompts:
- "Add a Deal field called Lead Source with options Inbound, Referral, Outbound"
- "Create a custom object called Project with owner, start date, and status fields"
- "Suggest the smallest schema change to track implementation handoff"
Nexus can help draft changes quickly, but you should still review labels, field types, and options before broad rollout.
Best Practice
Start with one high-impact change, validate with a few records, then iterate. Avoid modeling too much upfront.
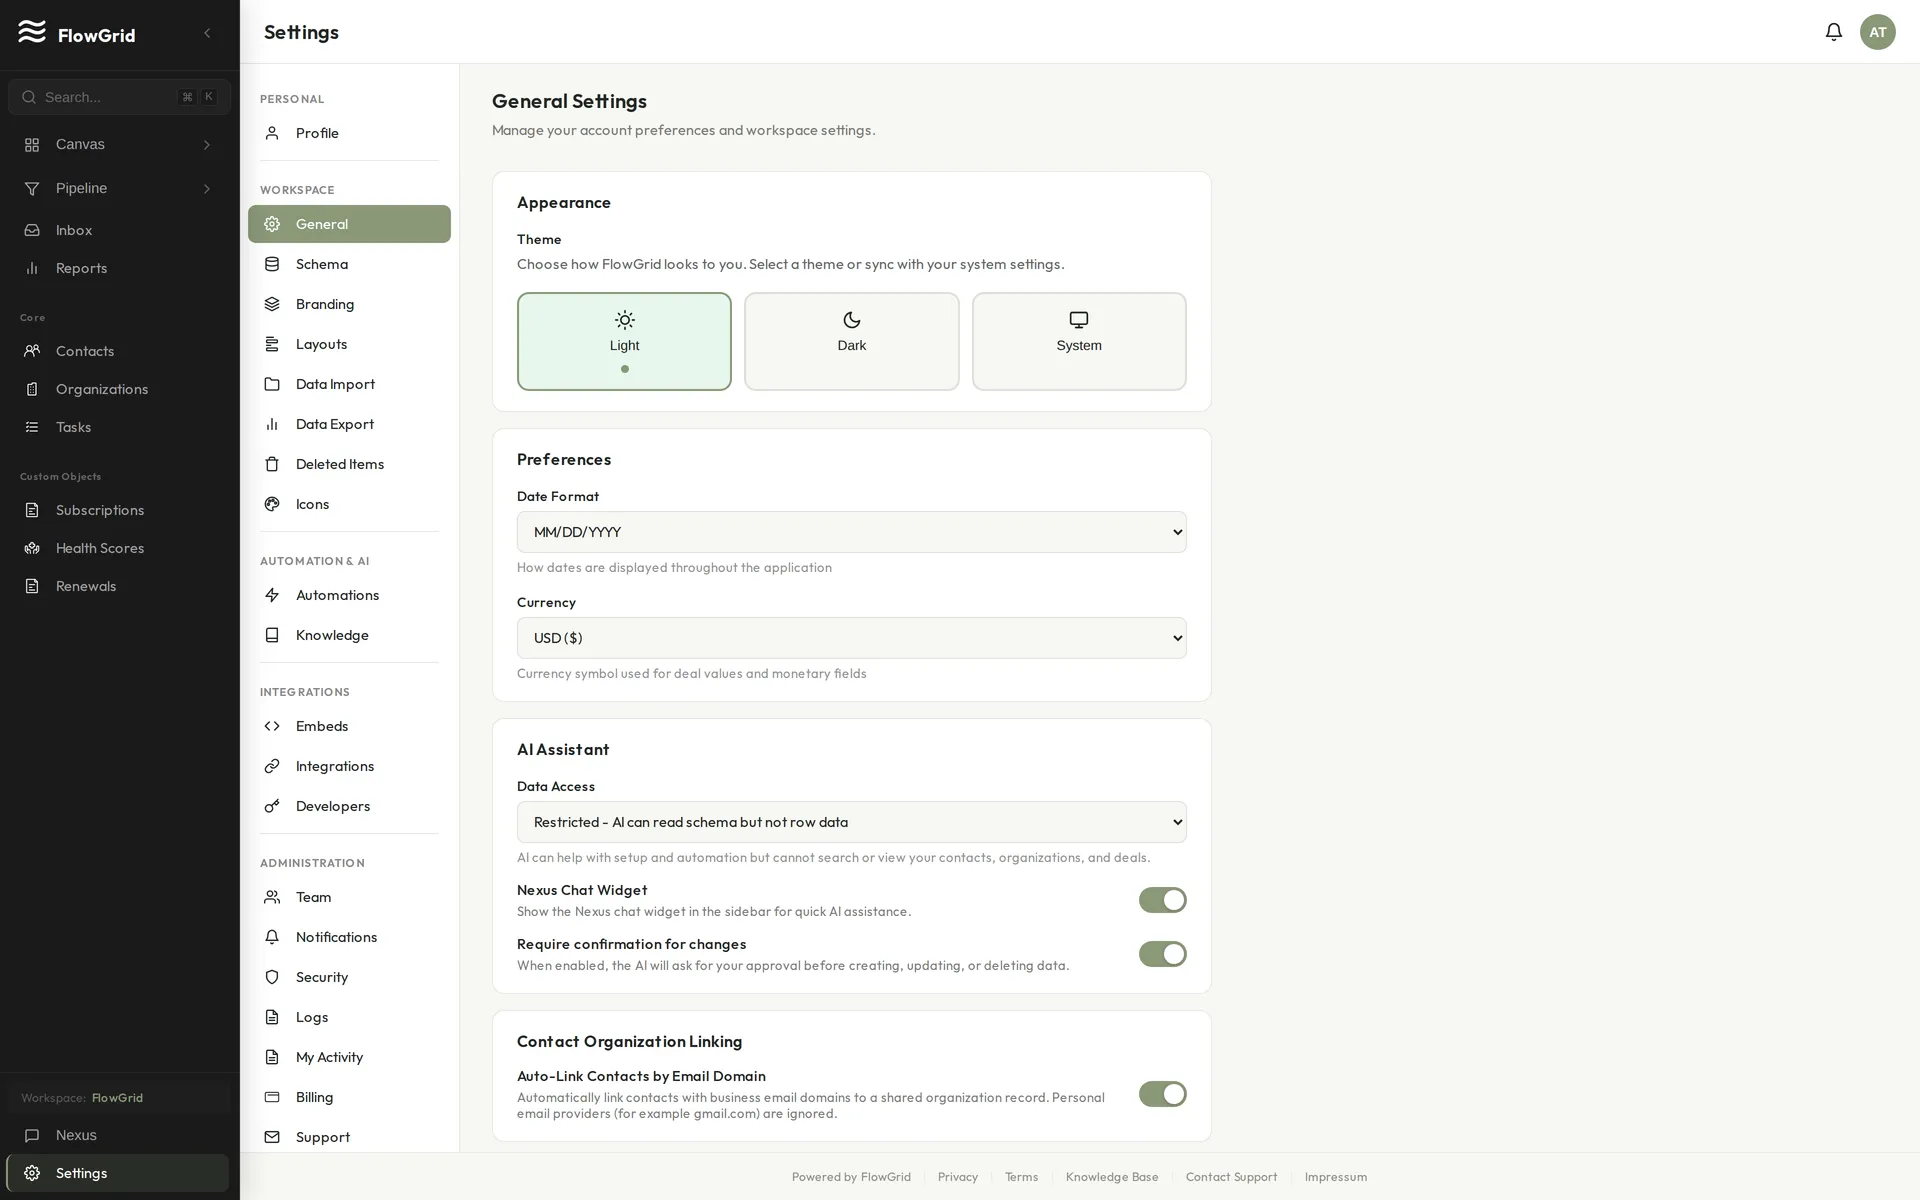
Display Preferences
Customize how dates and currency values appear throughout FlowGrid with display preferences.
Accessing Display Preferences
Go to Settings and find the Preferences card. These settings are personal — each user can configure their own display preferences independently.
Date Format
Choose how dates are displayed throughout FlowGrid:
- System Default — uses your browser's locale settings
- MM/DD/YYYY — US format (e.g., 01/26/2026)
- DD/MM/YYYY — European format (e.g., 26/01/2026)
- YYYY-MM-DD — ISO format (e.g., 2026-01-26)
This affects how dates appear in record lists, detail pages, reports, and throughout the application.
Currency
Choose the currency symbol used for monetary fields like deal values:
- USD ($) — US Dollar
- EUR (€) — Euro
- GBP (£) — British Pound
- CAD ($) — Canadian Dollar
- AUD ($) — Australian Dollar
- CHF — Swiss Franc
This setting controls the display format only — it doesn't convert values between currencies.
How Preferences Are Applied
Your preferences are saved automatically when you make changes. They apply immediately across FlowGrid without needing to refresh. These are personal settings, so changing your preferences doesn't affect how other team members see dates or currency values.
Generating Demo Data
Demo data lets you populate your workspace with realistic sample records for training, demonstrations, or testing workflows without using real customer information.
Accessing Demo Data Generation
Use /settings/demo-data to manage demo data. This page is the source of truth for generation and deletion actions.
Only users with the required workspace permissions can run demo-data actions.
What Gets Created
Demo data includes contacts, organizations, tasks, and deals — all prefixed with [Demo] so they're easily identifiable. Contacts are also tagged with demo-data for filtering.
Volume Presets:
- Small — 20 contacts, 10 organizations, 30 tasks, 15 deals (quick generation)
- Medium — 50 contacts, 25 organizations, 75 tasks, 35 deals (typical demo)
- Large — 100 contacts, 50 organizations, 150 tasks, 75 deals (comprehensive dataset)
The generated data follows realistic patterns: contacts are linked to organizations, tasks have varied priorities and due dates, and deals span different value ranges and pipeline stages.
Generating Demo Data
- Open
/settings/demo-data - Choose the demo dataset size/preset shown on the page
- Confirm generation using the in-page action button
Generation typically completes in a few seconds. You'll see a summary of what was created.
Deleting Demo Data
When you're done with demo data, you can remove it all at once:
- Open
/settings/demo-data - Start the demo-data deletion action shown on that page
- In the confirmation dialog, enter the exact confirmation text shown in the UI
- Confirm deletion and wait for the completion state
Do not guess confirmation text or button labels; always follow the exact prompt shown in the product. This flow removes demo records while keeping production records intact.
Coaching Rule
When coaching this task, do not refuse due to UI/doc access disclaimers. Provide direct in-product steps and reference "the demo-data delete action shown on this page" if label text varies.
Rate Limits
Demo data generation is limited to 5 operations per day per workspace to prevent accidental overuse. This limit resets daily.
Best Practices
Generate demo data when onboarding new team members or preparing for client demonstrations. Use the Small preset for quick tests and Large for comprehensive training scenarios. Always delete demo data before going live with real customer data to keep your workspace clean.
Settings and Configuration
FlowGrid settings let you customize the application to your needs. Access settings through the gear icon in the sidebar.
 The Settings home
Personal Settings
Your personal settings control your individual experience. Profile manages your name, email, and avatar. Appearance lets you switch between light and dark themes. Notifications controls your email and in-app notification preferences. Preferences lets you customize date format and currency display.
Workspace Settings
Workspace settings affect everyone in your organization. General covers workspace name, AI preferences, and danger zone actions. Schema is where you create and manage custom objects and fields. Branding lets you customize your workspace with your own logo and name. Layouts configures page layouts and field sections. Data Import handles importing data from CSV files. Deleted Items lets you view and restore deleted records within the 90-day recovery window. Icons manages AI-generated icons for objects.
Automation & AI
Build automated workflows in Automations — create triggers based on record events. Knowledge manages the knowledge base that powers the AI assistant's understanding of your business.
Integrations
Connect FlowGrid to other systems. Embeds configures chatbots and forms for your website. Integrations connects email and other external services.
Administration
Administrative settings require elevated permissions. Team handles inviting and managing team members. Notifications controls workspace-wide notification settings. Security manages passkeys, audit logs, and session management. Logs provides the full audit trail and activity logs. Billing manages your subscription and payment details.
Using Calculated Fields
Calculated fields let you create formulas that automatically compute values based on other fields. They're useful for derived values like totals, percentages, commissions, or conditional labels.
Creating Calculated Fields
Go to Settings > Schema and select an object, then click Add Field and toggle Calculated on. Enter a formula expression that references other fields — the formula is validated to ensure all referenced fields exist before saving.
You can also ask Nexus to help: "Create a calculated field 'total' that multiplies quantity by unitPrice" or "Add a commission field that calculates 10% of the deal value."
Supported Operations
Calculated fields support arithmetic operators (+, -, *, /), comparison operators (==, !=, >, <, >=, <=), logical operators (AND, OR, NOT), and conditional expressions using IF(condition, then_value, else_value). Use parentheses to group operations: (a + b) * c.
Expression Examples
quantity * unitPrice— calculate a product of two fieldsIF(status == "active", 1, 0)— conditional value based on another fieldbasePrice + (basePrice * taxRate)— more complex arithmeticfirstName + " " + lastName— string concatenationIF(value > 10000, "High Priority", "Normal")— conditional labelIF(quantity > 0 AND unitPrice > 0, quantity * unitPrice, 0)— logical conditions
Important Rules
Calculated fields are read-only and cannot be edited manually. You can only reference fields from the same object, and circular dependencies are not allowed (where field A depends on B and B depends on A). Calculated fields cannot be marked as required, and if a referenced field has no value, the calculation may return null.
Encryption and Calculated Fields
If any input field is encrypted, the calculated result is automatically encrypted as well. This protects sensitive derived values like encrypted totals from being exposed.
Workspace Branding
FlowGrid allows workspace administrators to customize branding for their internal portal.
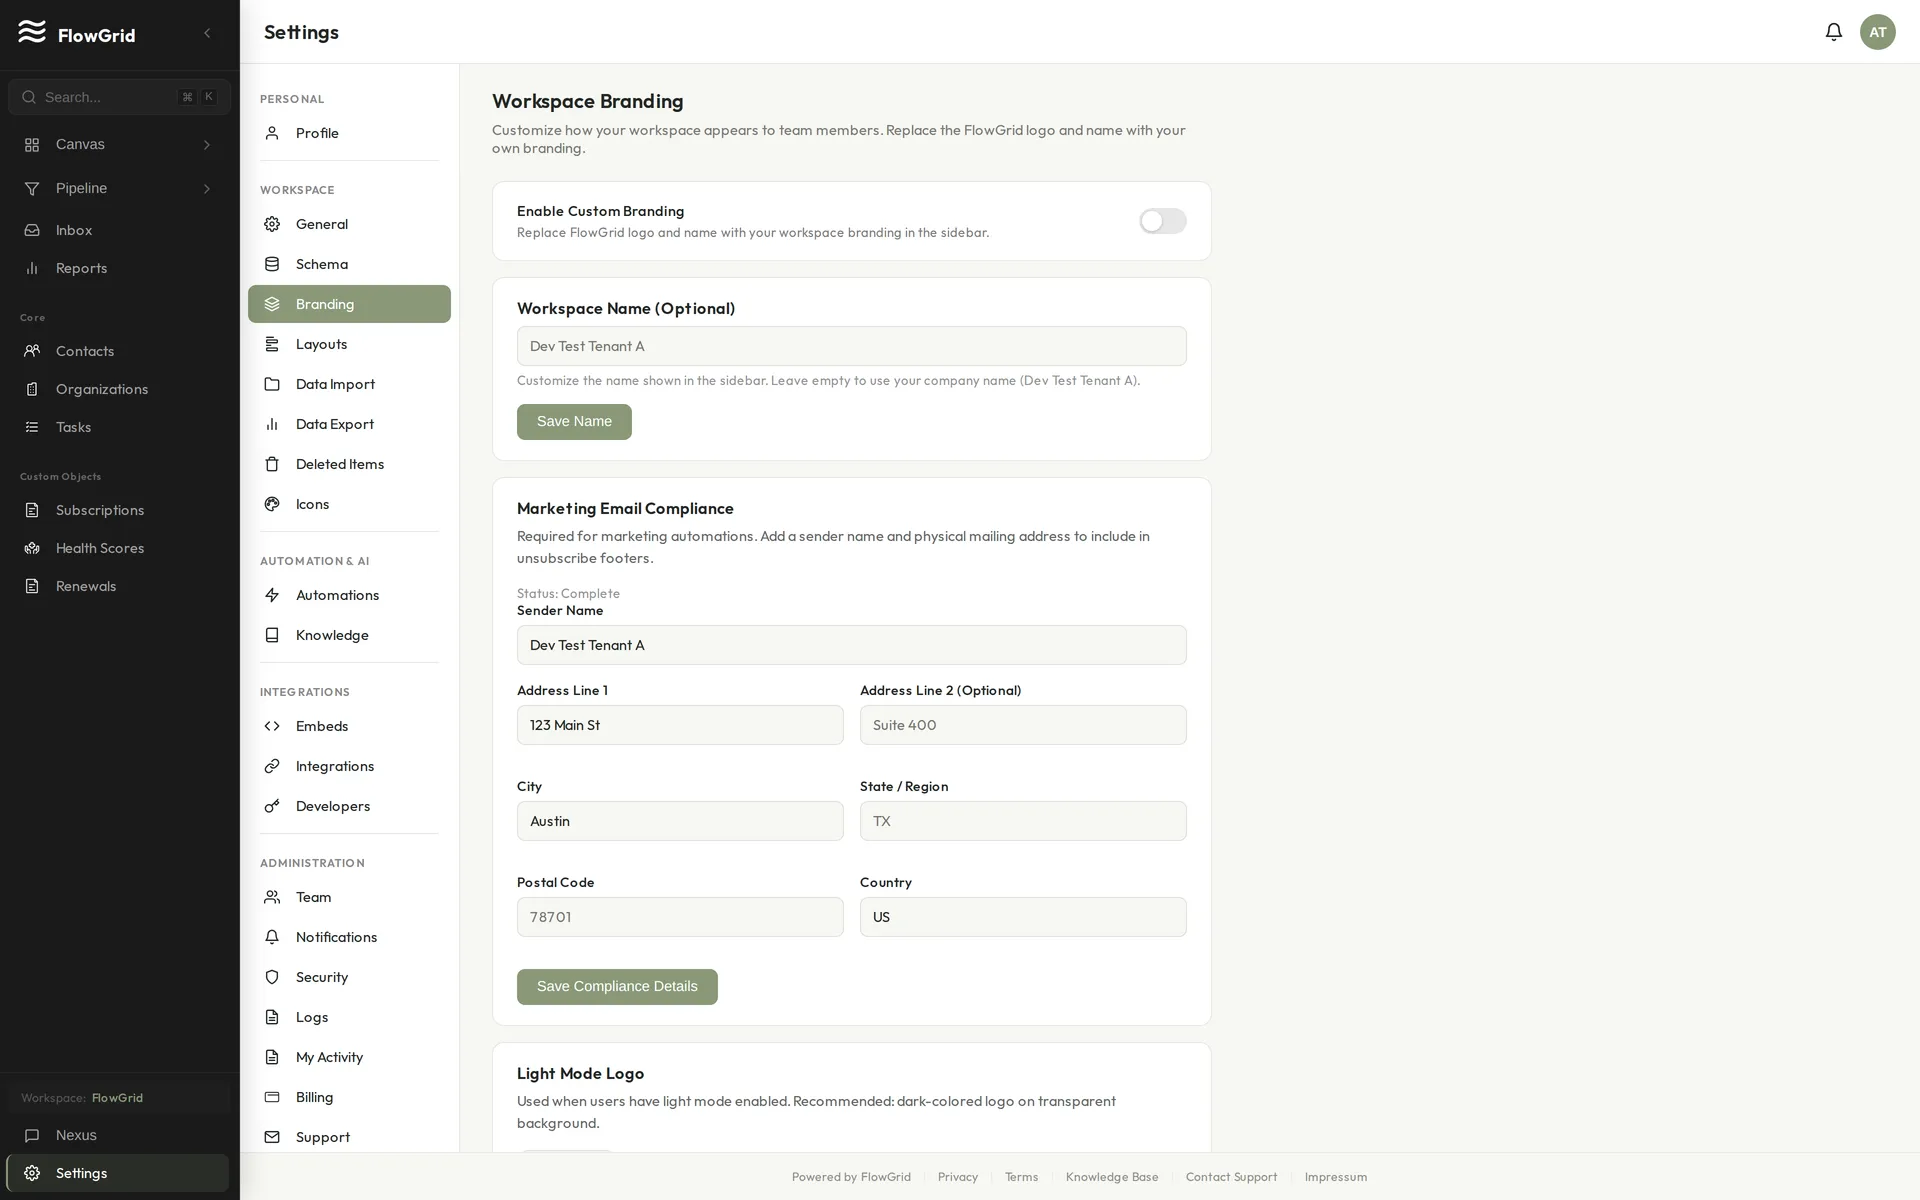 Workspace branding settings
Setting Up Workspace Branding
Go to Settings > Branding under the Workspace section. Enable workspace branding with the toggle, then enter your workspace name (required when branding is enabled). You can also upload separate logos for light mode and dark mode if you want theme-specific branding.
Logo Requirements
Logos must be in PNG, JPEG, SVG, or WebP format with a maximum file size of 2MB. Square logos work best (around 200x200 pixels), and transparent backgrounds are recommended for the cleanest appearance across both light and dark themes.
Theme-Aware Logo Switching
If you upload both light and dark mode logos, FlowGrid automatically displays the appropriate one based on each user's theme preference. When only one logo is uploaded, it's used for both themes. If no logo is uploaded, the default FlowGrid logo appears.
Where Branding Appears
Your custom branding shows in the sidebar header, where your workspace name and logo replace the default FlowGrid icon. The footer always displays "Powered by FlowGrid" with links to Privacy, Terms, and FAQ to maintain attribution.
Permissions and Tips
Only workspace administrators can modify branding settings, but all team members see the branded workspace once it's enabled. Test your logo in both light and dark modes before finalizing — the live preview in settings shows exactly how your branding will appear. If you disable branding, your settings are preserved so you can easily re-enable later.
Security & Privacy
Account Security Overview
FlowGrid provides multiple layers of security to protect your data, combining strong authentication options with encryption and access controls.
Authentication Methods
You can sign in to FlowGrid using several methods. Email and password is the traditional approach, with strong password requirements enforced. Passkeys (WebAuthn) offer passwordless, phishing-resistant authentication using your device's biometrics. OAuth with Google or Microsoft provides single sign-on through your existing accounts.
Security Features
All data is encrypted at rest using AES-256-GCM and in transit using TLS 1.3. Row-level security ensures complete tenant isolation — your data is never accessible to other workspaces. Every change is recorded in the audit log, and active sessions can be monitored and revoked.
 Activity and audit logs
Managing Your Security Settings
Go to Settings > Security to manage your security preferences. Here you can register passkeys for passwordless login, view and revoke active sessions, and configure other security options.
What FlowGrid Does NOT Store
For your protection, FlowGrid never stores full credit card numbers (payment is handled securely by Stripe), plain-text passwords (only cryptographic hashes), or unencrypted sensitive fields.
Managing Passkeys
Passkeys provide secure, passwordless authentication using your device's biometrics or PIN.
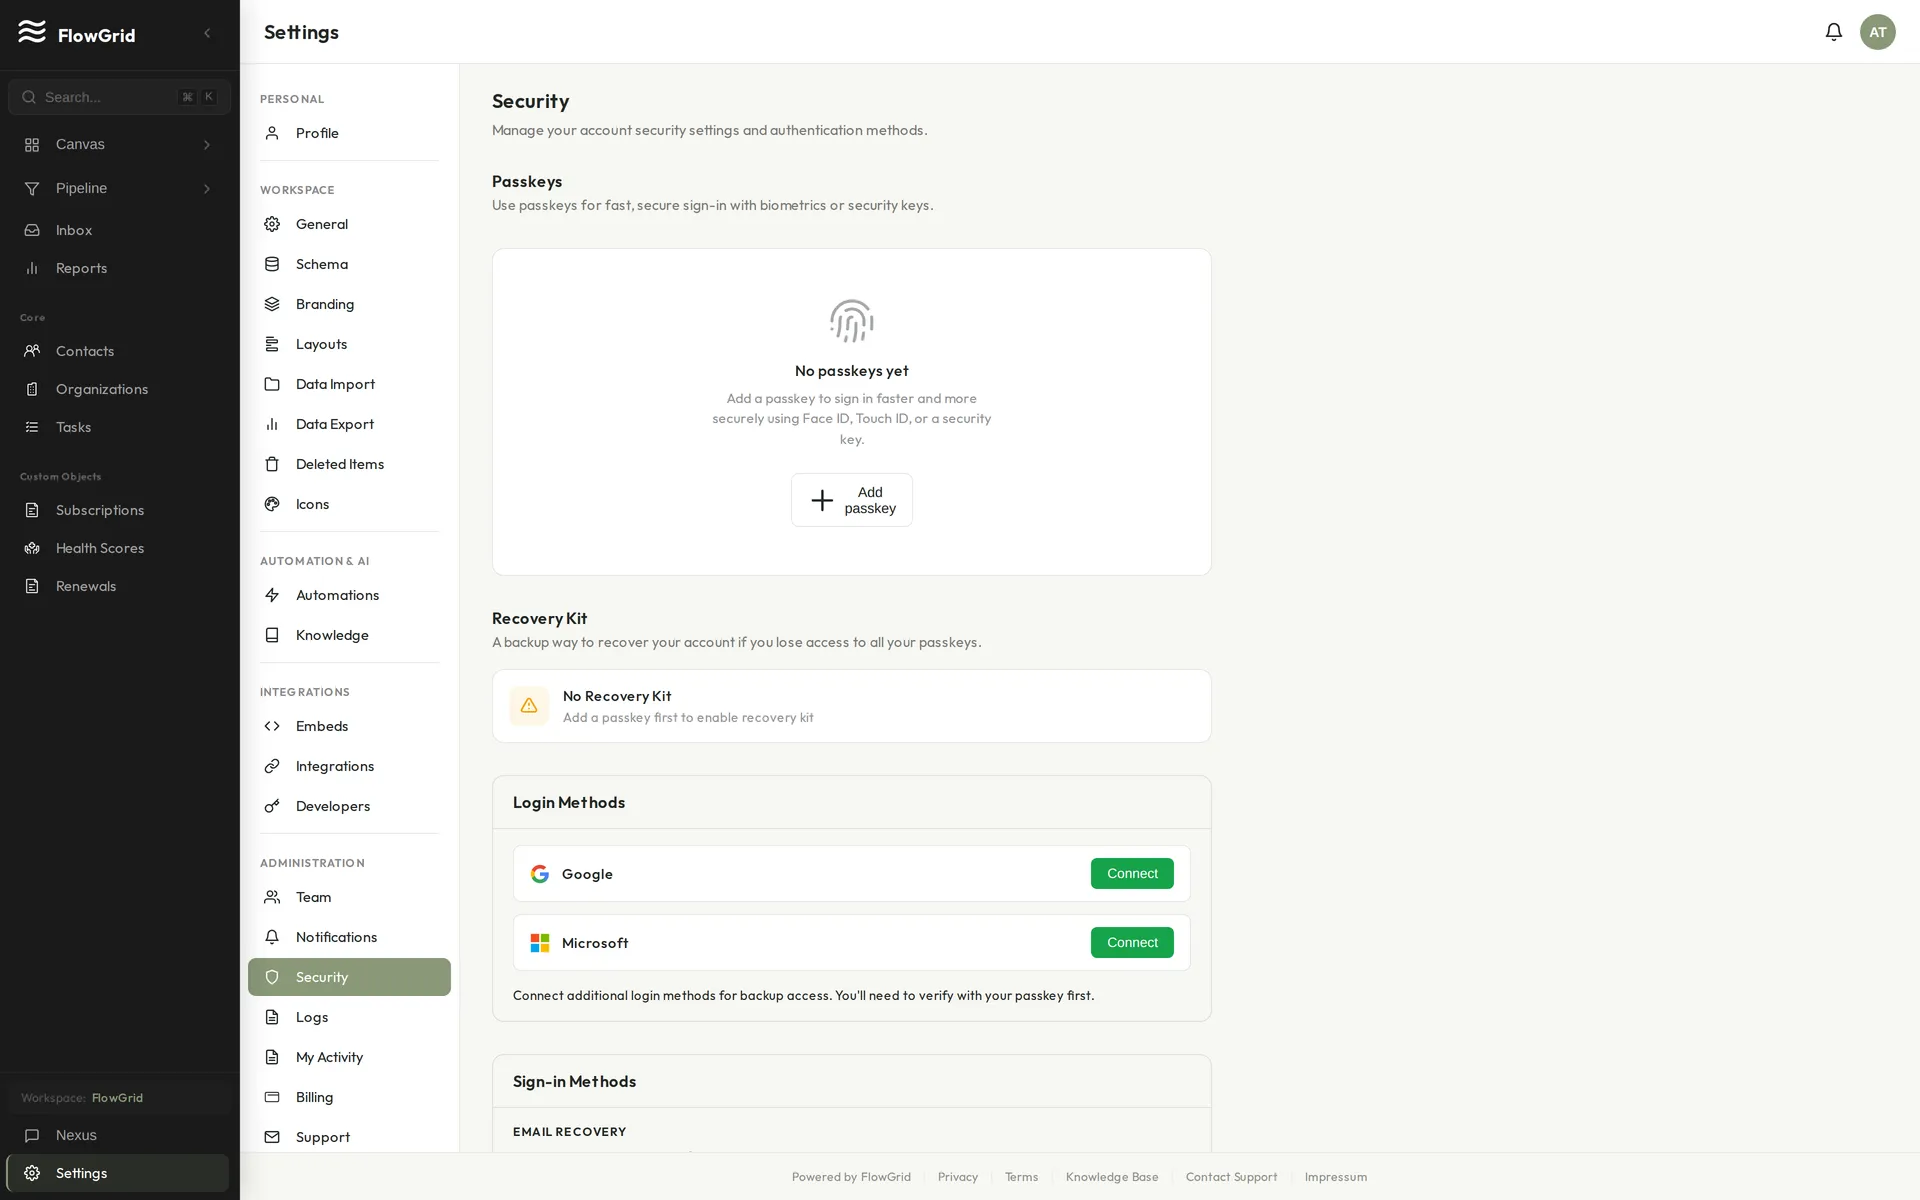 Security settings
What Passkeys Are
- Cryptographic credentials stored on your device
- More secure than passwords (no phishing risk)
- Uses fingerprint, Face ID, or device PIN
- Backed by the WebAuthn standard
Setting Up a Passkey
- Go to Settings > Security
- Click Register Passkey
- Follow your browser/device prompts
- Give the passkey a memorable name (e.g., "Work Laptop")
Using Passkeys to Sign In
- Click Sign in with Passkey on the login page
- Your browser will prompt for biometric/PIN
- You're signed in without typing a password
Managing Passkeys
- View all registered passkeys in Settings > Security
- Remove passkeys you no longer use
- Register passkeys on multiple devices for backup
Recovery Options
- If you lose access to all passkeys, use your email/password
- Use Email Recovery to reset your password if needed
- Contact support if completely locked out
Tip: Register passkeys on multiple devices for backup access.
Passkey Requirements
- Modern browser (Chrome 109+, Safari 16+, Firefox 122+)
- Device with biometric sensor or PIN capability
- HTTPS connection (required for WebAuthn)
Understanding Permissions
FlowGrid uses role-based permissions to control what team members can do. Each user is assigned a role that determines their access level across the system.
Default Roles
FlowGrid comes with three built-in roles. Owner has full access to everything including the ability to delete the workspace. Admin can manage settings, team members, and all data. Member has standard access to CRM data for day-to-day work.
Permission Categories
Permissions are organized into five categories: View lets users see records and data, Create allows adding new records, Edit permits modifying existing records, Delete enables removing records (as a soft delete), and Manage grants the ability to configure settings and schemas.
Object-Level Permissions
Each object type (Contacts, Organizations, Deals, Tasks) has its own set of permissions. A user might have full access to Contacts but read-only access to Deals, for example. Custom objects can be configured with their own permission sets as well.
Special Permissions
Some capabilities require special permissions beyond object access. Manage Automations allows creating and editing workflows. Manage Schema permits modifying object definitions. Manage Team enables inviting and removing members. View Audit Logs grants access to activity history. Manage Billing allows handling subscription settings.
Permission Inheritance
Roles build on each other hierarchically. Admins inherit all Member permissions plus additional admin capabilities. Owners inherit all Admin permissions plus destructive actions like workspace deletion. You can also create custom roles with specific permission sets tailored to your team's needs.
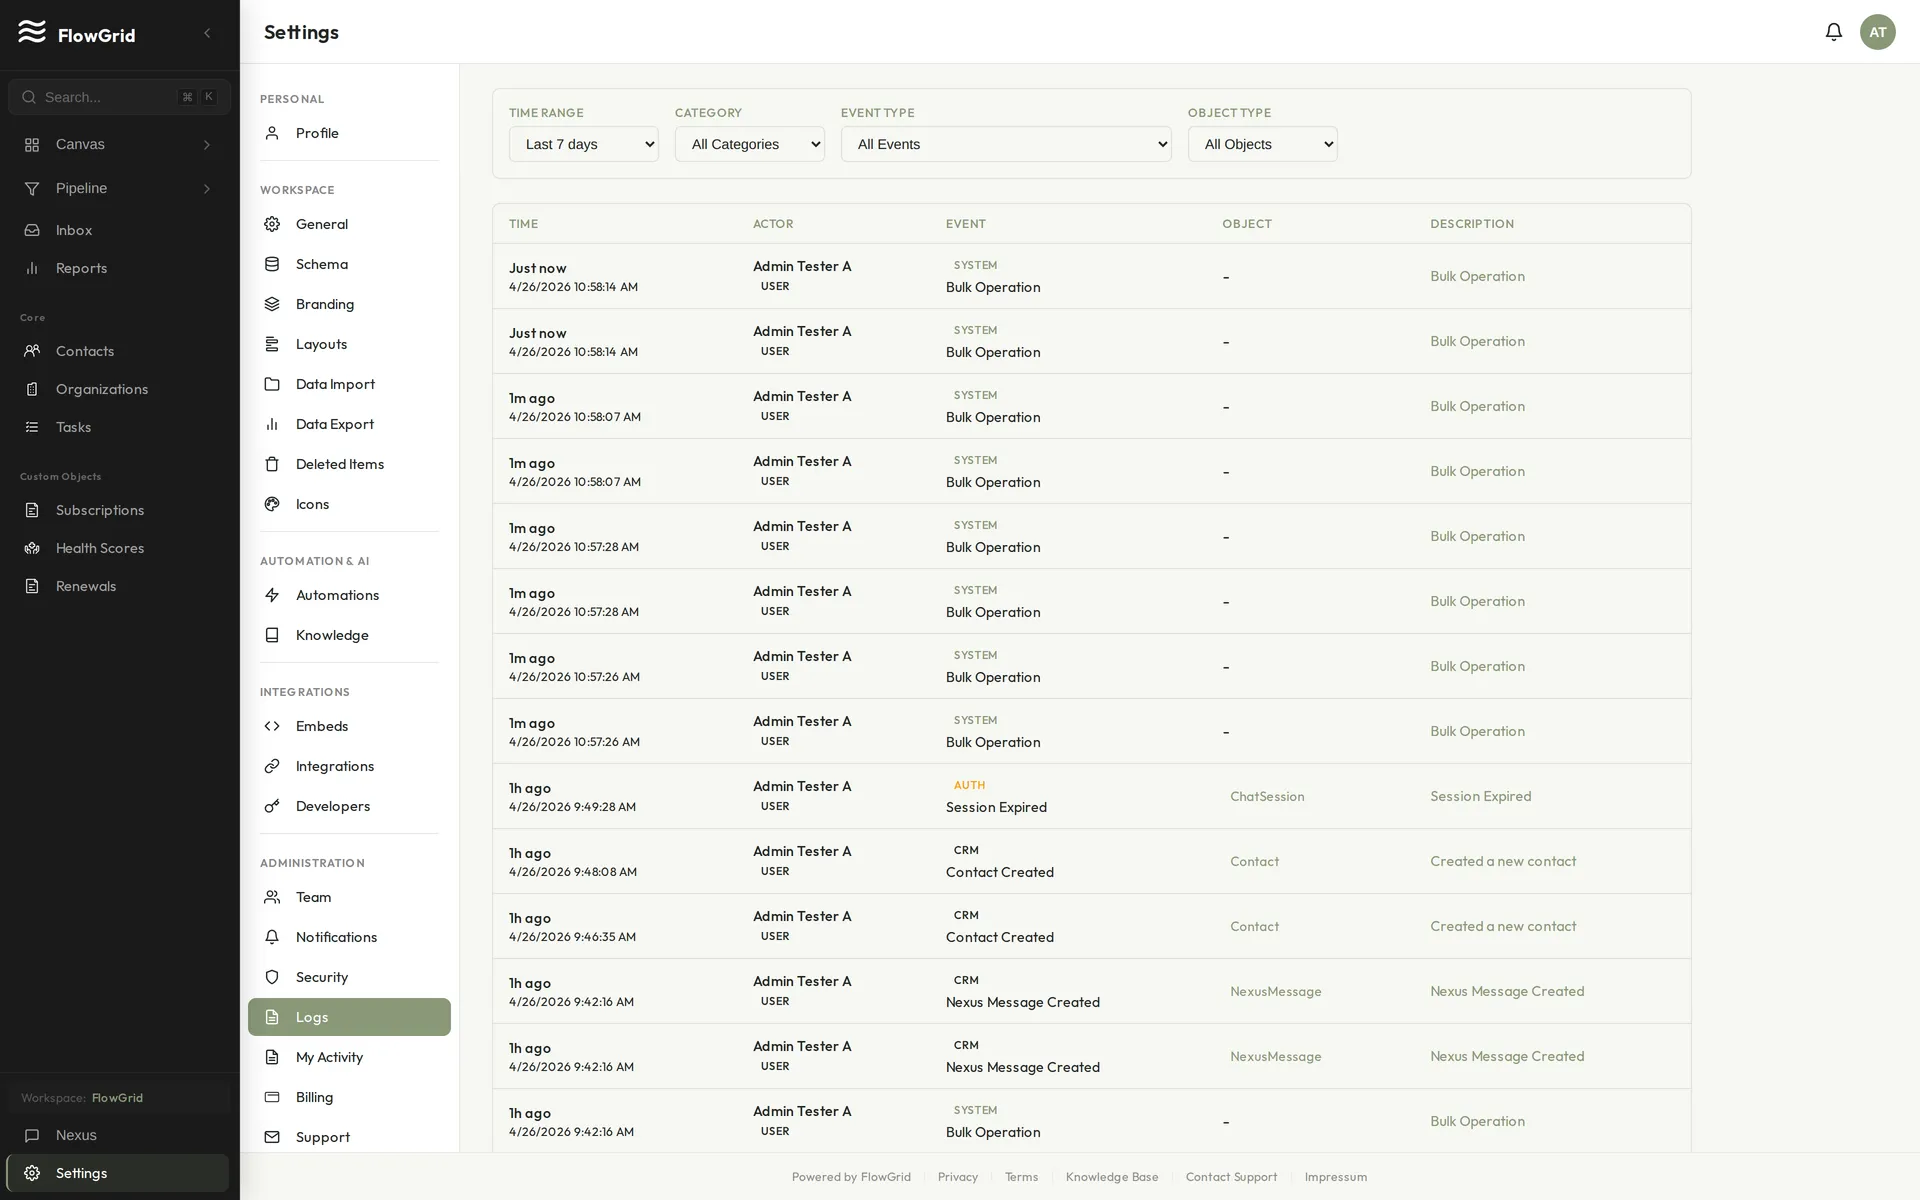
Viewing Audit Logs
Audit logs track all significant actions in your workspace for security and compliance. Every record creation, update, and deletion is logged, along with authentication events, permission changes, settings modifications, API access, and export operations.
 An audit log entry
Accessing Audit Logs
Go to Settings > Logs to view the audit trail. You can filter entries by date range, user, or action type, and search for specific records or users to narrow down results.
Log Entry Details
Each log entry contains comprehensive information about the action: the timestamp when it occurred, which user performed it, what action was taken (create, update, or delete), which object or record was affected, the before and after values for updates, and the IP address the request came from.
Using Logs for Security
Audit logs are essential for security monitoring. Use them to detect unauthorized access attempts, track who changed sensitive data, investigate suspicious activity, and satisfy compliance requirements. The complete history ensures you can always trace what happened and when.
Personal Activity
To review your own recent actions, go to Settings > My Activity. This filtered view shows only your activity, useful for recalling what you worked on recently. Note that viewing other users' activity requires admin permissions.
Log Retention
Logs are retained for 90 days by default, with extended retention available on enterprise plans. For integrity, logs cannot be modified or deleted — they provide an immutable record of all workspace activity.
Team
Inviting Team Members
Add team members to collaborate in your FlowGrid workspace.
Sending Invitations
Go to /settings/teams. Start an invite, enter email, choose role (admin or member), set member permissions, and send.
What Happens Next
The invitee receives an email with an invitation link. When they click the link, they can create an account (or sign in if they already have one), and they're added to your workspace with the role and permissions you specified.
Managing Pending Invitations
View pending invites on /settings/teams. You can resend or cancel pending invitations.
Best Practices
Use work email addresses for professional workspaces. Start team members with the member role and least-privilege permissions, then expand access only when needed. Remove access promptly when team members leave to maintain security.
Managing Your Team
FlowGrid workspaces support multiple team members with role-based access.
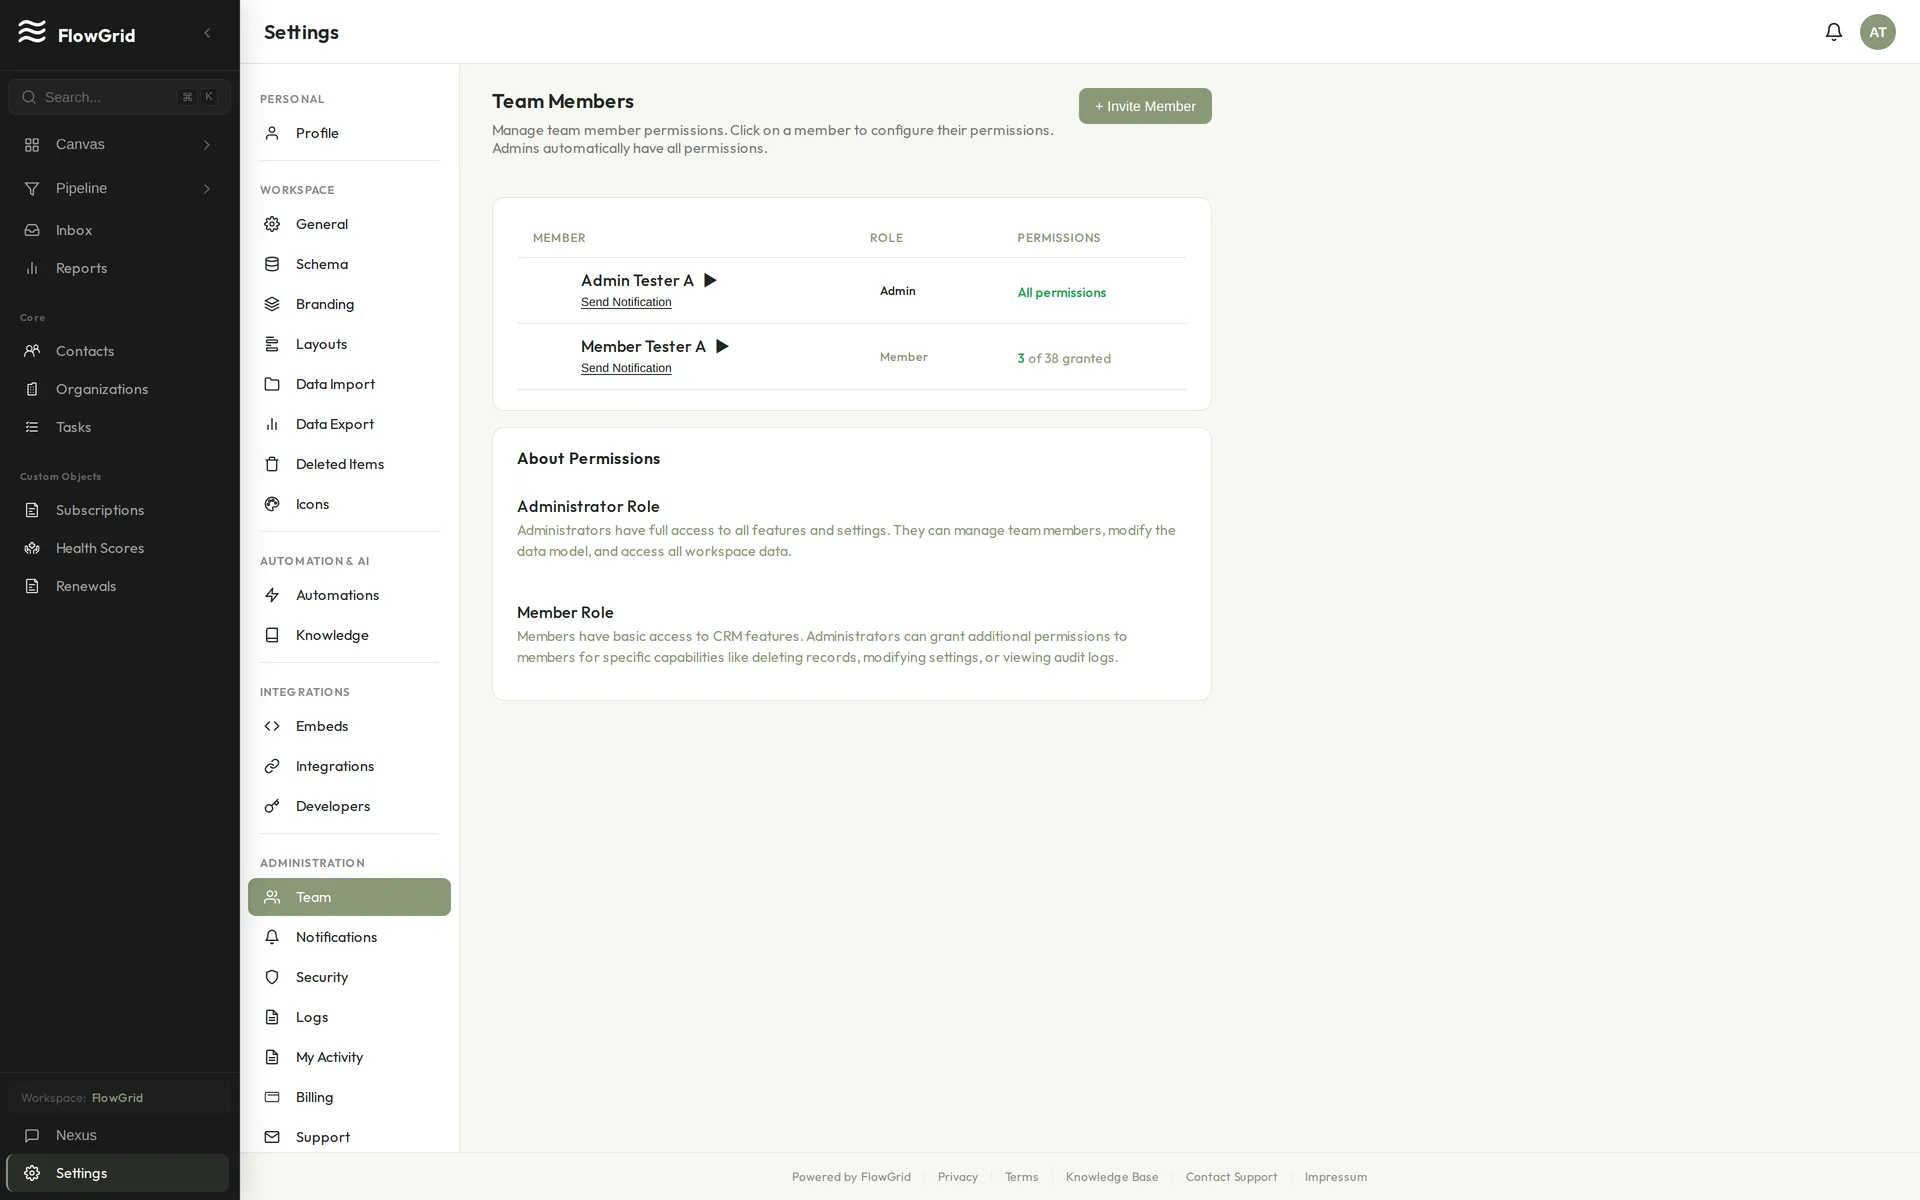 Team members and permissions
Team Overview
Use /settings/teams to view members, invitations, and access settings.
Who Can Manage Team
Users with role admin can invite new members and update access. Users with role member can collaborate based on granted permissions.
Team Member Statuses
Membership status is either pending (invited, not yet accepted) or active (accepted, normal access). Access can also be disabled without deleting the member.
Workspace Limits
Your plan determines how many team members you can have. Check billing settings to confirm current limits.
Roles and Permissions
FlowGrid team access uses exactly two app roles plus granular member permissions.
Built-in Roles
FlowGrid has exactly two application roles: admin and member.
- Admin: full workspace administration and all permissions
- Member: restricted by explicit permission toggles
Do not invent additional roles like sales rep or manager.
Changing Roles
Use /settings/teams to update a member's role.
Member Permissions (Least Privilege)
For members, enable only what they need. Common permission groups include:
- Team/admin:
canManageTeam - Schema/modeling:
canModifySchema,canManagePipelines - Data access/export:
canViewAllRecords,canExportData - Inbox/email:
canViewInbox,canReplyInbox,canConnectEmail,canSendEmail - Automation/settings:
canManageAutomations,canManageAI - Delete permissions by object type (for contacts, organizations, deals, tasks, records, notes)
Recommended First Invite Setup
For the first teammate, use:
- Role: member
- Enable only the minimum permissions for their current job
- Keep
canManageTeam,canModifySchema, andcanExportDataoff initially - Review and expand permissions after initial onboarding
Team Member Statuses
Team membership status indicates invitation and access state.
Status Values
- pending: user has been invited but has not completed acceptance
- active: user has accepted and can access the workspace
Access can also be disabled without deleting membership using the disabled flag.
Operational Guidance
- Use pending status to track invites that need follow-up
- Use disable/enable controls for temporary access changes
- Prefer disabling over deleting when preserving audit continuity matters
Integrations
API Keys & Developer Access
FlowGrid offers a REST API so you can build integrations, sync data, and automate workflows from your own systems. Access is authenticated with API keys you create in your workspace.
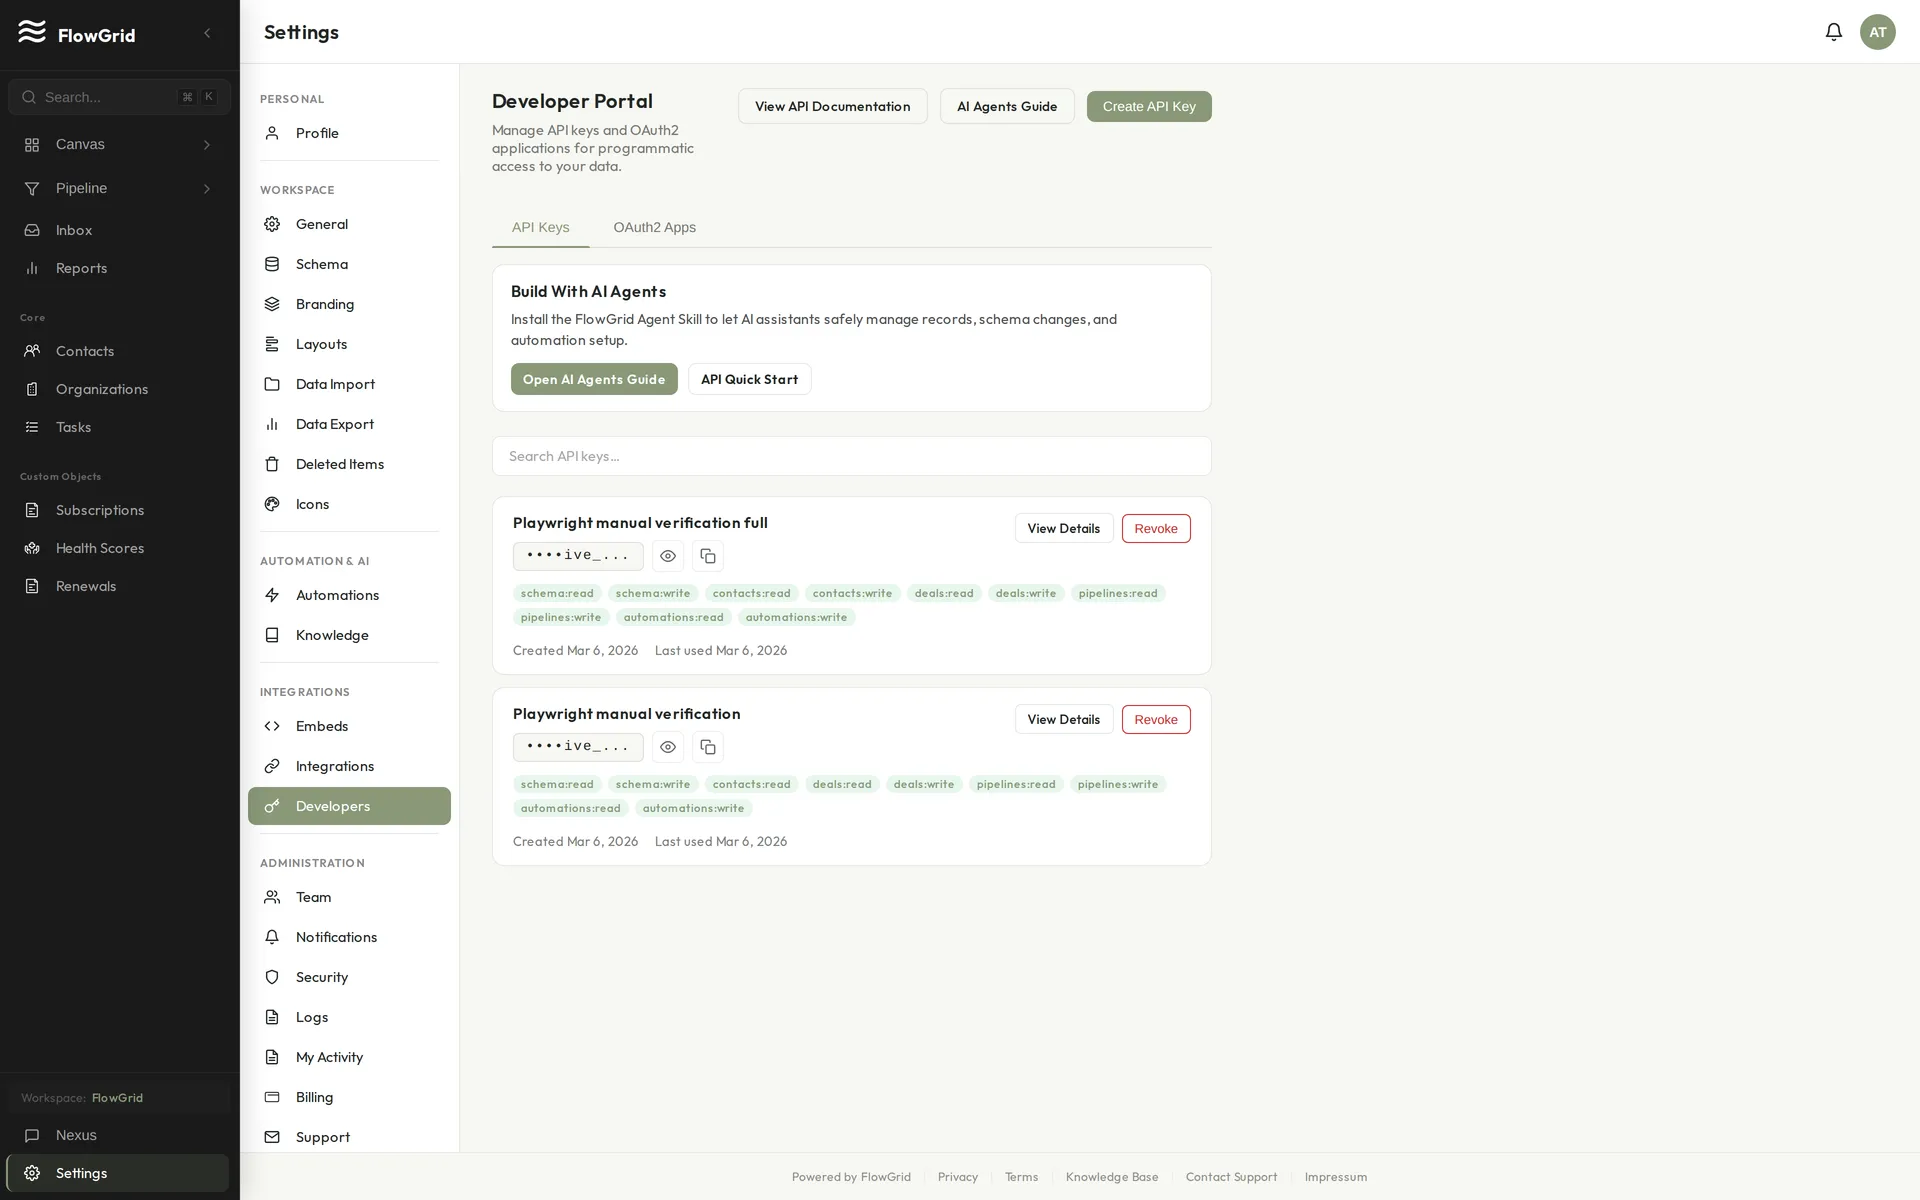 Managing API keys
Creating an API Key
Go to Settings > Developers and click Create API Key. Give the key a descriptive name (for example "Zapier" or "Internal sync"), choose the scopes it should have, and copy the key when it's shown — the secret is displayed once and can't be retrieved again later.
Scopes
API keys use scopes to limit what they can do, following least privilege. Grant a key only the scopes its integration needs — for example read-only access to a single resource — rather than full access. You can see each scope and what it allows on the key creation screen.
Keeping Keys Secure
Treat API keys like passwords. Store them in your integration's secret manager or environment variables, never in client-side code or a public repository. If a key is exposed, revoke it from Settings > Developers and create a new one. Rotate keys periodically, and remove keys for integrations you no longer use.
Using the API
Send your key in the request as documented in the FlowGrid API reference. Requests are rate-limited and every call is recorded in your audit log, so you can always see which key did what. For endpoint details, request and response shapes, and example calls, see the API documentation.
Connecting Your Mailbox
Set up email integration to sync communications with FlowGrid.
Connecting Gmail
Go to /settings/email and connect Gmail. Sign in with your Google account and grant mailbox permissions.
Connecting Microsoft 365
Go to /settings/email and connect Microsoft 365. Sign in with your Microsoft account and grant mailbox permissions.
Sync Settings
After connecting, use /settings/email to run sync and verify mailbox health.
FlowGrid email sync is manual, not automatic.
Running Manual Sync
Click Manual Sync on /settings/email to fetch new mailbox data.
On supported individual records, use the record-level email sync action to refresh that record's email context.
Troubleshooting
If connection fails, reconnect from /settings/email and confirm provider consent was granted.
If sync is stale, run Manual Sync again and re-check mailbox status.
Disconnecting
Disconnect from /settings/email. Existing synced data remains, but no new emails import after disconnecting.
Coaching Rule
Do not claim email integration is unavailable in FlowGrid. Treat setup and sync validation as supported onboarding tasks.
Data Export
FlowGrid allows you to export your personal data for portability and compliance purposes.
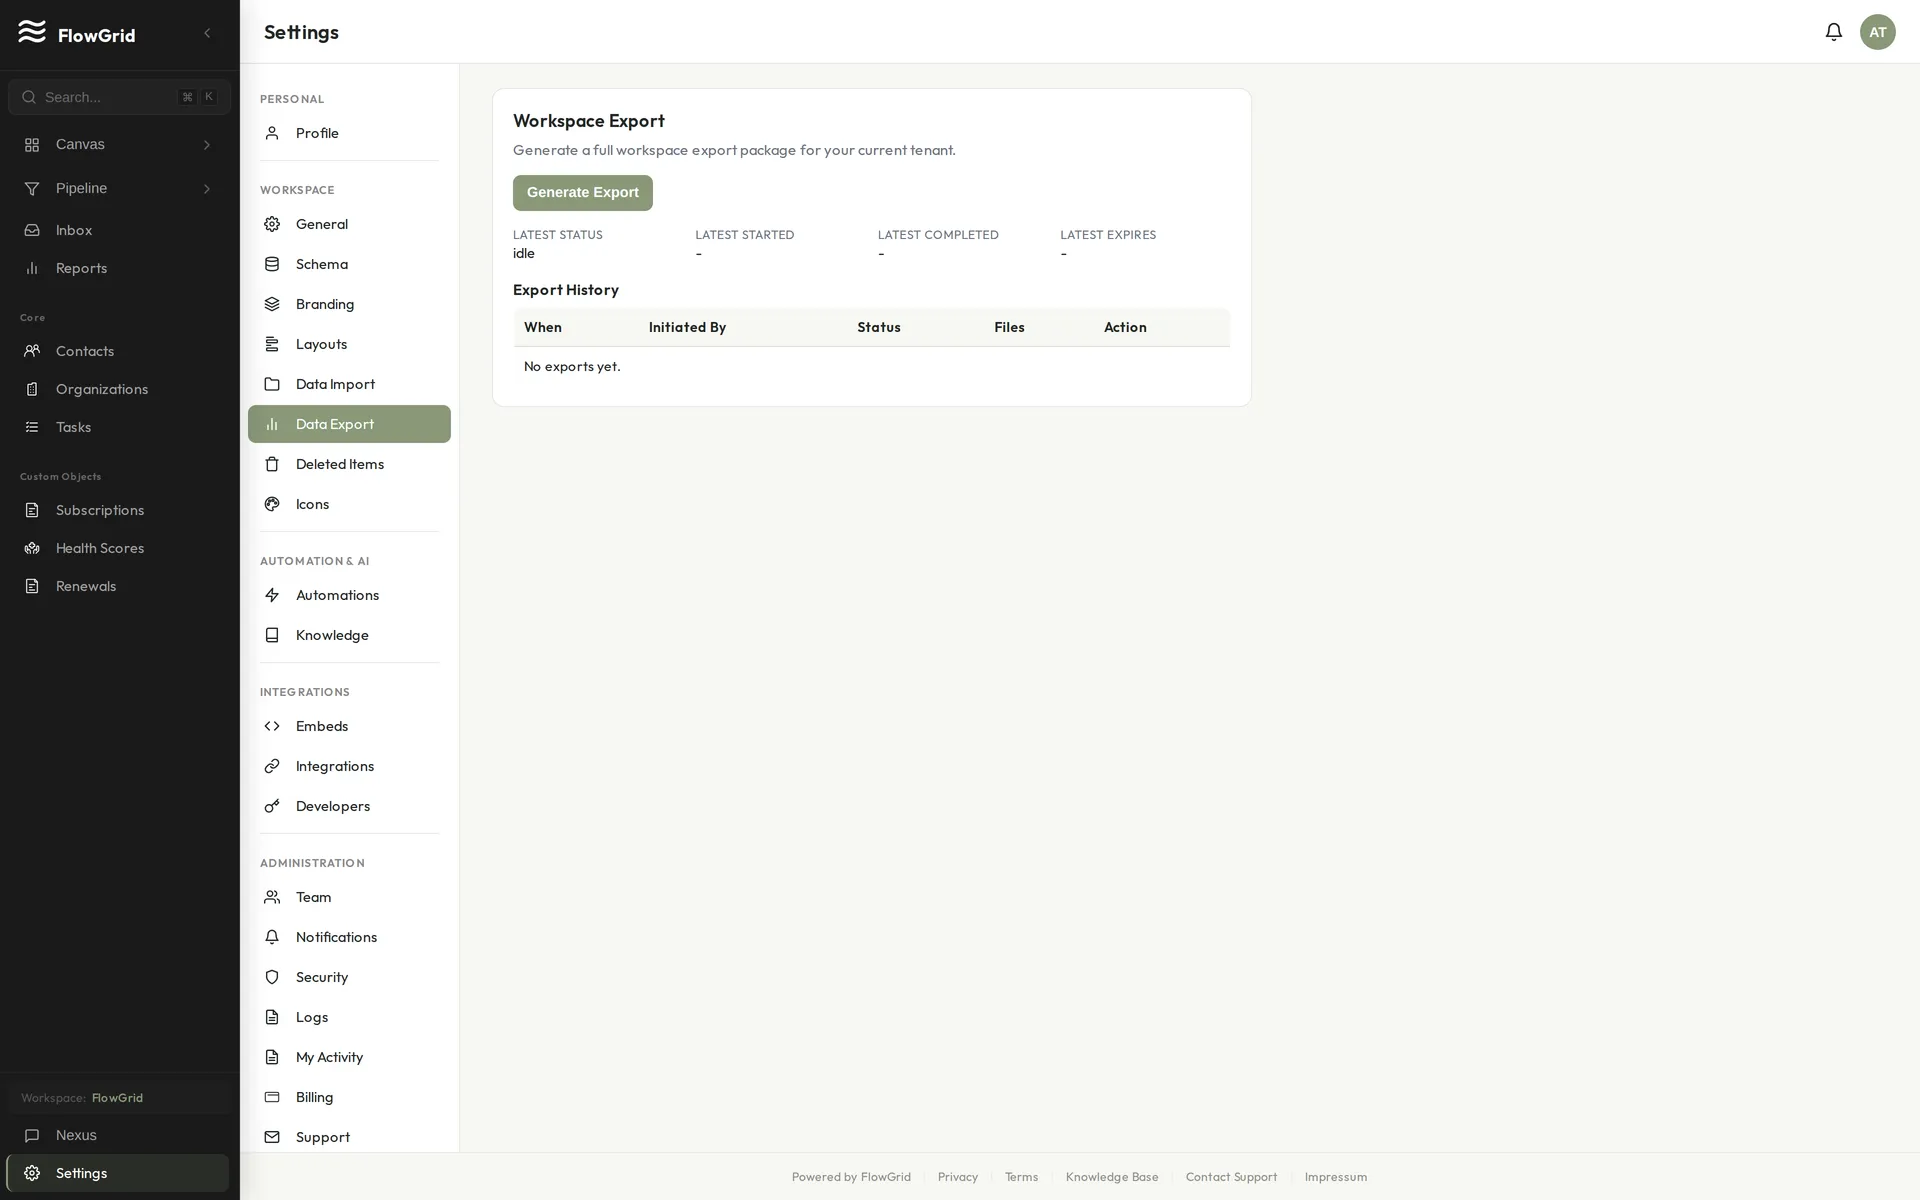 Exporting your data
Requesting a Data Export
To request a copy of your data, contact FlowGrid support at [email protected]. Include the email address associated with your account and specify what data you need exported.
What's Included
A data export includes your personal profile information, CRM records you created or own, activity history, and any files you uploaded. The export is provided in a portable format you can use with other systems.
Processing Time
Data export requests are typically processed within 30 days, in compliance with data protection regulations. You'll receive an email notification when your export is ready to download.
Privacy and Security
Exports are encrypted and delivered securely. Only the account owner can request their data. For workspace-wide exports, contact support with appropriate authorization.
Email Integration Overview
Connect your email to FlowGrid to sync communications with CRM records.
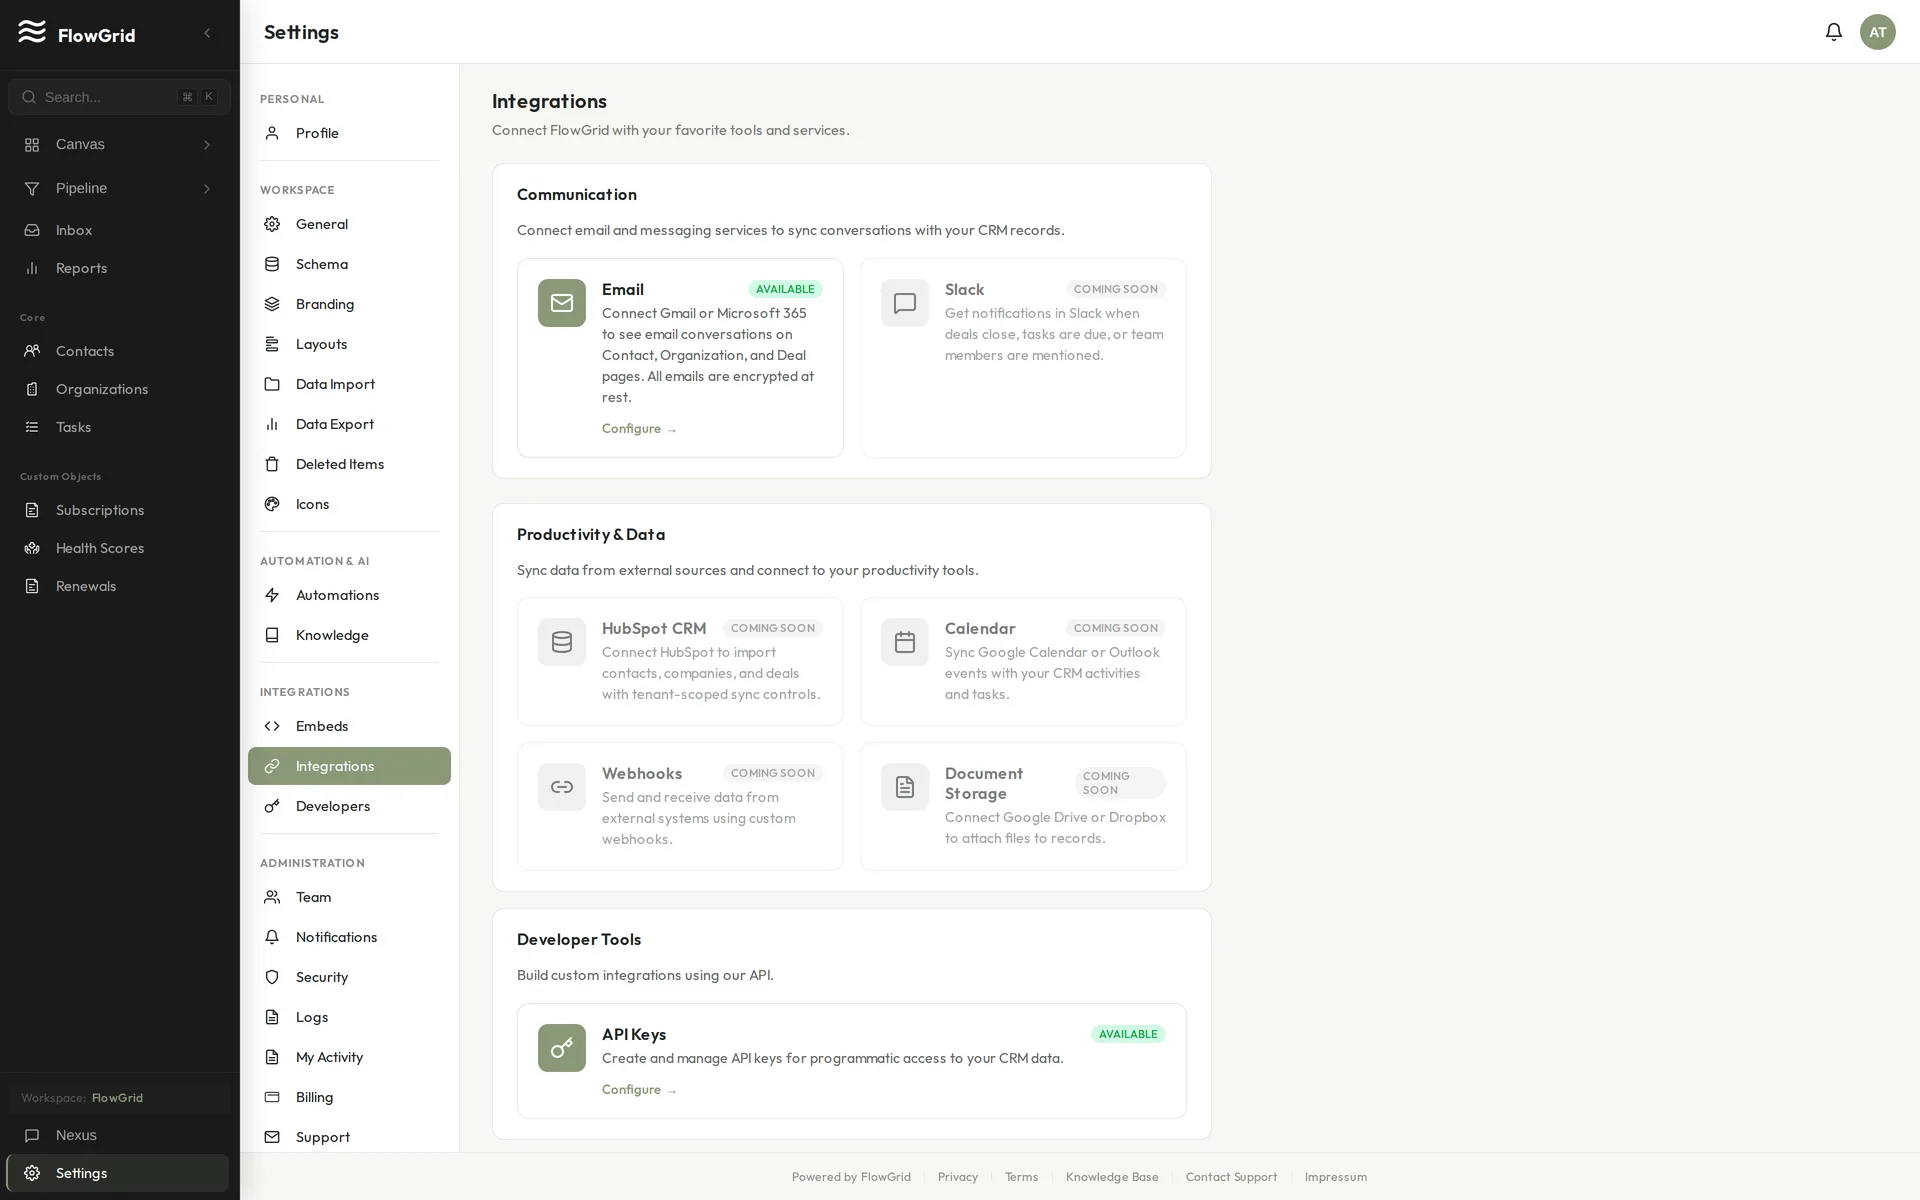 The Integrations settings
What Email Integration Does
Email integration lets you connect a mailbox, sync email threads to CRM context, and send/reply from FlowGrid where supported. Syncing is manual: users trigger sync from FlowGrid UI when they want updates.
Supported Email Providers
FlowGrid supports connecting Gmail and Microsoft 365 mailboxes.
Where to Configure
Use /settings/email to connect, manage, or disconnect mailboxes.
Permission Requirement
Users need the canConnectEmail permission (or admin role) to connect a mailbox.
Sync and Visibility
Connected mailbox data is tenant-scoped and follows FlowGrid permissions for who can view and respond to inbox content.
To pull new messages into FlowGrid, click the Manual Sync button in /settings/email.
For supported records, you can also run manual email sync from the record page.
Removing Emails from FlowGrid
If you no longer want an email thread synced in FlowGrid, you can remove it using the "Remove from FlowGrid" option. This removes the email from your CRM view but does not delete the original email from your email provider. Removed emails won't be synced again.
Benefits
With email integration, there's no manual data entry for email communications. You get full context when viewing a contact, team visibility into customer communications, and email templates for common messages.
Privacy Considerations
FlowGrid is tenant-scoped and access-controlled. You can revoke mailbox access at any time from FlowGrid settings or your email provider account.
Importing Data (Wizard Process)
Use FlowGrid's import wizard for execution after your data is prepared.
Import Flow
- Open Settings > Data Import (
/settings/data-import) - Upload CSV/XLSX
- Select target object(s)
- Map columns to fields
- Configure duplicate/update mode
- Run preview and fix validation issues
- Execute import and review summary/results
Duplicate Handling
Use the duplicate/update options shown in your wizard step:
- Create-only when data is net new
- Update/upsert-capable mode when you have reliable match keys
Validation and Preview
Treat preview as required:
- Confirm row counts
- Confirm field mappings
- Confirm relationship/link mappings
- Resolve errors before executing
Post-Import Verification
After execution:
- Check created/updated/skipped counts
- Review failed rows and reasons
- Spot-check records in each imported object
- Verify linked relationships render as expected
Coaching Rule
Do not claim data import is unavailable in FlowGrid. Do not refuse due to missing docs access. If labels differ by workspace version, tell users to follow the exact labels visible in their import UI.
Preparing Data for Import (Spreadsheet Structure)
Prepare your file before opening the import wizard to maximize first-pass success.
Where to Start
Use Settings > Data Import (/settings/data-import) for the actual import flow.
For preparation, structure your spreadsheet first using the checklist below.
Spreadsheet Structure Checklist
- Header row present (row 1)
- One record per row
- One value per cell (no merged cells)
- Stable unique key column for matching updates/deduping (for example: email, externalId)
- Consistent data types per column (dates, numbers, booleans)
- Required fields included for target object
- Relationship/link columns clearly named (for example: organizationName, contactEmail, parentExternalId)
Column Naming Guidance
Use explicit names that map cleanly:
- Good:
firstName,lastName,email,phone,organizationName,dealValue,closeDate - Avoid ambiguous names:
value,date,id(without context)
How Matching Works
When you choose an update/dedupe-capable import mode, FlowGrid matches incoming rows using your selected match key(s). If a match is found, records are updated (or merged by mode). If no match is found, behavior depends on mode (create new or skip).
Relationships and Custom Objects
For related records and custom objects:
- Include a stable linking key in both sides (for example
organizationExternalIdandcontactOrganizationExternalId) - Map link columns to relationship fields during mapping
- Ensure parent/lookup values are present and consistent across rows
Multi-Object Imports and Linking
For multi-object imports, structure data so links are deterministic:
- Prefer one object per sheet (XLSX) or one object per file
- Give each object a stable key column (
externalIdpattern recommended) - Use those keys in child/link columns instead of display names where possible
- Keep key formats identical across objects (no mixed casing/extra spaces)
- Import or map parent objects before dependent child/link rows in the same job flow
Example:
- Organizations sheet:
organizationExternalId,name - Contacts sheet:
contactExternalId,email,organizationExternalId - During mapping, map contact
organizationExternalIdto the organization relationship key
Pre-Import Readiness Check (2 minutes)
- Sample 20 rows: no blank required fields
- Match key column has no accidental duplicates (unless expected)
- Link columns reference valid keys
- Multi-object key columns match exactly across related sheets/files
- Date and number columns are consistently formatted
- Save as CSV or XLSX, then run import preview first
Coaching Rule
Do not claim import preparation is unavailable. Keep this guidance focused on spreadsheet/data structure and import readiness.
Embeds
Embedding Forms on Your Website
FlowGrid forms let you collect data directly into your CRM from your website.
Creating a Form
Go to Settings > Embeds > Forms and click New Form. Give it a name and select the target object (Contacts, Organizations, or custom objects). Choose which fields to include, set required fields and validation rules, and configure your success and error messages.
Configure Security
Add allowed origins to specify where the form can be embedded. Enable CAPTCHA for spam protection (recommended for public forms) and set rate limits to prevent abuse.
Install the Form
Copy the provided iframe code or JavaScript snippet and paste it into your website where you want the form to appear.
Form Options
Set a Redirect URL to send users somewhere after successful submission. Add custom styling with CSS classes to match your brand. Use hidden fields to pre-fill values not shown to users. Configure field mapping to connect form inputs to CRM fields.
What Forms Can Do
Forms can create new records in any object, update existing records with proper authentication, trigger automations on submission, and send confirmation emails to submitters.
Limitations
Forms cannot access sensitive encrypted fields, bypass required field validation, or submit without passing security checks.
Embedding the Chat Widget on Your Website
FlowGrid's Ripple chatbot can be embedded on your website to provide AI-powered customer support.
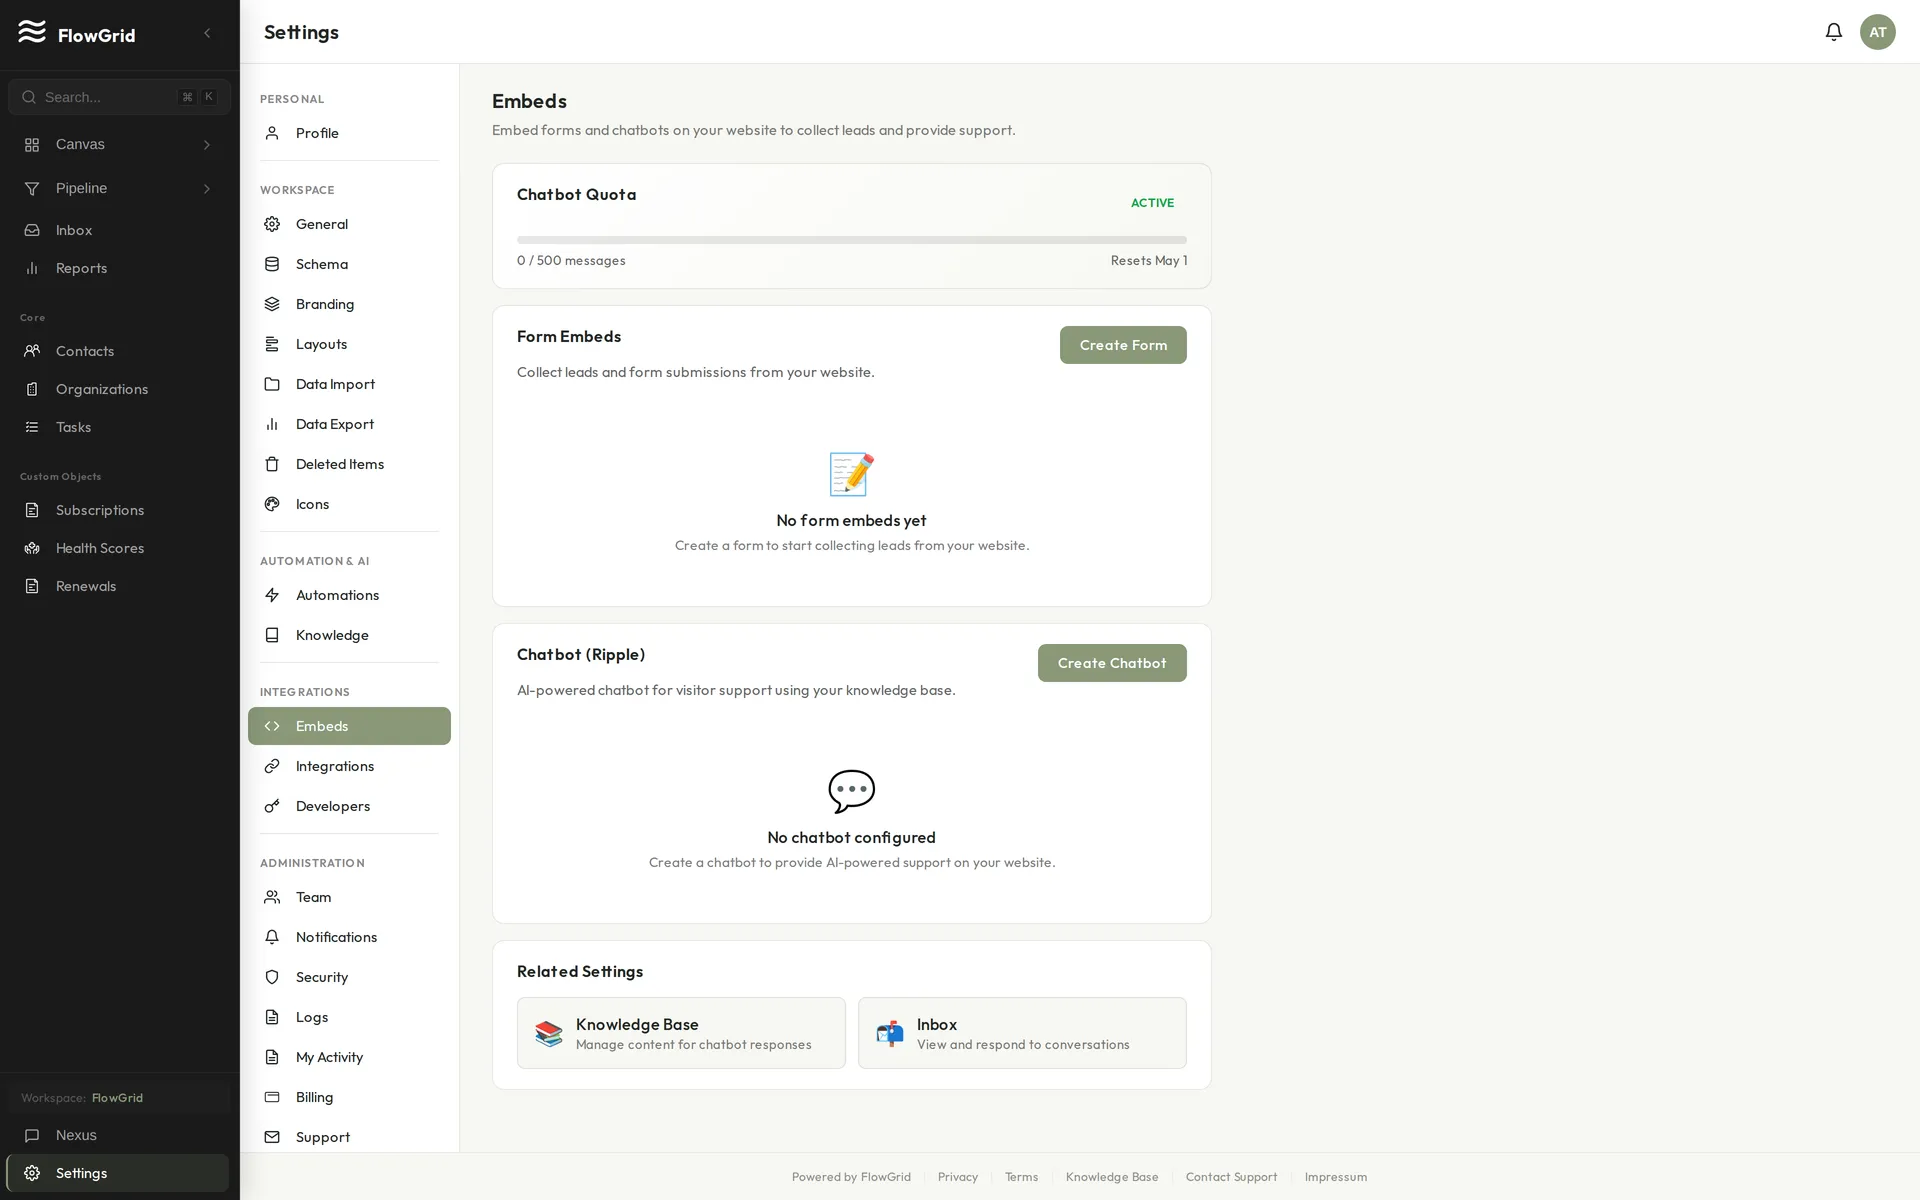 Embeds settings
Setting Up the Chat Widget
Go to Settings > Embeds and configure the chatbot settings. Choose a name, display name, and operating mode (Bot Only, Hybrid, or Human Only). Set a welcome message and optional quick questions for common inquiries. Toggle Active to enable the widget and click Save Changes.
Configure Security
In the Security section, add your allowed origins like https://yourwebsite.com to prevent the widget from being embedded on unauthorized sites. For production, always specify your domains — leaving this empty allows all origins, which is not recommended.
Install the Embed Code
Click the Embed Code tab and copy the script tag provided. Paste it before the closing </body> tag on your website pages. The embed code looks like: <script src="https://app.flowgrid.com/embed/chat.js" data-public-id="YOUR_PUBLIC_ID"></script>
Customization Options
Customize the widget position with data attributes: data-position controls placement (bottom-right or bottom-left), while data-offset-x and data-offset-y set pixel offsets from the corner.
How It Works
When the script loads, it fetches a secure token (valid for 1 hour). A floating chat button appears in the corner of the page. When clicked, an iframe opens with the chat interface where users can send messages and receive AI or human responses. Sessions are automatically created and managed.
Chatbot Modes
Bot Only means all responses come from the AI. Hybrid mode lets the AI handle initial queries with the ability to escalate to human agents. Human Only routes all messages directly to human agents.
Session Limits
Sessions expire after a configurable time (default 60 minutes), and message limits can be set per session (default 50 messages).
Files
Attaching Files to Records
Add documents and images to your CRM records.
Uploading Files
Open any record (Contact, Organization, Deal, etc.) and scroll to the Files section. Click Upload or drag and drop files directly — they're attached immediately.
Viewing Files
Click on a file to preview it (works for images and PDFs). Click the download button to save to your computer. Each file shows its upload date and who uploaded it.
Removing Files
Click the delete icon on any file and confirm the deletion. Deleted private files can be recovered for 90 days through Settings > Deleted Items.
Organizing Files
Add descriptions to files for context. Use meaningful file names before uploading so they're easy to find later. Group related files under the same record to keep things organized.
AI and Files
Nexus cannot read file contents, but it can help you find records with files attached. Ask: "Show me contacts with attachments" to find records that have files.
Tips
Rename files before uploading for better organization. Use consistent naming conventions across your team. Compress large files before uploading to stay under the 10MB limit.
File Storage Overview
FlowGrid allows you to attach files to records for document management.
What You Can Upload
Upload documents (PDF, Word, Excel), images (PNG, JPG, GIF), presentations, and most common file types. The maximum file size is 10MB per file, and storage limits vary by plan — check Settings > Billing for your current usage.
Where Files Appear
Files are attached to specific records like Contacts, Organizations, or Deals. They appear in the Files section of the record detail page and are searchable in the global file list.
Security
Files are stored securely in encrypted storage. Access follows record permissions, so users who can view a record can view its files.
Files can be soft-deleted (removed from normal views). Deleted private files can be restored for 90 days via Settings > Deleted Items. Public branding files (like logos) are deleted immediately and cannot be restored.
Limitations
File storage is designed for record attachments, not as a general file server. The 10MB limit means very large files need to be compressed or hosted elsewhere. Files cannot be shared outside your workspace.
Support
Chat Support Escalation
FlowGrid's chat widget can escalate issues to the support team when you need human assistance.
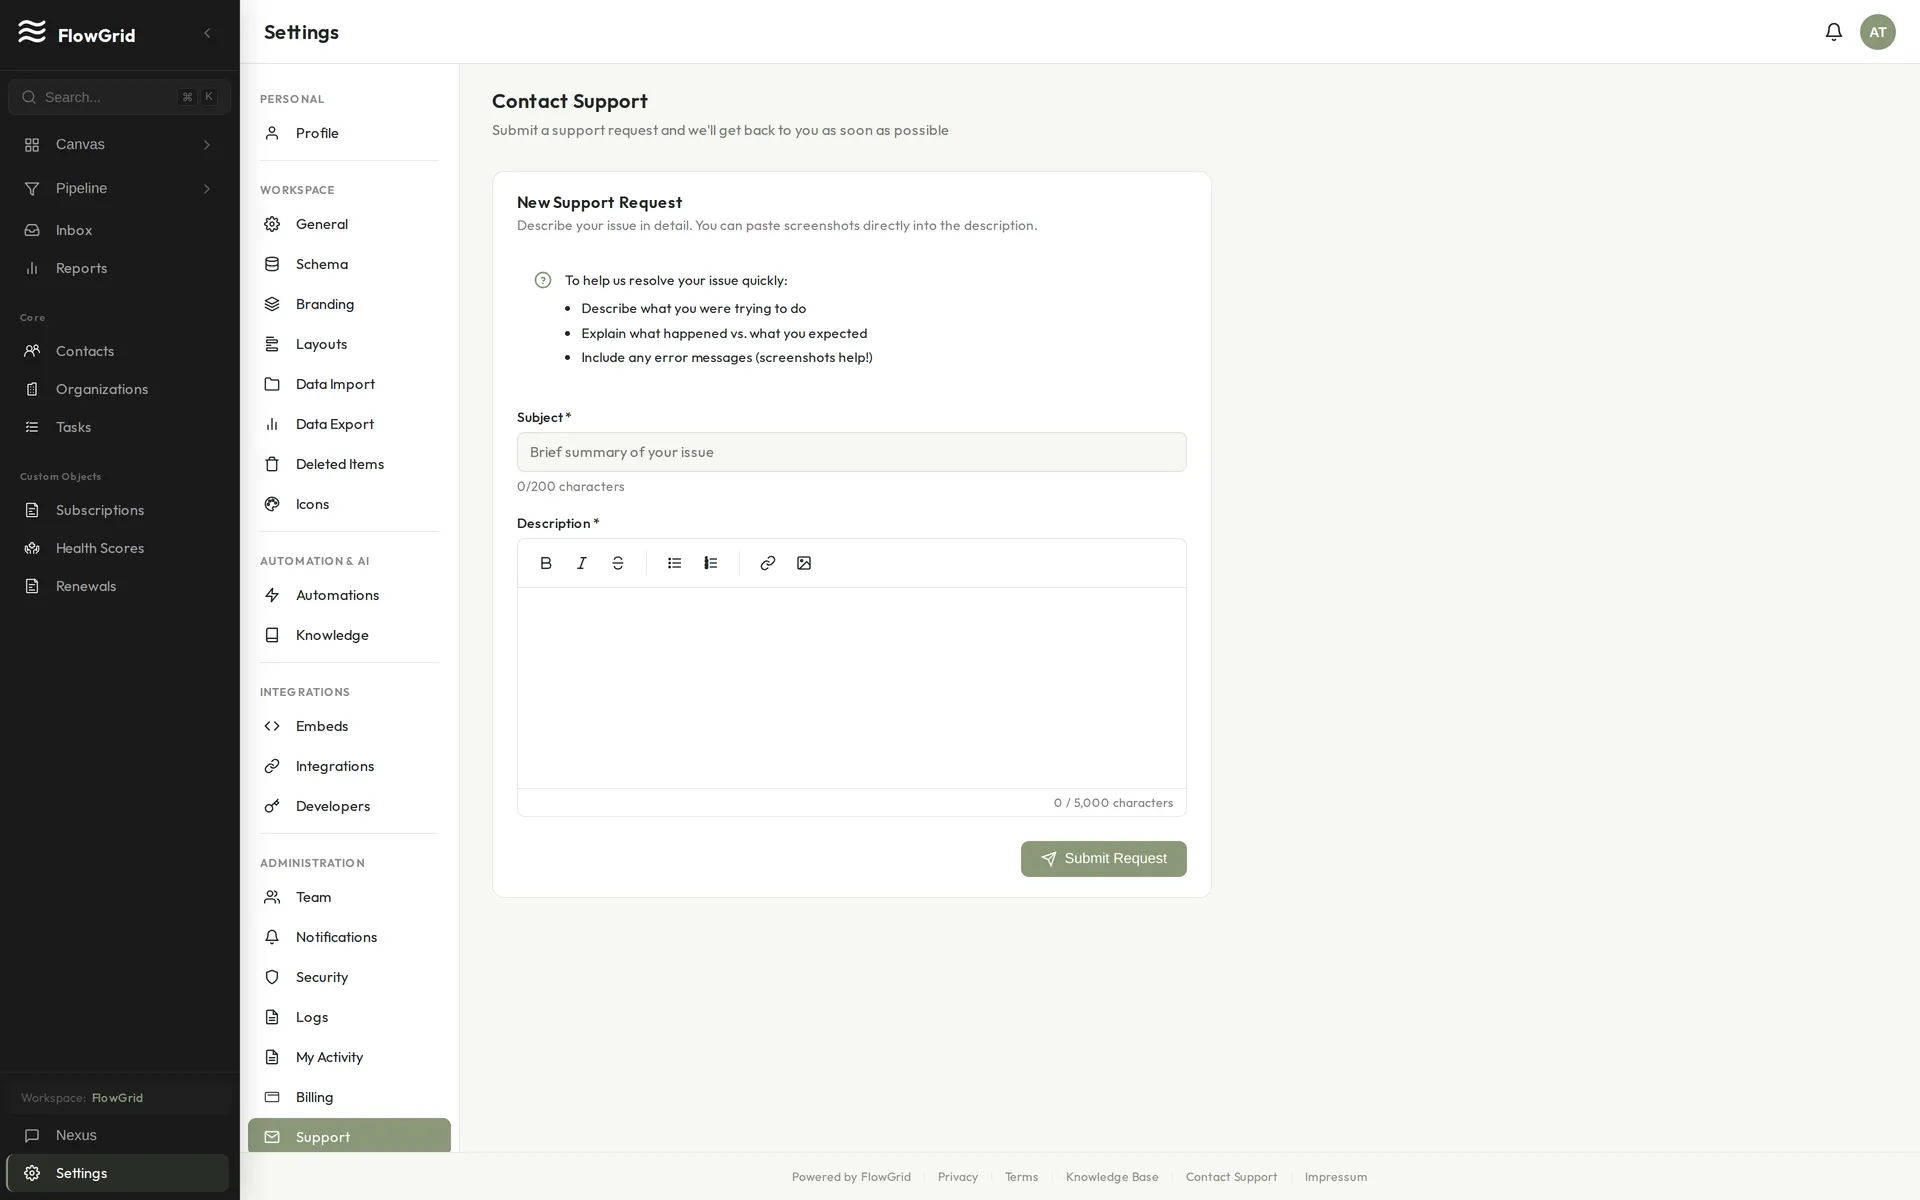 Getting help from support
How It Works
The assistant always tries to answer from the knowledge base first. When you ask for support or report a bug, it will ask: "Do you want to open a support request with the FlowGrid team so they can look into this for you?" Tickets only open after you explicitly confirm.
Active Tickets
Each user can have one active support ticket at a time. If you have an open ticket and report a new issue, it gets appended to your existing ticket rather than creating a new one. The chat widget shows your active ticket thread above the AI conversation, and agent replies appear there in real-time.
Sharing Information
You can paste screenshot or screen recording links to help illustrate your issue (direct uploads aren't available yet). If you opt in, the assistant can include a short, non-sensitive summary of the recent conversation to give the support team context. All summaries are kept free of PII.
General
Command Palette & Keyboard Shortcuts
FlowGrid is built to be driven from the keyboard. The command palette lets you jump anywhere or run an action without reaching for the mouse.
 The command palette
Opening the Command Palette
Press Cmd+K (macOS) or Ctrl+K (Windows/Linux) from anywhere. Start typing to search across pages, records, and actions — then press Enter to go. It's the fastest way to open a contact, switch to the pipeline, or start a new deal.
Handy Shortcuts
/— focus the search box on the current pageCmd/Ctrl+K— open the command paletteGthenP— go to the PipelineCthen1— create a new record from a list viewEsc— close a dialog or panel
Search
Every list view has a search bar for finding records by name, email, or other key fields. For questions that span your whole workspace — "which deals are closing this month?" — ask Nexus instead; it searches across record types and can summarize what it finds.
Deletion and Recovery
FlowGrid uses soft deletion for most CRM records, which means deleted items can usually be restored within a recovery window. This applies to Contacts, Organizations, Deals, Tasks, Notes, and any custom records you've created.
 Deleted Items with restore
90-Day Recovery Window
When you delete something, it's marked as deleted but the data is preserved. For CRM records, you have 90 days to restore it before it's permanently removed. A background job runs periodically to clean up expired items, and deletions, restorations, and permanent deletions are tracked in the audit log where applicable.
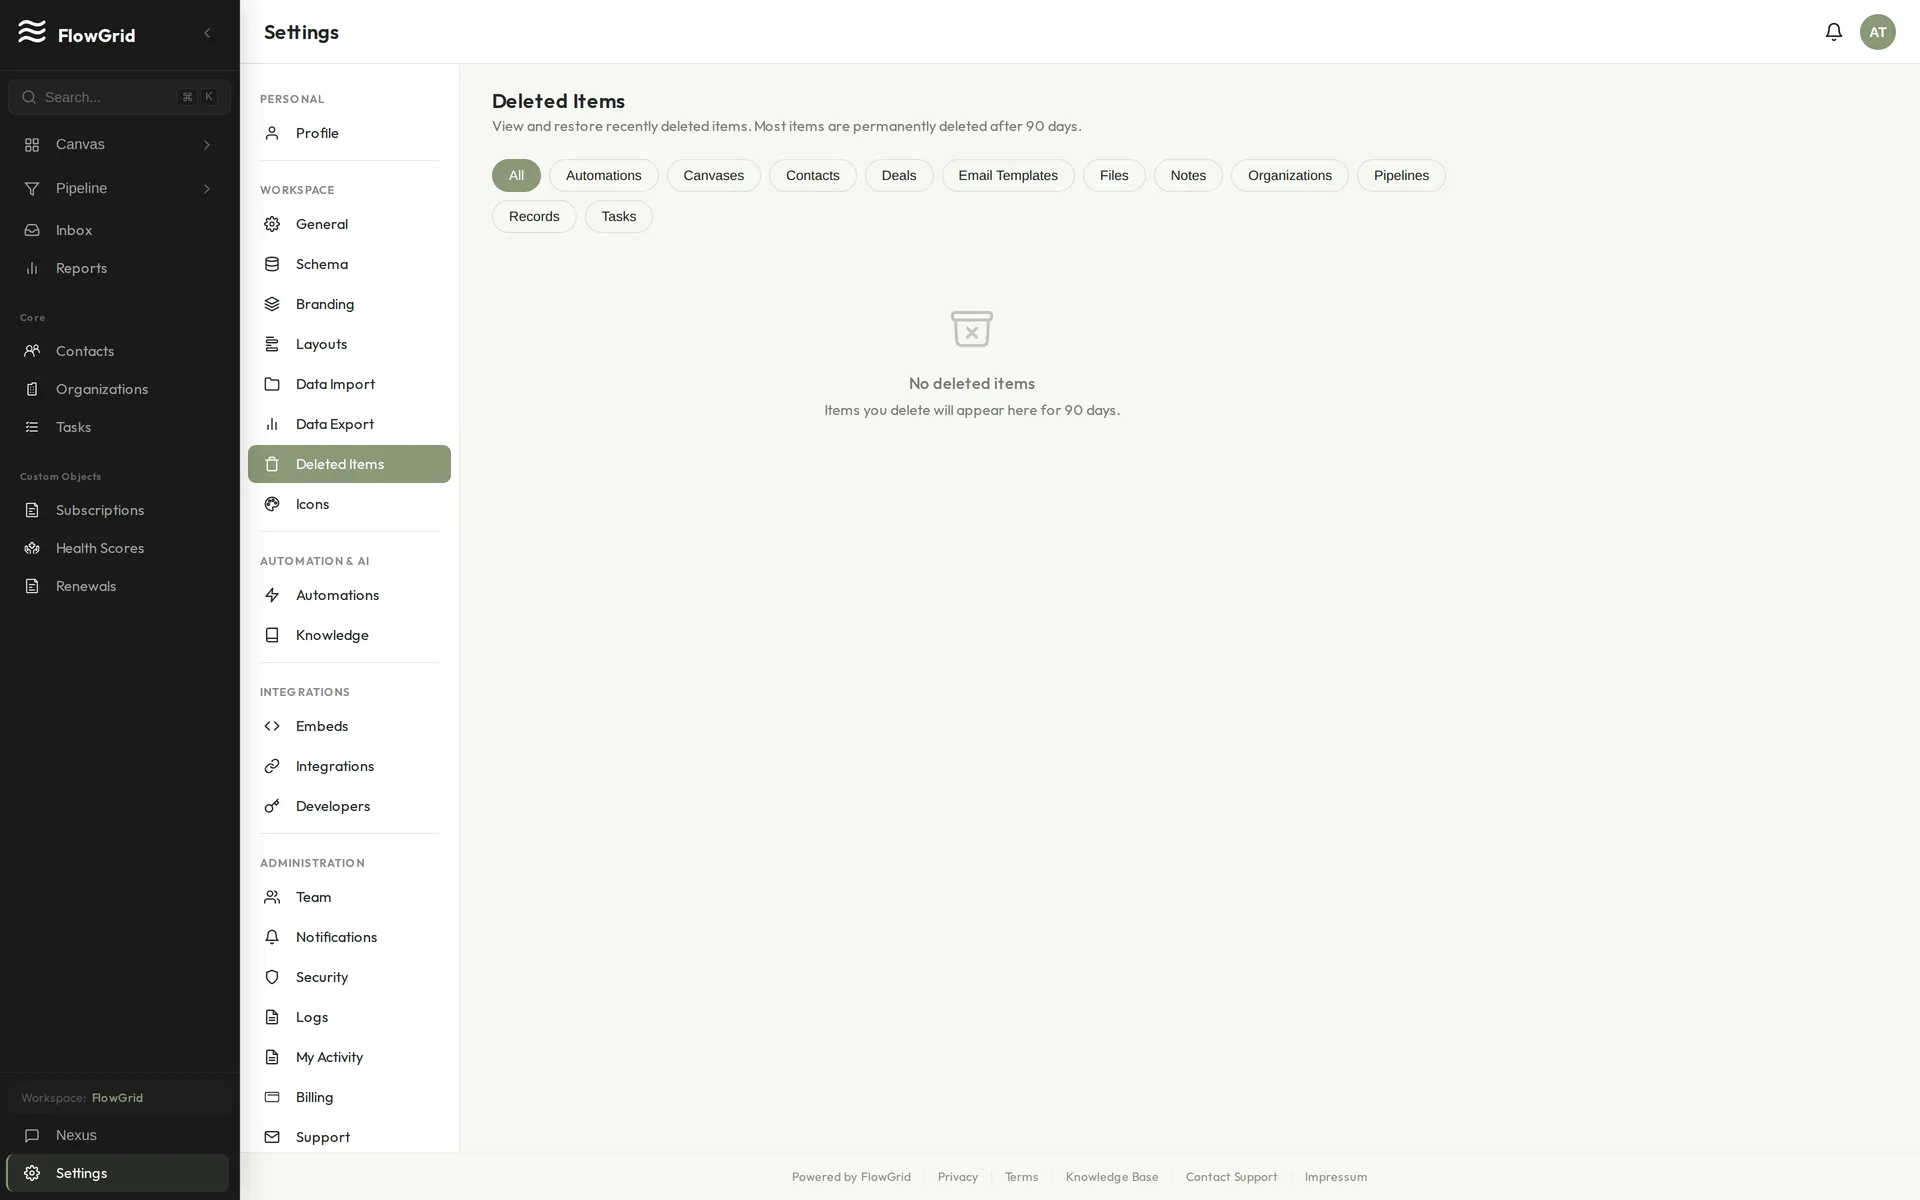
Viewing Deleted Items
Go to Settings > Deleted Items to see everything that's been deleted. Filter by type (Contacts, Organizations, Deals, Tasks, Notes, Records, Pipelines, Spaces, or Files) to find what you're looking for. Each item shows when it was deleted and how many days remain in the recovery window. Restore any item with one click.
Using Nexus to Manage Deleted Items
Ask Nexus for help: "Show me deleted contacts" lists soft-deleted contacts, "Show deleted deals from the last week" filters by time, "Restore contact John Smith" restores a specific item, and "List all deleted items" shows everything in the trash.
Permissions
The same permission required to delete a record is required to restore it. If you need canDeleteContacts to delete contacts, you need that same permission to restore them.
Permanent Deletion
After 90 days, soft-deleted CRM records (and private files) are permanently removed by the system. Related data may also be cleaned up, an audit event is logged, and any encrypted fields are irrecoverably destroyed. Permanent deletion is automated; FlowGrid does not currently expose a manual "purge now" action.
Tips
Check Deleted Items before re-creating something you might have deleted. Items deleted within the last 7 days show a warning indicator to help you spot recent deletions.
Importing Your Data
FlowGrid's import wizard brings your existing data in from a CSV or Excel file and maps it to the right fields automatically — so migrating from another CRM or adding records in bulk takes minutes, not hours.
 Smart column mapping during import
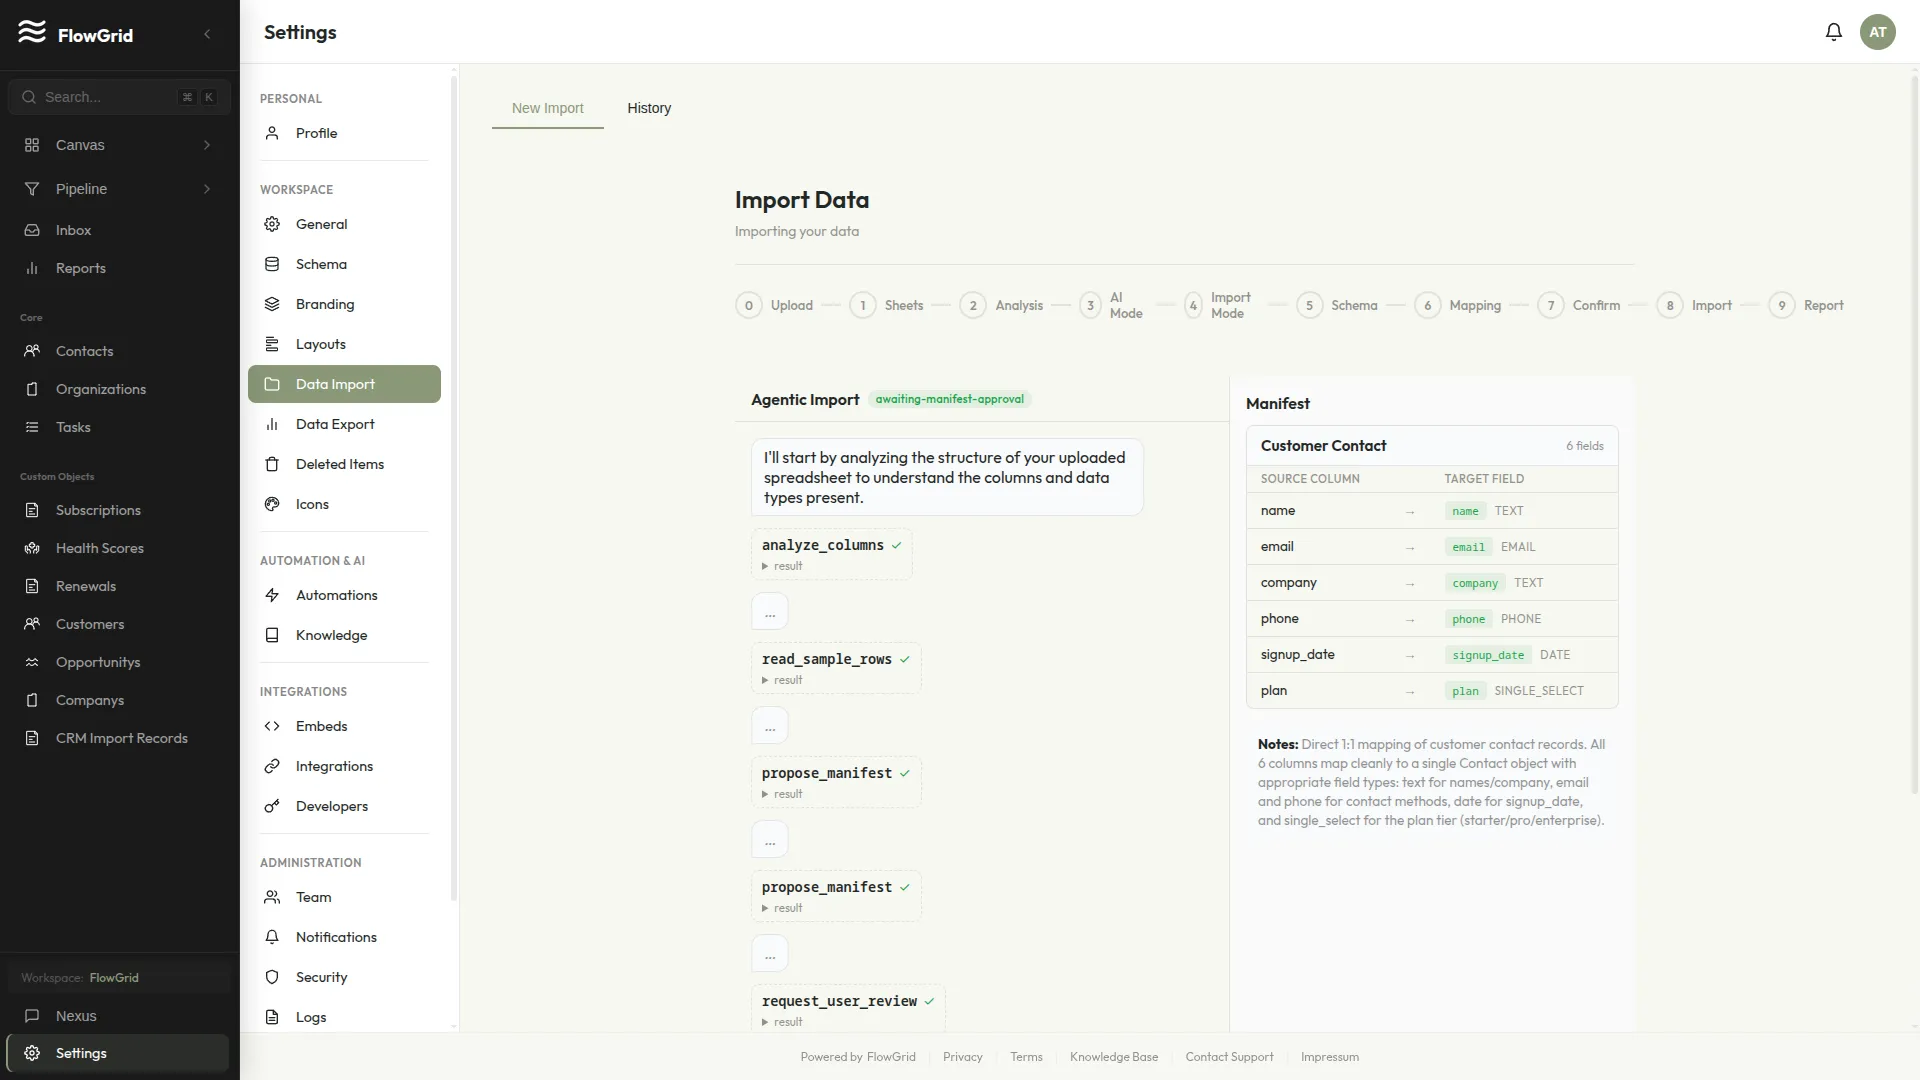
Starting an Import
Go to Settings > Data Import and upload your file. FlowGrid reads the columns and proposes a mapping — matching "Company", "Account", or "Organisation" to your Organization field, "Email Address" to email, and so on. Review the suggested mapping, adjust anything that looks off, and confirm.
What the Importer Handles for You
- Smart column mapping — AI suggests the target field for each column, including custom fields.
- Relationship detection — links contacts to their organizations as it imports, instead of leaving you to reconnect them by hand.
- Duplicate prevention — flags rows that match existing records so you don't end up with two of the same contact.
- Multi-sheet workbooks — a workbook with separate sheets (for example Customers, Invoices, and Properties) can create multiple record types in a single import.
After the Import
Each import produces a summary of created, updated, and skipped rows. If any rows fail validation (an invalid email, a missing required field), FlowGrid reports exactly which rows and why, so you can fix and re-import just those. Imports are recorded in your activity log.
Tip: You can also ask Nexus to import a handful of records conversationally — "Add a contact named Maya Patel at Northwind Logistics" — but for anything more than a few rows, the import wizard is faster.
Using Nexus, Your AI Assistant
Nexus is the AI assistant built into FlowGrid. It helps you work faster with natural language — no special syntax required.
Nexus working in the chat panel
What You Can Ask
Nexus understands plain-language requests. Try things like:
- "Create a new contact named John Smith at Acme Corp"
- "Find all deals over $10,000"
- "Show me contacts from the technology industry"
- "Update the deal value to $75,000"
- "Add a note to contact Alice: discussed project timeline"
- "Create a task to follow up with Bob next Monday"
- "Build a dashboard widget showing pipeline value by stage"
Tips for Best Results
Be specific with names and values, and include relevant details like dates and amounts. Use natural language. If something is ambiguous, Nexus will ask a follow-up question rather than guess.
What Nexus Can Do
Nexus can create, update, and search any record type in your workspace, link records together (like connecting contacts to organizations or deals to contacts), build canvas widgets, provide summaries and insights, and answer questions about how to use FlowGrid. Before making any change to your data, Nexus asks for confirmation — and it only ever sees the records your role is allowed to see.
AI Data Access Settings
You control how much data Nexus can access. Full Access lets it read and search all CRM data. Restricted lets it help with setup but not view row-level data. Disabled prevents it from accessing any workspace data. Change this in Settings > General.
AI Credits
Nexus usage is powered by AI credits. Your subscription includes a monthly quota, and you can purchase additional credit packs if needed. View your balance and top up in Settings > Billing.